In this lesson, you will
learn how to:
·
Start PowerPoint
·
Create a blank presentation
·
Select an AutoLayout
·
Use PowerPoint windows
·
Use menu commands - mouse
·
Use menu commands - keyboard
·
Display/Hide toolbars
·
Exit PowerPoint
d Discussion
Microsoft PowerPoint is a presentation graphics program that
produces dynamic and powerful slide shows containing text, graphics, and charts.
You can use PowerPoint for formal presentations, meetings or informal
presentations, and presentations on the Internet.
Whether presenting an idea, plan, or complex report to a group,
you can use PowerPoint to combine essential data, dramatic illustrations,
animation and special effects, and timed sequences to convey your important
points in an informative and convincing visual presentation.
PowerPoint incorporates a wide variety of tools and
features for selecting fonts, formats, styles, and colors. You can import
documents from word processing programs or worksheets and charts from
spreadsheet applications. For example, in a presentation designed to show your
company's financial performance, you could import a previously created list of
assets from Microsoft Word and a graph illustrating stock performance from
Microsoft Excel. You can use illustrations from clip art libraries or picture
files, or you can create your own pictures.
In addition to extensive built-in help, the Microsoft Office
Assistant is available to offer tips and hints for using PowerPoint more
efficiently. The Office Assistant, a context-sensitive Help feature, may appear
in its own window when you start PowerPoint. You can adjust the capabilities of
the Office Assistant as well as choose not to have the Assistant appear, if
desired.
PowerPoint also provides tutorials for on-line instruction,
pre-designed templates for popular types of presentations, and an AutoContent
Wizard that builds a basic presentation based on the answers you give to a
series of questions.
Additionally, PowerPoint Central provides an on-line link to
resources you can use to help you create better presentations. For example, you
can use PowerPoint Central to link to Internet sites or to the Office 97
ValuePak multimedia content available on the CD-ROM (to add a variety of sound
clips to your presentation).
Before you work in an application, it must be loaded. There are
several ways you can load the PowerPoint program. One way to start PowerPoint
is to use the Windows Start menu.
|
|
|
|
o
|
The first time you open PowerPoint after installation,
the Office Assistant appears, welcoming you to the program. In this instance,
select Start using Microsoft PowerPoint to start PowerPoint and close
the Office Assistant.
|
|
|
|
|
o
|
You can select not to install the Office Assistant
during the installation process, if desired.
|
|
|
|
C Procedures
|
1. Click the Start button.
|
|
2. Point to Programs.
|
|
3. Select Microsoft PowerPoint.
|
f Step-by-Step
Start PowerPoint.
|
Steps
|
Practice Data
|
|
1. Click the Start button.
The Start menu appears.
|
Click  Start Start
|
|
2. Point to Programs.
The Programs submenu appears.
|
Point to  Programs Programs
|
|
3. Select Microsoft PowerPoint.
PowerPoint starts.
|
Click  Microsoft PowerPoint Microsoft PowerPoint
|
d Discussion
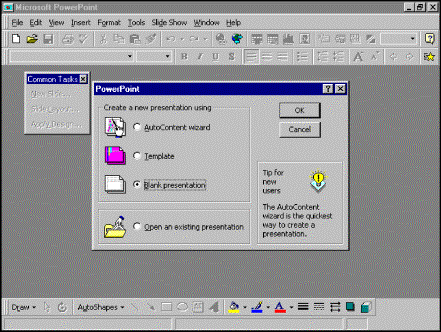
When PowerPoint opens, the PowerPoint dialog box allows you to
select how you want to begin.
When you want to produce a quick, well-designed presentation and you need help with ideas
for the content, you should select the AutoContent wizard option. To
select a predefined look, you should select the Template option. You
should select the Blank presentation option when you want total control
over your presentation and do not need any assistance with the look or content.
Once a presentation has been created, you can select the Open
an existing presentation option to edit it or to use it as a basis for a
new presentation. The PowerPoint dialog box also includes a tip for new users.
Creating a blank presentation
C Procedures
|
1. Start PowerPoint, if necessary.
|
|
2. Select the desired option.
|
|
3. Select OK.
|
f Step-by-Step
Create a blank presentation.
Start PowerPoint, if necessary.
|
Steps
|
Practice Data
|
|
1. Select the desired option.
The option is selected.
|
Click  Blank presentation Blank presentation
|
|
2. Select OK.
The New Slide dialog box opens.
|
Click OK
|
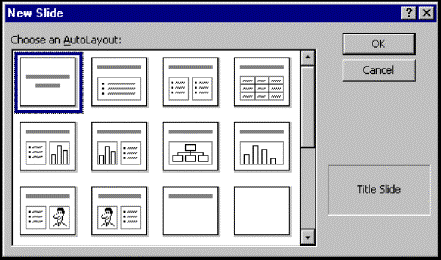
d Discussion
Once you select a presentation slide format, you can choose an
AutoLayout. An AutoLayout is a predefined
style in which you can enter text, graphics, and clip art. PowerPoint provides
a variety of AutoLayouts from which you can choose. For example, if your
presentation will include text supported by a graph, you can choose the Text
& Chart AutoLayout.
Selecting an AutoLayout
|
|
|
|
o
|
When you select an AutoLayout, a description of it
appears in the bottom right corner of the New Slide dialog box. You can use
this description for an easy reference to determine the available
placeholders style.
|
|
|
|
C Procedures
|
1. Click the desired AutoLayout.
|
|
2. Select OK.
|
f Step-by-Step
Select an AutoLayout.
Start PowerPoint and create a blank presentation, if necessary.
|
Steps
|
Practice Data
|
|
1. Click the desired AutoLayout.
The AutoLayout is selected and its description appears in the New Slide
dialog box.
|
Click the Title Slide
AutoLayout, if necessary
|
|
2. Select OK.
The slide with the AutoLayout appears in the presentation window.
|
Click OK
|
d Discussion
In PowerPoint, there are two types of
windows: the program window and the presentation window. The
program window, which is the larger of the two windows, includes the menu bar,
assorted toolbars, and the status bar. These items are briefly described below:
|
Program Window Item
|
Description
|
|
Title bar
|
Displays the name of the
presentation.
|
|
Menu bar
|
Displays the PowerPoint menus.
|
|
Status bar
|
Displays information about the presentation or current
command.
|
|
Toolbars
|
Groups of buttons that are shortcuts for commonly used
PowerPoint features.
|
|
Office Assistant
|
Provides tips for building and delivering
presentations.
|
You create and edit slides in the presentation window, which appears
within the program window. Since the presentation is its own window, you can
size it as desired.
PowerPoint provides five different views in which you can
display a presentation. Each view provides a different way of looking at your
work. The View buttons are located at the end of the horizontal scroll
bar, above the status bar and the Drawing toolbar, if it is displayed.
You can also use the View menu to access the various views.
|
View
|
Description
|
|
Slide
|
The default view in PowerPoint
that allows you to view one slide at a time.
|
|
Outline
|
Displays only the slide text in an outline format.
|
|
Slide Sorter
|
Allows you to view multiple slides at one time.
|
|
Notes Page
|
Allows you to add notes to accompany a slide show.
|
|
Slide Show
|
Allows you to make an on-screen presentation.
|
Using the program and presentations windows
d Discussion
The menu bar provides access
to all the features of PowerPoint. Each menu contains commands grouped by
function. Some menu commands are grayed or dimmed, which indicates that the
command is not available for the current task.
When you select an item on the menu bar, the corresponding menu
appears from which you can select the desired command.
When a menu command is followed by an ellipsis (...),
selecting it opens a dialog box in which additional information is entered.
In addition to the standard menus on the menu bar, PowerPoint
contains shortcut menus that may be accessed by clicking the right mouse
button. Shortcut menus contain commonly used commands and are
context-sensitive. Therefore, the options available on the shortcut menu vary,
depending on the area of the window or the object selected.
|
|
|
|
o
|
If you have installed Microsoft IntelliMouse, you can
use the mouse for both scrolling and zooming. For further instructions on the
use of the IntelliMouse, see your IntelliPoint Online User's Guide.
|
|
|
|
C Procedures
|
1. Click the desired menu.
|
|
2. Click the desired command.
|
f Step-by-Step
Execute a menu command using the mouse.
|
Steps
|
Practice Data
|
|
1. Click the desired menu.
The Edit menu appears.
|
Click Edit
|
|
2. Click the desired command.
The Find command is executed and the Find dialog box opens.
|
Click Find...
|
Select Close to close the Find dialog box.
d Discussion
Some users prefer to keep both hands on the keyboard rather
than use the mouse to execute commands. You can execute many
menu commands using key combinations. To display a menu, you press the [Alt]
key and the underlined letter of the menu name. You can then press the
underlined letter of the desired command to perform the action.
|
|
|
|
o
|
When selecting a menu command using key combinations,
you can press the desired letter in either uppercase or lowercase.
|
|
|
|
|
o
|
Many menu commands have predefined keys combinations
(such as [Ctrl+F]) that you can use to execute the command instead of
pressing the [Alt] key and letter combination to open the menu.
|
|
|
|
C Procedures
|
1. Press [Alt] to activate the menu bar.
|
|
2. Type the underlined letter of the menu you want to display.
|
|
3. Type the underlined letter of the command you want to perform.
|
f Step-by-Step
Execute a menu command using the keyboard.
|
Steps
|
Practice Data
|
|
1. Press [Alt] to activate the menu
bar.
The File command is selected on the menu bar.
|
Press [Alt]
|
|
2. Type the underlined letter of the menu you want to display.
The Edit menu appears.
|
Type E
|
|
3. Type the underlined letter of the command you want to perform.
The Find command is executed and the Find dialog box opens.
|
Type F
|
Press [Esc] to close the Find dialog box.
d Discussion
Toolbars provide shortcuts to menu commands. Each PowerPoint
toolbar is composed of buttons and pull-down lists. Each
button executes a specific menu
command.
In addition to the many toolbars you can select in PowerPoint,
task specific toolbars appear when you are working in the Outline or Slide
Sorter views. When you first start PowerPoint, the Standard, Formatting,
Drawing, and Common Tasks toolbars appear. Other toolbars appear
depending upon the task you are performing.
You can choose to display one, several, or all the toolbars at
any given time, depending upon the view in which you are currently working. In
addition, you can hide all the toolbars, so that none appear. For example, if
your presentation includes only text and inserted clip art pictures, you can
hide the Drawing toolbar. You can also hide toolbars to maximize the work area.
When you point to a button on the toolbar, the name for its
function appears. This description is referred to as a toolbar ScreenTip.
|
|
|
|
o
|
Even if a toolbar button is grayed (because it is not
available for the current task), the ScreenTip still appears when you point
to the button.
|
|
|
|
|
o
|
You can customize various toolbars by adding or
removing buttons.
|
|
|
|
|
o
|
You can also display and hide toolbars by clicking the
right mouse button on the menu bar or any toolbar and selecting or
deselecting any of the toolbars. A check mark next to the name of a toolbar
indicates that it is active.
|
|
|
|
|
o
|
If you hide all the toolbars, you must use the Toolbars
command on the View menu to redisplay them.
|
|
|
|
C Procedures
|
1. Select the View menu.
|
|
2. Point to the Toolbars
command.
|
|
3. Select the toolbar you want to display or hide.
|
f Step-by-Step
Display and hide a toolbar.
|
Steps
|
Practice Data
|
|
1. Select the View menu.
The View menu appears.
|
Click View
|
|
2. Point to the Toolbars command.
The Toolbars submenu appears.
|
Point to Toolbars
|
|
3. Select the toolbar you want to display or hide.
The corresponding toolbar appears.
|
Click Picture
|
Hide the Picture toolbar.
d Discussion
When you have finished using PowerPoint, you should exit the
application properly, since PowerPoint performs necessary housekeeping before
it closes.
If the current presentation has been modified but not saved,
PowerPoint prompts you to save the changes before exiting.
|
|
|
|
o
|
You can also exit PowerPoint by clicking the Close
button located at the right end of the program window title bar.
|
|
|
|
|
o
|
If the Office Assistant is not displayed when you exit
PowerPoint, and you have not saved any changes to the presentation, a message
box opens, asking if you want to save the changes.
|
|
|
|
C Procedures
|
1. Select the File menu.
|
|
2. Select the Exit command.
|
f Step-by-Step
Exit PowerPoint.
|
Steps
|
Practice Data
|
|
1. Select the File menu.
The File menu appears.
|
Click File
|
|
2. Select the Exit command.
PowerPoint closes.
|
Click Exit
|
If a message box prompts you to save the presentation, select No
to exit without saving the changes.
e Task
Start PowerPoint, create a blank presentation, view toolbar
Screen Tips, access menu commands, and display and hide toolbars.
|
1. Start PowerPoint, if necessary.
|
|
2. Create a blank presentation.
|
|
3. Select the Title Slide AutoLayout.
|
|
4. Explore the toolbar Screen Tips until you find the New
button.
|
|
5. Use the mouse to view the Insert menu commands.
|
|
6. Use the keyboard to view the Edit menu commands.
|
|
7. Display the Picture and Animation Effects
toolbars.
|
|
8. Hide the Picture and Animation Effects
toolbars.
|
|
9. Exit PowerPoint.
|
In this lesson, you will
learn how to:
·
Use the Office Assistant
·
Find an answer
·
Select an Assistant
·
Change Assistant options
·
Hide the Assistant
d Discussion
To assist you in quickly and efficiently getting comprehensive
help on any PowerPoint feature, you can use the Office Assistant. The Office
Assistant appears in the application
window as an animated graphic in a small window with a balloon attached. The balloon contains shortcuts for
accessing additional topics and tips. When you display the Assistant, the
balloon automatically appears. You can move the window portion of the Assistant
anywhere on the screen, as
well as resize it.
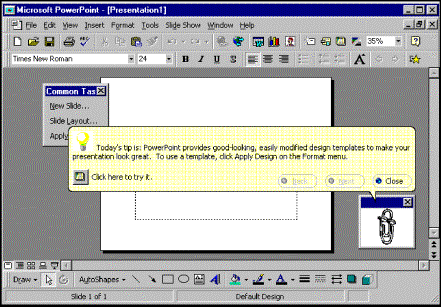
The Office Assistant provides helpful hints called tips to help
you get the most from PowerPoint. A typical tip might provide a keyboard
combination that quickly displays a particular dialog box or a more efficient
way to accomplish a task. When the Assistant has a tip for your current task, a
light bulb appears in the Office Assistant window. If the Assistant is not
displayed when a tip is available, a light bulb appears on the Office
Assistant button on the Standard Toolbar. You can click the Office
Assistant button to open the Office Assistant and view the tip.
After you have read the tip, you can close it, or you can view
previous tips. However, tips are not available for all PowerPoint functions.
Using the Office Assistant
|
|
|
|
o
|
You can also display a tip by clicking the Office
Assistant and selecting the Tips button or by clicking the Office
Assistant with the right mouse button and selecting the See Tips command.
|
|
|
|
|
o
|
Once you have closed a tip, it does not appear again.
To view a previous tip, you can select Back in any Tip balloon or
select the Reset my tips button on the Options page of the
Office Assistant dialog box.
|
|
|
|
C Procedures
|
1. Click the Office Assistant button  on the Standard toolbar. on the Standard toolbar.
|
|
2. Select Tips.
|
|
3. When you have finished viewing the tip, select Close.
|
f Step-by-Step
Use the Office Assistant to get a tip.
Start PowerPoint and create a blank presentation with the Title
Slide AutoLayout, if necessary.
|
Steps
|
Practice Data
|
|
1. Click the Office Assistant button on
the Standard toolbar.
The Office Assistant opens and displays a balloon.
|
Click 
|
|
2. Select Tips.
A balloon with the text of the tip appears.
|
Click Tips
|
|
3. When you have finished viewing the tip, select Close.
The balloon with the tip closes, and the Office Assistant window remains
open.
|
Click Close
|
d Discussion
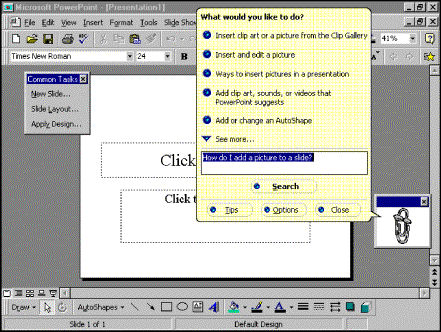
You can query the Office Assistant directly with any questions you may have
regarding PowerPoint. When you query the Assistant, help topics related to your
question appear. You can select any available help topic to view additional
information. If there are more topics than can be displayed at one time, you
can use the See more and the See previous commands to scroll
through the available topics.
The Office Assistant provides the best answers when you enter a
complete sentence or question in a query, rather than just a word or phrase.
For example, it is better to ask How do I add bullets to a slide?
rather than just bullets. The last query remains in the Office Assistant
until you create a new query or close PowerPoint.
Finding an answer to a question
C Procedures
|
1. Open the Office Assistant, if necessary.
|
|
2. Click the Office Assistant.
|
|
3. Type the desired question or sentence.
|
|
4. Select Search.
|
|
5. Select the desired help topic.
|
f Step-by-Step
Find an answer to a question using the Office Assistant.
Open the Office Assistant, if necessary.
|
Steps
|
Practice Data
|
|
1. Click the Office Assistant.
The Office Assistant balloon appears.
|
Click the Office Assistant
|
|
2. Type the desired question or sentence.
The query appears in the text box.
|
Type How do I add a picture to a slide?
|
|
3. Select Search.
A list of pertinent help topics appears.
|
Click Search
|
|
4. Select the desired help topic.
The corresponding help window with the answer to the question opens.
|
Click Ways to insert pictures in a presentation
|
Close the help window.
d Discussion
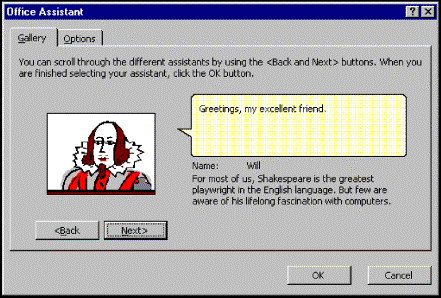
The default Office Assistant is an animated paper clip called Clippit.
Other Assistants are available, including The Dot, The Genius, Hoverbot,
Office Logo, Mother Nature, Power Pup, Scribble,
and Will. You can preview and select the desired Assistant in the
Office Assistant dialog box.
When you preview the Assistants, each one greets you with a message.
The name of the Assistant appears as well as an introduction to it. Even though
you can select any Assistant you want, you are limited to only one Assistant at
a time. No matter which Assistant you choose, however, the Office Assistant
maintains the same functionality.
Other Office programs, such as Word and Excel,
share the Office Assistant. Therefore, any changes you make to the Assistant in
PowerPoint affect all other Office programs.
Selecting an Assistant
|
|
|
|
o
|
Two Assistants, Mother Nature and The Genius,
are only available when PowerPoint is installed from CD-ROM.
|
|
|
|
|
o
|
If you have Internet access to the World Wide Web, you
can select additional Assistants from Microsoft’s web page. These Assistants
are found under the home page address of http://www.microsoft.com.
|
|
|
|
|
o
|
You can also select an Assistant by clicking the right
mouse button on the Office Assistant and selecting the Choose Assistant command.
|
C Procedures
|
1. Open the Office Assistant, if necessary.
|
|
2. Click the Office Assistant.
|
|
3. Select Options.
|
|
4. Select the Gallery tab.
|
|
5. Select Next as desired to view each Assistant.
|
|
6. Select Back as desired to view previous Assistants.
|
|
7. Select OK.
|
f Step-by-Step
Select a different Assistant.
Open the Office Assistant, if necessary.
|
Steps
|
Practice Data
|
|
1. Click the Office Assistant.
The Office Assistant balloon appears.
|
Click the Office Assistant
|
|
2. Select Options.
The Office Assistant dialog box opens.
|
Click Options
|
|
3. Select the Gallery tab.
The Gallery page appears.
|
Click the Gallery tab
|
|
4. Select Next as needed to view each Assistant.
The next Assistant appears.
|
Click Next> twice
|
|
5. Select Back as desired to view previous Assistants.
The previous Assistant appears.
|
Click <Back
|
|
6. Select OK.
The Office Assistant dialog box closes and the new Assistant appears in
the Office Assistant window.
|
Click OK
|
Change the Assistant back to Clippit.
d Discussion
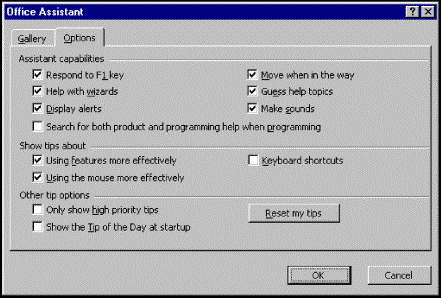
You can use the options available on the Options page of
the Office Assistant dialog box to make the Office Assistant work best for you.
These options, some of which are activated by default, are divided into three
distinct groups: Assistant capabilities, Show tips about, and Other
tip options.
Some of the options that can be selected under Assistant
capabilities include: Respond to F1 key, which opens the
Assistant whenever you press [F1]; Move when in the way, which
moves the Assistant as needed when screen elements (such as a dialog box) are
open; and Guess help topics, in which the Assistant automatically
displays help on the current task. These options are all enabled by default.
Under Show tips about, you can choose exactly which type
of tip you want to display or hide, depending upon your individual needs. For
example, you can select to show or hide tips about Using features more
effectively, Using the mouse more effectively, and Keyboard
shortcuts. The Using features more effectively and Using the
mouse more effectively options are enabled by default.
Under Other tip options, you can select the following
options: Only show high priority tips, which shows only important tips
(such as time-saving tips); and Show the Tip of the Day at startup,
which opens an Office Assistant tip each time
PowerPoint starts. Neither of these options are enabled by default.
You can also reset your tips. This option allows you to review
previous tips in the current PowerPoint session.
Changing Assistant options
|
|
|
|
o
|
You can also open the Office Assistant dialog box by
clicking the right mouse button on the Office Assistant and selecting the Options
command.
|
|
|
|
C Procedures
|
1. Open the Office Assistant, if necessary.
|
|
2. Click the Office Assistant.
|
|
3. Select Options.
|
|
4. Select the Options tab.
|
|
5. Select or deselect the desired options.
|
|
6. Select OK.
|
f Step-by-Step
Change Assistant options.
Open the Office Assistant, if necessary.
|
Steps
|
Practice Data
|
|
1. Click the Office Assistant.
The Office Assistant balloon appears.
|
Click the Office Assistant, if
necessary
|
|
2. Select Options.
The Office Assistant dialog box opens.
|
Click Options
|
|
3. Select the Options tab.
The Options page appears.
|
Click the Options tab, if necessary
|
|
4. Select or deselect the desired options.
The options are selected or deselected.
|
Click  Move when in the way to
deselect it Move when in the way to
deselect it
|
|
5. Select OK.
The Office Assistant dialog box closes and the appropriate options are
enabled or disabled.
|
Click OK
|
Move the Office Assistant to the center of the document window
and open the Page Setup dialog box. Notice that the Assistant does not move to
accommodate the Page Setup dialog box. Close the Page Setup dialog box.
Open the Office Assistant dialog box again and enable the Move
when in the way option. Then, open the Page Setup dialog box again. Notice
that the Assistant now moves to accommodate the Page Setup dialog box. Close
the Page Setup dialog box.
d Discussion
You can display or hide the Office Assistant as desired. Hiding
the Assistant removes it from view, but does not disable it. The Assistant
continues to monitor your activities and, if it detects that you are using
procedures that can be performed more efficiently, the Office Assistant
button on the toolbar displays a light bulb, or it may appear automatically to
offer assistance.
You may want to hide the Office Assistant if you are
not using it, find it distracting, or require a larger working area.
|
|
|
|
o
|
You can also hide the Office Assistant by clicking it
with the right mouse button and selecting the Hide Assistant command.
|
|
|
|
C Procedures
|
1. Open the Office Assistant, if necessary.
|
|
2. Click the Close button on the Office Assistant.
|
f Step-by-Step
Hide the Office Assistant.
Open the Office Assistant, if necessary.
|
Steps
|
Practice Data
|
|
1. Click the Close button on the Office
Assistant.
The Office Assistant closes.
|
Click 
|
Open the Office Assistant and the Office Assistant dialog box.
On the Options page, select Reset my tips. Close the Office
Assistant dialog box and hide the Assistant.
e Task
Use the Office Assistant to view a tip and find an answer to a
question. Select a different Assistant, reset the Assistant tips, and hide the
Assistant.
|
1. Start PowerPoint, if necessary.
|
|
2. Open the Office Assistant, if necessary.
|
|
3. Close the Office Assistant balloon, if necessary.
|
|
4. Select the Page Setup command from the File menu
to open the Page Setup dialog box.
|
|
5. Click the Assistant.
|
|
6. Select the Troubleshooting printing help topic.
|
|
7. Close the help window.
|
|
8. Close the Page Setup dialog box.
|
|
9. Use the Assistant to find help on changing the layout of
presentation slides.
|
|
10. Display the How layouts help me design slides help topic.
|
|
11. Close the help window.
|
|
12. Change the Clippit Assistant to the Scribble Assistant.
|
|
13. Return the Assistant to Clippit.
|
|
14. In the Office Assistant dialog box, reset the tips.
|
|
15. Hide the Office Assistant.
|

In this lesson, you will
learn how to:
·
Create a new presentation
·
Save a new presentation
·
Close a presentation
·
Open a presentation
·
Enter text
·
Add a new slide
·
Rename an existing file
·
Use design templates
·
Use content templates
·
Navigate slides
·
Switch views
·
Use the AutoContent Wizard
d Discussion
In the New Presentation dialog box, you have several options
for creating a new presentation, including design and content templates.
You can create a blank presentation from the General
tab. A blank presentation is based on the design of the default template and
does not suggest any content. You can then choose the layout for each slide
from the AutoLayout dialog box.
Creating a blank presentation gives you complete control over
the look and the content of the presentation from the beginning.

Creating a new presentation
|
|
|
|
o
|
You can also create a new presentation by clicking the
New button on the Standard toolbar. This button creates a blank
presentation by default and immediately opens the New Slide dialog box so
that you can choose an AutoLayout.
|
|
|
|
C Procedures
|
1. Select the File menu.
|
|
2. Select the New command.
|
|
3. Select Blank Presentation.
|
|
4. Select OK.
|
|
5. Under Choose an AutoLayout, select the desired slide layout.
|
|
6. Select OK.
|
f Step-by-Step
Create a new presentation.
|
Steps
|
Practice Data
|
|
1. Select the File menu.
The File menu appears.
|
Click File
|
|
2. Select the New command.
The New Presentation dialog box opens.
|
Click New...
|
|
3. Select Blank Presentation.
Blank Presentation is selected.
|
Click Blank Presentation, if necessary
|
|
4. Select OK.
The New Slide dialog box opens.
|
Click OK
|
|
5. Under Choose an AutoLayout, select the desired slide
layout.
The AutoLayout is selected.
|
Click Title Only (third row, third column)
|
|
6. Select OK.
The slide appears in the presentation window.
|
Click OK
|
d Discussion
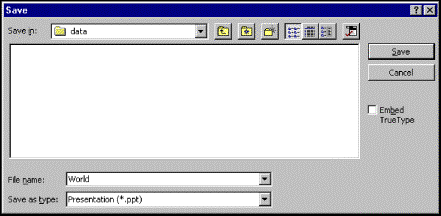
Once you have created a presentation, it is important to save it. In
the Save dialog box, you enter the file name of the presentation and select the
folder in which you want to store it.
The Save dialog box opens whenever you click the Save
button for a new presentation that has not yet been saved.
Once a file has been named, the Save dialog box does not
open when you select the Save command. Instead, PowerPoint automatically
saves the file with the same name and to the same location, overwriting the
original file.
Saving a new presentation
|
|
|
|
o
|
You can also select the Save command from the File
menu to save a presentation.
|
|
|
|
|
o
|
You can use the Create New Folder button in the
Save As dialog box to create a new folder without leaving PowerPoint.
|
|
|
|
|
o
|
The following characters cannot be used in filenames:
forward slash (/), backslash (\), greater than symbol (>),
less than symbol (<), asterisk (*), quotation marks (“ ”),
pipe symbol ( | ), colon (:), or semicolon (;).
|
|
|
|
|
o
|
For every file named in PowerPoint 97 that is more
than eight characters in length, there is an eight character file name
created in order for the file to be compatible when used with earlier
operating systems.
|
|
|
|
|
o
|
Since PowerPoint saves files in small increments, even
large files are saved quickly.
|
|
|
|
C Procedures
|
1. Click the Save button  . .
|
|
2. Type the desired file name.
|
|
3. Select the Save in list.
|
|
4. Select the drive in which you want to save the presentation.
|
|
5. Select the folder in which you want to save the presentation.
|
|
6. Select Save.
|
f Step-by-Step
Save a new presentation.
|
Steps
|
Practice Data
|
|
1. Click the Save button.
The Save dialog box opens.
|
Click 
|
|
2. Type the desired file name.
The file name appears in the File name text box.
|
Type world
|
|
3. Select the Save in list.
A list of available drives appears.
|
Click Save in 
|
|
4. Select the drive in which you want to save the presentation.
A list of available folders appears.
|
Click the student data drive
|
|
5. Select the folder in which you want to save the presentation.
A list of the files in the selected folder appears.
|
Double-click to select the student data folder
|
|
6. Select Save.
The Save dialog box closes and the presentation is saved to the selected
drive and folder.
|
Click Save
|
d Discussion
When you have finished working on a presentation, you can close the presentation
to remove it from the presentation window without exiting PowerPoint. The Close
command closes only the active presentation. If you have more than one
presentation open, all other presentations remain open.
If you have not saved changes made to a presentation when you
close it, PowerPoint prompts you to save the most recent changes. You can
choose to save the changes made to the document, or you can close the document
without saving the changes.
|
|
|
|
o
|
To close the active presentation, you can double-click
the PowerPoint icon to the left of the word File on the menu
bar or click the Close button at the right end of the menu bar.
|
|
|
|
|
o
|
The PowerPoint AutoRecover feature saves a
temporary file at timed intervals. In this way, you can retrieve the changes
made to a presentation if PowerPoint exits without saving them (e.g. due to a
power failure or similar problem).
|
|
|
|
|
|
|
|
x
|
To be able to recover lost work, you must select the Save
AutoRecover info option on the Save page of the Options dialog box
prior to creating the file.
|
|
|
|
C Procedures
|
1. Select the File menu.
|
|
2. Select the Close command.
|
f Step-by-Step
Close the current presentation.
|
Steps
|
Practice Data
|
|
1. Select the File menu.
The File menu appears.
|
Click File
|
|
2. Select the Close command.
The presentation closes and the program window remains open.
|
Click Close
|
If a message box prompts you to save the changes to the current
presentation, select No.
d Discussion
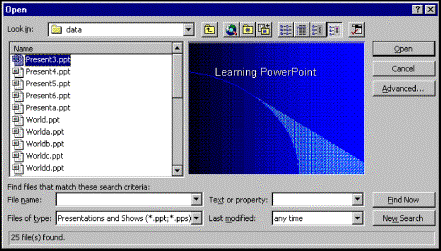
You must open a presentation file in order to view or edit it.
The Open dialog box lists all the files stored in the current folder and
displays a preview of the selected file. You can select the desired file from
the list, or you can type the name of the file you want to open.
If the file resides in a different drive or folder, you can use
the Look in list to select the correct location. The folders and files
residing in the selected location appear below the Look in box.
You can also have more than one presentation open at a time.
Opening a presentation
|
|
|
|
o
|
If you frequently use a particular file, you can add
it to the Favorites folder by selecting the desired file and clicking
the Add to Favorites button. Then, when you want to open the file, you
can click the Look in Favorites button to see the files in the Favorites
folder.
|
|
|
|
|
o
|
Because PowerPoint files open in small increments, you
can start working on presentations, even large ones, immediately upon opening
them.
|
|
|
|
|
o
|
The names of the four most recently opened
presentations appear in a list at the bottom of the File menu. When
you click a file name in the list, the appropriate presentation opens.
|
|
|
|
|
o
|
You can also open a presentation by selecting the Open
command from the File menu or by pressing [Ctrl+O].
|
|
|
|
C Procedures
|
1. Click the Open button  . .
|
|
2. Select the Look in list.
|
|
3. Select the drive where the file you want to open is located.
|
|
4. Select the folder where the file you want to open is located.
|
|
5. Select the name of the presentation you want to open.
|
|
6. Select Open.
|
f Step-by-Step
Open an existing presentation from a specified
drive and folder location.
|
Steps
|
Practice Data
|
|
1. Click the Open button.
The Open dialog box appears.
|
Click 
|
|
2. Select the Look in list.
A list of available drives appears.
|
Click Look in 
|
|
3. Select the drive where the file you want to open is located.
A list of available folders appears.
|
Click the student data drive
|
|
4. Select the folder where the file you want to open is located.
A list of available files appears.
|
Double-click to select the student data folder
|
|
5. Select the name of the presentation you want to open.
The file name appears in the File name text box.
|
Click World1
|
|
6. Select Open.
The Open dialog box closes and the file opens in the presentation window.
|
Click Open
|
d Discussion
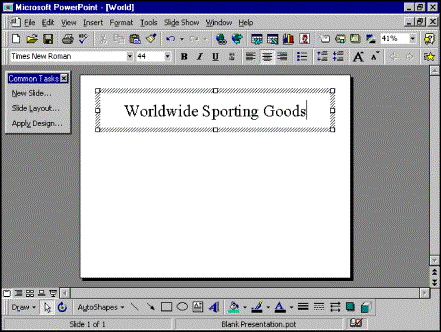
After you have opened the presentation, you can enter text into it. The amount of text
you enter depends upon the current slide layout. For example, on a Bulleted
List layout, you can add title text into the title area and several lines
of text into the body area. However, on the Text & Chart or Text
& Clip Art layouts, you must leave enough room to insert the chart or
clip art images.
In PowerPoint, text appears in placeholders. Text placeholders
determine the placement of text on the page and are formatted with the font
style and font size defined for each AutoLayout. Default placeholder text
appears until you type the desired text. If you do not enter any text, the
default text appears on the screen, but is not printed.
When you click a text placeholder, you switch to edit mode.
Selection handles appear around the placeholder and the insertion point appears
in it.
Entering text
C Procedures
|
1. Click the placeholder to which you want to add text.
|
|
2. Type the desired text.
|
|
3. To deselect the placeholder, click outside of it.
|
f Step-by-Step
Enter text into a placeholder on a slide.
|
Steps
|
Practice Data
|
|
1. Click the placeholder to which you want to
add text.
The insertion point appears in the placeholder.
|
Click the Click to add title
placeholder
|
|
2. Type the desired text.
The text appears in the placeholder.
|
Type Worldwide Sporting Goods
|
|
3. To deselect the placeholder, click outside of it.
The placeholder is deselected and the text is entered.
|
Click outside of the placeholder
|
d Discussion
You can add additional slides to a presentation. When adding
additional slides, you can select the current AutoLayout or choose a new one.
By default, PowerPoint inserts new slides after the current slide.
|
|
|
|
o
|
You can also add a new slide to a presentation by
selecting the New Slide command from the Insert menu.
|
|
|
|
C Procedures
|
1. Select New Slide on the Common Tasks toolbar.
|
|
2. Under Choose an AutoLayout, select the desired AutoLayout.
|
|
3. Select OK.
|
f Step-by-Step
Add a new slide to a presentation.
|
Steps
|
Practice Data
|
|
1. Select New Slide on the Common
Tasks toolbar.
The New Slide dialog box opens.
|
Click New Slide...
|
|
2. Under Choose an AutoLayout, select the desired AutoLayout.
The AutoLayout is selected and its description appears in the New Slide
dialog box.
|
Click Bulleted List (first row, second column)
|
|
3. Select OK.
The new slide appears in the presentation window after the current slide.
|
Click OK
|
d Discussion
Once a file has been saved to disk, PowerPoint updates the
existing file with any changes each time you subsequently save the
presentation.
However, there may be times when you want to save the current
presentation with a different name or to a different location. For example, you
may want to perform this task to modify a presentation and save the changes,
but still keep the original presentation intact, or you may want to save a copy
of the presentation to a floppy disk. You can use the Save As dialog box to
accomplish these tasks.
In the Save As dialog box, you can enter a new file name, or you
can select a different drive or folder in which to save the file.
C Procedures
|
1. Select the File menu.
|
|
2. Select the Save As command.
|
|
3. Type the desired file name.
|
|
4. Select the Save in list.
|
|
5. Select the drive in which you want to
save the new presentation.
|
|
6. Select the folder in which you want to save the new
presentation.
|
|
7. Select Save.
|
f Step-by-Step
Rename an existing presentation.
|
Steps
|
Practice Data
|
|
1. Select the File menu.
The File menu appears.
|
Click File
|
|
2. Select the Save As command.
The Save As dialog box opens.
|
Click Save As...
|
|
3. Type the desired file name.
The file name appears in the File name text box.
|
Type World Test
|
|
4. Select the Save in list.
A list of available drives appears.
|
Click Save in 
|
|
5. Select the drive in which you want to save the new presentation.
The folders in the selected drive appear.
|
Click the student data drive
|
|
6. Select the folder in which you want to save the new
presentation.
The files in the selected folder appear.
|
Double-click to select the student data folder
|
|
7. Select Save.
The Save As dialog box closes and the file is saved with the new name to
the selected location.
|
Click Save
|
Close World Test.
d Discussion
When creating a new presentation, you can choose a design
template. Design templates give the slides in your presentation a consistent,
professional look.
PowerPoint provides a variety of design templates, which are listed on the Presentation
Designs page of the New Presentation dialog box. When you select a design
template, a preview of it appears in the New Presentation dialog box.

Selecting a design template
C Procedures
|
1. Select the File menu.
|
|
2. Select the New command.
|
|
3. Select the Presentation Designs tab.
|
|
4. Select the desired design template.
|
|
5. Select OK.
|
|
6. Under Choose an AutoLayout, select the desired slide layout.
|
|
7. Select OK.
|
f Step-by-Step
Select a design template.
|
Steps
|
Practice Data
|
|
1. Select the File menu.
The File menu appears.
|
Click File
|
|
2. Select the New command.
The New Presentation dialog box appears.
|
Click New...
|
|
3. Select the Presentation Designs tab.
The Presentation Designs page appears.
|
Click the Presentation Designs tab
|
|
4. Select the desired design template.
A preview of the design template appears under Preview.
|
Scroll as necessary and click Whirlpool
|
|
5. Select OK.
The New Slide dialog box opens.
|
Click OK
|
|
6. Under Choose an AutoLayout, select the desired slide
layout.
The layout is selected.
|
Click Title Slide, if necessary
|
|
7. Select OK.
The New Slide dialog box closes and the new slide with the design template
appears in the presentation window.
|
Click OK
|
Close the presentation without saving it.
d Discussion
PowerPoint provides a variety of presentations containing both
design and suggested content. These templates, called content templates, allow
you to create a professional presentation quickly. PowerPoint creates a title
slide and supporting slides with
generic text, which you can then customize as desired.
The content templates provided by PowerPoint appear on the Presentation
page of the New Presentation dialog box. When you select a content
template, a preview of it appears in the New Presentation dialog box.
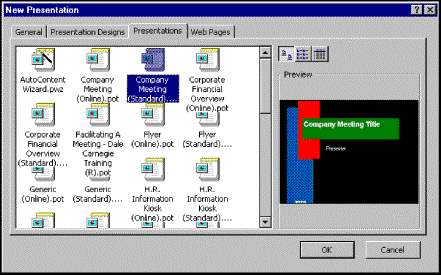
Using content templates
C Procedures
|
1. Select the File menu.
|
|
2. Select the New menu.
|
|
3. Select the Presentations tab.
|
|
4. Select the desired content template.
|
|
5. Select OK.
|
f Step-by-Step
Create a presentation from a content template.
|
Steps
|
Practice Data
|
|
1. Select the File menu.
The File menu appears.
|
Click File
|
|
2. Select the New menu.
The New Presentation dialog box opens.
|
Click New...
|
|
3. Select the Presentations tab.
The Presentations page appears.
|
Click the Presentations tab
|
|
4. Select the desired content template.
A preview of the content template appears under Preview.
|
Click Company Meeting (Standard)
|
|
5. Select OK.
The New Presentation dialog box closes and the slide with the content
template appears in the presentation window.
|
Click OK
|
Close the presentation without saving it.
d Discussion
In Slide view, you can use the Next Slide and Previous
Slide buttons to move from one slide to another. These buttons are located at the
bottom of the vertical scroll bar.
You can also use the scroll box in the vertical scroll bar to
go to other slides. As you drag the scroll box, PowerPoint displays the number
and title of each slide in a ScreenTip. When you release the scroll box,
PowerPoint displays the slide at that location in the presentation.
|
|
|
|
o
|
The Notes Page view also uses the Next Slide
and Previous Slide buttons to go to other slides.
|
|
|
|
C Procedures
|
1. To move to the next slide, click the Next Slide button.
|
|
2. To move to the previous slide, click the Previous Slide
button.
|
|
3. Drag the scroll box to the desired presentation location.
|
|
4. Release the mouse button.
|
f Step-by-Step
From the Student Data directory, open MEETING.PPT.
Navigate slides using the Next Slide and Previous Slide buttons.
|
Steps
|
Practice Data
|
|
1. To move to the next slide, click the Next
Slide button.
The next slide appears.
|
Click 
|
|
2. To move to the previous slide, click the Previous Slide
button.
The previous slide appears.
|
Click 
|
|
3. Drag the scroll box to the desired presentation location.
PowerPoint displays the number and title of each slide in a ScreenTip as
you drag.
|
Drag the scroll box to slide 3
|
|
4. Release the mouse button.
The slide appears in the presentation window.
|
Release the mouse button
|
Go back to slide 1.
d Discussion
PowerPoint provides five ways to view a presentation: Slide,
Outline, Slide Sorter, Notes Page, and Slide Show.
These views give you flexibility in the way you view and work with your
presentation. You can use the View buttons at the left end of the
horizontal scroll bar to switch between views.
|
View Button
|
View
|
Description
|
|

|
Slide
|
Displays one slide at a time.
Use this view when you want to edit objects on a slide. This is the default
view.
|
|

|
Outline
|
Displays the presentation in an outline format. Use
this view to edit the text in a presentation or to check the flow of ideas
from one slide to another.
|
|

|
Slide Sorter
|
Displays multiple slides at one time. Use this view to
move, copy, and delete slides.
|
|

|
Notes Page
|
Displays each slide and any notes attached to it, one
at a time. You can print these notes and use them when you give the
presentation.
|
|

|
Slide Show
|
Displays the slides as they appear during a slide
show.
|
|
|
|
|
o
|
You can also use the View menu commands to
switch views.
|
|
|
|
C Procedures
|
1. Click the View button for the desired view.
|
f Step-by-Step
Switch views in a presentation.
|
Steps
|
Practice Data
|
|
1. Click the View button for the
desired view.
The corresponding view appears.
|
Click 
|
Switch to Slide Sorter view and then back to Slide
view.
Close MEETING.PPT.
d Discussion
The AutoContent Wizard offers the quickest way to
create a presentation. It provides content ideas, template selections, and
step-by-step guidance to build a title and supporting slides. For example, you
can use the AutoContent Wizard to present a company's financial overview. The
AutoContent Wizard steps you through the selection of a presentation type,
style and output options, and provides suggested slide titles and text.
The AutoContent Wizard helps you select several predesigned
content templates that can be used for creating meeting presentations,
certificates, flyers, calendars of events, and Web home pages. In addition, if
you want information on how to become an effective presenter, you can use the
Dale Carnegie Training® templates that are included with the AutoContent
Wizard.
When the AutoContent Wizard finishes, the presentation appears
in Outline view. This view allows you to easily enter the slide text.
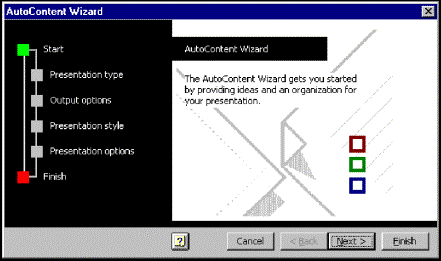
Using the AutoContent Wizard
|
|
|
|
o
|
Depending on the type of presentation you choose to
develop, the AutoContent Wizard options may vary.
|
|
|
|
|
o
|
You can also select the AutoContent Wizard
option in the opening PowerPoint dialog box when PowerPoint starts.
|
|
|
|
C Procedures
|
1. Select the File menu.
|
|
2. Select the New command.
|
|
3. Select the Presentations tab.
|
|
4. Select AutoContent Wizard.
|
|
5. Select OK.
|
|
6. Select Next >.
|
|
7. Select the desired presentation category.
|
|
8. Select the type of presentation you want to give.
|
|
9. Select Next >.
|
|
10. Select the desired output option.
|
|
11. Select Next >.
|
|
12. Select the desired type of output.
|
|
13. Specify whether or not you want to print handouts.
|
|
14. Select Next >.
|
|
15. Select the Presentation title text box.
|
|
16. Type the desired title of the presentation.
|
|
17. Select the Your name text box.
|
|
18. Type the desired name in the Your name text box.
|
|
19. Select the Additional information text box.
|
|
20. Type any additional information as desired.
|
|
21. Select Next >.
|
|
22. Select Finish.
|
f Step-by-Step
Use the AutoContent Wizard to create a
presentation.
|
Steps
|
Practice Data
|
|
1. Select the File menu.
The File menu appears.
|
Click File
|
|
2. Select the New command.
The New Presentation dialog box opens.
|
Click New...
|
|
3. Select the Presentations tab.
The Presentations page appears.
|
Click the Presentations tab
|
|
4. Select AutoContent Wizard.
AutoContent Wizard is selected.
|
Click AutoContent Wizard
|
|
5. Select OK.
The first AutoContent Wizard dialog box opens.
|
Click OK
|
|
6. Select Next >.
The AutoContent Wizard dialog box Presentation type panel appears.
|
Click Next >
|
|
7. Select the desired presentation category.
The presentation category is selected.
|
Click General
|
|
8. Select the type of presentation you want to give.
The presentation type is selected.
|
Click Generic
|
|
9. Select Next >.
The AutoContent Wizard dialog box Output options panel appears.
|
Click Next >
|
|
10. Select the desired output option.
The output option is selected.
|
Click  Presentations, informal meetings,
handouts, if necessary Presentations, informal meetings,
handouts, if necessary
|
|
11. Select Next >.
The AutoContent Wizard dialog box Presentation style panel appears.
|
Click Next >
|
|
12. Select the desired type of output.
The output type is selected.
|
Click  Color overheads Color overheads
|
|
13. Specify whether or not you want to print handouts.
The option is selected.
|
Click  Yes, if necessary Yes, if necessary
|
|
14. Select Next >.
The AutoContent Wizard dialog box Presentation options panel
appears.
|
Click Next >
|
|
15. Drag to select the text in the Presentation title text
box.
The text is highlighted as you drag.
|
Drag to select the text in the Presentation
title text box
|
|
16. Release the mouse button.
The text is selected.
|
Release the mouse button
|
|
17. Type the desired title of the presentation.
The text appears in the Presentation title text box.
|
Type Making a Business of Recreation
|
|
18. Select the Your name text box.
The text in the Your name text box is selected.
|
Press [Tab]
|
|
19. Type the desired name in the Your name text box.
The text appears in the Your name text box.
|
Type Worldwide Sporting Goods
|
|
20. Select the Additional information text box.
The text in the Additional information text
box is selected.
|
Press [Tab]
|
|
21. Type any additional information as desired.
The text appears in the Additional information
text box.
|
Type Product, Value, Quality and Service
|
|
22. Select Next >.
The AutoContent Wizard dialog box Finish panel appears.
|
Click Next >
|
|
23. Select Finish.
The AutoContent Wizard dialog box closes and the presentation appears in Outline
view.
|
Click Finish
|
Switch to Slide view and review the presentation. Then,
close the presentation without saving it.
e Task
Create a new presentation using the AutoContent Wizard. Add
slides and text. Navigate slides and switch views.
|
1. Create a new presentation using the AutoContent Wizard. Select
the Corporate category and create a presentation for a Company
Meeting.
|
|
2. Select the default output options and presentation style. On the
Presentation options panel, enter Annual Meeting as the
presentation title. Type Worldwide Sporting Goods in the Your name
text box and January, 1998 in the Additional information text
box. Finish the presentation.
|
|
3. Save the new presentation as Annual Meeting to the
student data folder.
|
|
4. Switch to Slide Sorter view to view the slides and then
switch back to Slide view.
|
|
5. Insert a new slide with the Title Slide layout.
|
|
6. On the new slide, click the Click to add title
placeholder and type Opening Message.
|
|
7. Click the Click to add sub-title placeholder and type Robert
Anderson, President.
|
|
8. Save the presentation as Annual to the student data folder.
|
|
9. Close the presentation.
|

In this lesson, you will
learn how to:
·
Change the font
·
Change the font size
·
Change font style and effect
·
Change text alignment
·
Add/Remove bullets
·
Modify paragraph spacing
d Discussion
Text font is determined by the template and the design you
choose when you create a presentation. You can change the font as desired to
suit your needs. In this way, you can customize a presentation to accommodate
special conditions, such as text for a company logo.
The fonts available to you depend upon which fonts are
installed on your computer and printer. A TT symbol next to a font name
indicates that it is a True Type font installed in Windows. A printer icon next
to a font name indicates that it is a font installed in your printer.
|
|
|
|
o
|
You can also use the Font command on the Format
menu to change the font.
|
|
|
|
C Procedures
|
1. Select the placeholder containing the text for
which you want to change the font
|
|
2. Select the desired text.
|
|
3. Select the Font list on the Formatting toolbar.
|
|
4. Select the desired font.
|
f Step-by-Step
From the Student Data directory, open WORLD2.PPT.
Change the font of selected text.
Go to slide 1, if necessary.
|
Steps
|
Practice Data
|
|
1. Select the placeholder containing the text
for which you want to change the font
The placeholder is selected.
|
Click the Worldwide Sporting
Goods placeholder
|
|
2. Drag to select the desired text.
The text is highlighted as you drag.
|
Drag to select Worldwide Sporting Goods
|
|
3. Release the mouse button.
The text is selected.
|
Release the mouse button
|
|
4. Select the Font list on the Formatting toolbar.
A list of available fonts appears.
|
Click Font 
|
|
5. Select the desired font.
The font is applied to the selected text.
|
Scroll as necessary and click Times New Roman
|
Click outside of the placeholder to deselect the text.
d Discussion
The default font size of titles, bulleted text, and other text
in a presentation depends upon the template or design you chose to use to
create a presentation. You can change
font size as needed in order to emphasize or de-emphasize text.
|
|
|
|
o
|
You can also use the Increase Font Size and Decrease
Font Size buttons on the Formatting toolbar to incrementally
increase or decrease the font size.
|
|
|
|
|
o
|
You can also use the Font command on the Format
menu to change the font size.
|
|
|
|
C Procedures
|
1. Select the placeholder containing the text for which you want to
change the font size.
|
|
2. Select the desired text.
|
|
3. Select the Font Size list on the Formatting
toolbar.
|
|
4. Select the desired font size.
|
f Step-by-Step
Change the font size of selected text.
Go to slide 3.
|
Steps
|
Practice Data
|
|
1. Select the placeholder containing the text
for which you want to change the font size.
The placeholder is selected.
|
Click the Supporting Retail
Partners placeholder
|
|
2. Drag to select the desired text.
The text is highlighted as you drag.
|
Drag to select Supporting Retail Partners
|
|
3. Release the mouse button.
The text is selected.
|
Release the mouse button
|
|
4. Select the Font Size list on the Formatting
toolbar.
A list of available font sizes appears.
|
Click Font Size 
|
|
5. Select the desired font size.
The font size is applied to the selected text.
|
Scroll as necessary and click 28
|
Click outside of the placeholder to deselect the text.
d Discussion
You can change the font style and effect. Font style
includes bold and italic and font effects include underline, shadow, emboss,
superscript, and subscript. Buttons for bold, italic, underline, and shadow
appear on the Formatting toolbar.
Font styles and effects can make words stand out on a slide.
You can use them to call attention to the key words in a presentation.
|
|
|
|
o
|
You can also use the Font command on the Format
menu to add font style and effects. In the Font dialog box, you can select
any font style or effect. In addition, you can apply more than one font style
or effect at one time.
|
|
|
|
C Procedures
|
1. Select the placeholder containing the
text for which you want to change the font style or effect.
|
|
2. Select the desired text.
|
|
3. Click the desired font style or effect button.
|
f Step-by-Step
Change the font effect of text on a slide.
Go to slide 4.
|
Steps
|
Practice Data
|
|
1. Select the placeholder containing the text
for which you want to change the font style or effect.
The placeholder is selected.
|
Click the Meeting the Needs
placeholder
|
|
2. Drag to select the desired text.
The text is highlighted as you drag.
|
Drag to select Meeting the Needs
|
|
3. Release the mouse button.
The text is selected.
|
Release the mouse button
|
|
4. Click the desired font style or effect button.
The font style or effect is applied to the selected text.
|
Click 
|
Click outside of the placeholder to deselect the text.
d Discussion
You can change the alignment of text in a
slide to best achieve a desired look. You can align text to the left or to the
right margin, center it between the margins, or justify it to both the left and
right margins.
Aligning text affects the entire paragraph. You do not need to
select the text in the paragraph you want to align; you can simply position the
insertion point anywhere within the paragraph.
|
|
|
|
o
|
You can use the available buttons on the Formatting
toolbar to align text to the left, right, or center. You must use the Alignment
command to justify text.
|
|
|
|
|
o
|
You can also use the Alignment command on the Format
menu to change text alignment.
|
|
|
|
C Procedures
|
1. Select the placeholder containing
the text you want to align.
|
|
2. Position the insertion point in the paragraph you want to align.
|
|
3. Click the desired alignment button.
|
f Step-by-Step
Change text alignment.
Go to slide 4, if necessary.
|
Steps
|
Practice Data
|
|
1. Select the placeholder containing
the text you want to align.
The placeholder is selected.
|
Click the Meeting the Needs placeholder
|
|
2. Position the insertion point in the paragraph you want to align.
The insertion point appears in the text.
|
Click in Meeting
|
|
3. Click the desired alignment button.
The text is aligned accordingly.
|
Click 
|
Click outside of the placeholder to deselect it.
d Discussion
Often, slides contain text in bulleted lists. PowerPoint
creates the bullets automatically as you type. However, you can add and remove
bullets manually, if desired. For
example, if presentation objectives appear in a list, you can add bullets to the list to
highlight each objective. The bullet size and style are determined by the size
and style of the corresponding text line.
You can use the Bullets button on the Formatting toolbar
to add or remove bullets.
C Procedures
|
1. Select the placeholder containing the text to which you want to add bullets.
|
|
2. Select the text to which you want to add
bullets.
|
|
3. Click the Bullets button  . .
|
f Step-by-Step
Add and remove bullets.
Go to slide 4, if necessary.
|
Steps
|
Practice Data
|
|
1. Select the placeholder containing the text
to which you want to add bullets.
The placeholder is selected.
|
Click the Saturday delivery
placeholder
|
|
2. Drag to select the text to which you want to add bullets.
The text is highlighted as you drag.
|
Drag to select Saturday delivery through Toll-free
800 number
|
|
3. Release the mouse button.
The text is selected.
|
Release the mouse button
|
|
4. Click the Bullets button.
Bullets appear on the selected text lines.
|
Click 
|
Click outside of the placeholder to deselect the text.
Go to slide 6. Select the bulleted text and click the Bullets
button to remove the bullets.
d Discussion
You can change the default line and paragraph
spacing on a slide if you want to spread lines out on the slide or condense
them into a smaller area.
Paragraph spacing refers not only to the spacing before and
after a paragraph, but also to the spacing between the lines within the
paragraph. The Increase Paragraph Spacing and Decrease Paragraph
Spacing buttons increase or decrease the paragraph spacing by .1 line each
time you click the button.
|
|
|
|
o
|
You can use the Line Spacing command on the Format
menu to open the Line Spacing dialog box, where you can manually define the
paragraph spacing.
|
|
|
|
C Procedures
|
1. Select the placeholder containing the text for which you want to
modify the paragraph spacing.
|
|
2. Select the text for which you want to modify the paragraph
spacing.
|
|
3. Click the Increase Paragraph Spacing  or the Decrease Paragraph Spacing or the Decrease Paragraph Spacing  as desired. as desired.
|
f Step-by-Step
Modify paragraph spacing.
Go to slide 7.
|
Steps
|
Practice Data
|
|
1. Select the placeholder containing the text
for which you want to modify the paragraph spacing.
The placeholder is selected.
|
Click the Early Monday
Delivery placeholder
|
|
2. Drag to select the text for which you want to modify the
paragraph spacing.
The text is highlighted as you drag.
|
Drag to select Early Monday Delivery through are
announced
|
|
3. Release the mouse button.
The text is selected.
|
Release the mouse button
|
|
4. Click the Increase Paragraph Spacing button or Decrease
Paragraph Spacing button as desired.
The paragraph spacing adjusts accordingly.
|
Click 
|
Close WORLD2.PPT.
e Task
Enhance text in a presentation. Change the font, font size, and
font style and effects. Align text, add bullets, and change paragraph spacing.
|
1. Open Meeting2.
|
|
2. On slide 1, change the font of Worldwide Sporting Goods
to Times New Roman and change the font size to 28. Also, add
bold and italic to the text.
|
|
3. Go to slide 2. Center the word Agenda.
|
|
4. On slide 2, remove the bullets from the Welcome and
Introductions placeholder.
|
|
5. With the text still selected, increase the paragraph spacing by
.1 line.
|
|
6. Close the presentation without saving it.
|
In this lesson, you will
learn how to:
·
Use Outline view
·
Navigate in Outline view
·
Collapse/Expand an outline
·
Demote/Promote text lines
·
Move text lines
·
Add slides in Outline view
·
Delete slides - Outline view
·
Rearrange slides
·
Create a summary slide - Outline View
d Discussion
When you are working on a presentation, Outline view allows you to concentrate on
the content. Since most presentations list highlights instead of full
explanations, Outline view is also an effective way of organizing your
thoughts.
Outline view displays a presentation in the form of a
classic outline, consisting of a heading and associated body text for each
slide. The heading and body text appear on separate lines, with the body text
indented to one of five levels. Level one is the highest level. For example, in
a presentation highlighting a company's financial performance, a slide might
contain the heading Agenda as the title. The body text might include the
text Assets at level one and the text Stock Performance indented
to level two, below Assets.
Working in Outline view is a convenient way of
customizing the content of a presentation. You can add and delete titles, body
text, and entire slides. You can edit text, add bullets and other textual
emphasis, and move text from one position to another or to another slide.
Outline view also adds a global perspective to your
presentation. You can display just the titles to check for continuity,
selectively expand a particular selection to review body text, or view the
entire outline to verify content. Printing the outline is also a convenient way
of reviewing the text in a presentation.
Using Outline view
|
|
|
|
o
|
In Outline view, a thumbnail picture of the
current slide appears.
|
|
|
|
d Discussion
You can use the mouse or the keyboard to navigate in Outline
view. The [Up] and [Down]
keys move the insertion point to the previous or the next line. The [Left]
and [Right] keys move the insertion point to the previous or the next
character.
C Procedures
|
1. Press [Down] to move down one line.
|
|
2. Press [Left] to move to the left one character.
|
|
3. Press [Up] to move up one line.
|
|
4. Press [Right] to move to the right one character.
|
f Step-by-Step
From the Student Data directory, open WORLD3.PPT.
Navigate in Outline view.
Switch to Outline view, if necessary. Click in the text Partnerships
on slide 3.
|
Steps
|
Practice Data
|
|
1. Press [Down] to move down one line.
The insertion point moves down one line.
|
Press [Down]
|
|
2. Press [Left] to move to the left one character.
The insertion point moves to the left one character.
|
Press [Left]
|
|
3. Press [Up] to move up one line.
The insertion point moves up one line.
|
Press [Up]
|
|
4. Press [Right] to move to the right one character.
The insertion point moves to the right one character.
|
Press [Right]
|
d Discussion
One of the advantages of working with an outline is the ability
to expand and collapse the
outline. A collapsed outline allows you to see the
flow of ideas more easily, since you see only the titles of each slide. You can
also collapse all slides except for the current slide. This option leaves more
of the screen available.
You can choose to collapse the entire outline and view only the
titles of each slide, or you can collapse specific slides. You can also expand
the entire outline to view all the body text, or you can expand only specific
slides as you want to work with them.
A collapsed outline
|
|
|
|
o
|
When an outline is collapsed, a gray line appears
under the titles of slides containing body text.
|
|
|
|
C Procedures
|
1. To collapse the current slide, click the Collapse button  . .
|
|
2. To expand the current slide, click the Expand
button  . .
|
|
3. To collapse the entire outline, click the Collapse
All button  . .
|
|
4. To expand the entire outline, click the Expand All button
 . .
|
f Step-by-Step
Collapse and expand slides.
Switch to Outline view, if necessary. Position the
insertion point in slide 2.
|
Steps
|
Practice Data
|
|
1. To collapse the current slide, click the Collapse
button.
Only the slide title text appears.
|
Click 
|
|
2. To expand the current slide, click the Expand button.
All text on the current slide appears.
|
Click 
|
|
3. To collapse the entire outline, click the Collapse All
button.
Only the title text of each slide appears.
|
Click 
|
|
4. To expand the entire outline, click the Expand All button.
All text in the outline appears.
|
Click 
|
d Discussion
There are five levels of indentation available for the body text on a slide.
Level one is the largest in font size and has the smallest
indent. Level five is the smallest in size and has the greatest indent.
When you want to place less emphasis on an item, you can demote
it. When you demote an item, the font size for that item becomes smaller and
the indentation increases. When you want to place more emphasis on an item, you
can promote it. When you promote an item, the font size for that item becomes
larger and the indentation decreases.
|
|
|
|
o
|
The Promote and Demote buttons also
appear on the Formatting toolbar.
|
|
|
|
|
o
|
You can also press [Tab] to demote a line and [Shift+Tab]
to promote a line.
|
|
|
|
C Procedures
|
1. Position the insertion point in the line of text you want to
demote.
|
|
2. Click the Demote button  . .
|
|
3. Position the insertion point in the line of text you want to promote.
|
|
4. Click the Promote button  . .
|
f Step-by-Step
Demote and promote text lines.
|
Steps
|
Practice Data
|
|
1. Position the insertion point in the line of
text you want to demote.
The insertion point appears in the text line.
|
Click in the New Co-op
Partners Program line on slide 2
|
|
2. Click the Demote button.
The text line is demoted.
|
Click 
|
|
3. Position the insertion point in the line of text you want to
promote.
The insertion point appears in the text line.
|
Click in the Success is our objective line on
slide 2
|
|
4. Click the Promote button.
The text line is promoted.
|
Click 
|
d Discussion
You can use the Move Up and Move Down buttons on
the Outlining toolbar to move titles and body text up or down on a slide
or between slides. If no selection is
made, the text line containing the insertion point changes places with the text
line immediately above or below it. If multiple text lines are selected, the
entire selection changes places with the text line immediately above or below
it.
|
|
|
|
o
|
If you move a line with text indented below it, the indented
text does not move.
|
|
|
|
C Procedures
|
1. Position the insertion point in the text line you want to move
up.
|
|
2. To move the line up one position,
click the Move Up button  . .
|
|
3. Position the insertion point in the text line you want to move
down.
|
|
4. To move the line down one position, click the Move Down
button  . .
|
f Step-by-Step
Move a text line up and
down.
|
Steps
|
Practice Data
|
|
1. Position the insertion point in the text
line you want to move up.
The insertion point appears in the text.
|
Click in the Success is our
objective line on slide 2
|
|
2. To move the line up one position, click the Move Up
button.
The text line moves up one line.
|
Click 
|
|
3. Position the insertion point in the text line you want to move
down.
The insertion point appears in the text.
|
Click in the Products, Value, Quality, and Service
line on slide 2
|
|
4. To move the line down one position, click the Move Down
button.
The text line moves down one line.
|
Click 
|
d Discussion
You can easily add slides in Outline view. By default, new slides inserted in Outline
view have the Bulleted List layout.
C Procedures
|
1. Position the insertion point to the left of the
title line where you want to add a slide.
|
|
2. Press [Enter].
|
f Step-by-Step
Add a slide in Outline view.
|
Steps
|
Practice Data
|
|
1. Position the insertion point to the left of
the title line where you want to add a slide.
The insertion point appears in the new location.
|
Click to the left of Success-Satisfaction-Partnership
on slide 2
|
|
2. Press [Enter].
A blank slide appears.
|
Press [Enter]
|
Position the insertion point in the new slide and type Agenda.
d Discussion
You can easily delete slides in Outline view. You also can delete multiple
slides by first selecting the slides you want to delete.
C Procedures
|
1. Click the icon of the slide you want to delete.
|
|
2. Press [Delete].
|
f Step-by-Step
Delete a slide.
|
Steps
|
Practice Data
|
|
1. Click the icon of the slide you want to
delete.
The slide text and icon are selected.
|
Scroll as necessary and click  in slide 9 in slide 9
|
|
2. Press [Delete].
The slide is deleted and the remaining slides are renumbered accordingly.
|
Press [Delete]
|
Delete the Agenda slide.
d Discussion
You can rearrange slides in Outline view, whether the outline is collapsed or
expanded. However, moving collapsed slides shortens the outline and makes it
quick and easy to move slides.
In Outline view, you can move a single slide or
multiple, contiguous slides at the same time. When moving multiple slides, you
can use the [Shift] key both to expand the selection and to drag it to a
new location.
C Procedures
|
1. Point to the icon of the slide you want to move.
|
|
2. Drag the icon to the desired location.
|
|
3. Release the mouse button.
|
f Step-by-Step
Rearrange slides in Outline view.
|
Steps
|
Practice Data
|
|
1. Point to the icon of the slide you want to
move.
The pointer changes into a four-headed arrow.
|
Scroll as necessary and point
to  Customer Requirements Customer Requirements
|
|
2. Drag the icon to the desired location.
An line appears as you drag.
|
Drag to above the Meeting the Needs text
|
|
3. Release the mouse button.
The slide appears in the new position and the outline is renumbered
accordingly.
|
Release the mouse button
|
Close WORLD3.PPT.
d Discussion
You can easily create a summary slide in Outline view.
A summary slide contains the titles of each slide. For example, you can select
the title from each slide in the presentation and use the Summary Slide
button to create an agenda slide to introduce the presentation.
Creating a summary slide
C Procedures
|
1. Select the slides you want to include
in the summary slide.
|
|
2. Click the Summary Slide button  . .
|
f Step-by-Step
From the Student Data directory, open WORLD4.PPT.
Create a summary slide.
Switch to Outline view, if necessary.
|
Steps
|
Practice Data
|
|
1. Drag to select the slides you want to
include in the summary slide.
The text is highlighted as you drag.
|
Drag to select the entire
presentation
|
|
2. Release the mouse button.
The appropriate slides are selected.
|
Release the mouse button
|
|
3. Click the Summary Slide button.
The summary slide appears at the beginning of the outline.
|
Click 
|
Close WORLD4.PPT.
e Task
Use Outline view to manipulate slides in a presentation,
add and delete slides, rearrange slide order, promote and demote text, and
create a summary slide.
|
1. Open Meeting3.
|
|
2. Promote the Competitive - Expand into foreign markets
text line on slide 4.
|
|
3. Demote the Dollars spent on recreation went up text line
on slide 6.
|
|
4. Collapse the entire outline.
|
|
5. Move the Financial Overview slide before the Review of
Prior Goals slide.
|
|
6. Move the Review of Prior Goals slide before the Highlights
of Past Year slide.
|
|
7. Expand the entire outline.
|
|
8. On slide 7, move the Financial Goals line before the Strategic
undertakings line.
|
|
9. Add a slide before slide 6. Enter Regional Comparison as
the slide title text.
|
|
10. Delete slide 2, Agenda.
|
|
11. Select all the text in the presentation and create a summary
slide.
|
|
12. Close the presentation without saving it.
|

In this lesson, you will
learn how to:
·
Check spelling as you type
·
Hide spelling errors
·
Start the spelling checker
·
Use Ignore/Ignore All
·
Use Change/Change All
·
Use Replace/Replace All
·
Select AutoCorrect options
·
Use AutoCorrect
·
Create an AutoCorrect entry
·
Delete an AutoCorrect entry
d Discussion
In order to help you check your
presentations for errors in spelling, PowerPoint includes a Spelling feature.
This feature works in two ways. One way is to automatically check spelling.
With this method, the spelling checker automatically identifies words not in PowerPoint’s
dictionary as you type. This method is enabled by default. The other way allows
you to invoke the spelling checker after a presentation has been created. Both
methods find the same errors.
The check spelling as you type feature is an excellent tool for
correcting typographical errors as you type. This feature examines the words in
a presentation and compares them to the words found in the main dictionary.
When a word is found that is not in the main dictionary, a single, red, wavy
line appears beneath the word. (Red, wavy lines also appear under words
identified as not in PowerPoint’s dictionary when you open a document.)
You have two choices when PowerPoint identifies a word. If the
word is spelled correctly in its context, you can ignore the underline and
continue typing. You can also correct the misspelled word with one of the
suggestions on the shortcut menu. If the correct spelling is not present, you
can edit the error in the Spelling dialog box. You can also edit the error in
the presentation itself.
You can quickly move to the next spelling by double-clicking
the Spelling Status icon on the status bar. This icon, which resembles
an open book, displays an X when additional errors are present in a
presentation. The Spelling Status icon, however, is only visible if the
spelling option has been enabled.
When text is identified as not in PowerPoint’s dictionary,
PowerPoint does not automatically correct the error because of the vast
complexities and idiosyncrasies of the English language. For example, your
company may use an acronym or word that is perfectly correct in its context,
although it is identified as incorrect. Therefore, you can decide whether or
not to correct identified text.
In addition to checking spelling, the spelling checker searches
for oddly capitalized words (tHe), words that should be capitalized (Missouri),
and words that should be all capitals (OK).
The identified word can be changed to one of the suggestions,
or you can type the correct spelling. You can then choose to change only this
occurrence of the word or all occurrences of the word in the document.
You can enable or disable spelling option on the Spelling page
of the Options dialog box.
|
|
|
|
o
|
In order to check spelling automatically as you type,
the Spelling option must be selected and the Hide spelling errors
option must be deselected on the Spelling page of the Options dialog
box.
|
|
|
|
|
o
|
You do not need to correct misspellings immediately as
they occur. You can correct them any time the presentation is open.
|
|
|
|
|
o
|
The spelling checker red, wavy lines only appear on
the screen; they are not printed with the presentation.
|
|
|
|
d Discussion
The red, wavy underlines that appear when you check spelling as you type may
distract you or clutter the text on the screen. You can select the Hide
spelling errors option on the Spelling page of the Options dialog
box. This option is helpful if you prefer to check the spelling at a more
convenient time.
|
|
|
|
o
|
You must deselect the Hide spelling errors option
in order to view spelling errors as you type.
|
|
|
|
C Procedures
|
1. Select the Tools menu.
|
|
2. Select the Options command.
|
|
3. Select the Spelling tab.
|
|
4. Select the Hide spelling errors option.
|
|
5. Select OK.
|
f Step-by-Step
From the Student Data directory, open WORLD5.PPT.
Hide spelling errors.
Scroll to slide 7 to view the identified text.
|
Steps
|
Practice Data
|
|
1. Select the Tools menu.
The Tools menu appears.
|
Click Tools
|
|
2. Select the Options command.
The Options dialog box opens.
|
Click Options...
|
|
3. Select the Spelling tab.
The Spelling page appears.
|
Click the Spelling tab
|
|
4. Select the Hide spelling errors option.
The option is selected.
|
Click  Hide spelling errors Hide spelling errors
|
|
5. Select OK.
The Options dialog box closes and the text is no longer identified with
red, wavy lines.
|
Select OK
|
Open the Options dialog box and deselect the Hide spelling
errors option on the Spelling page.
d Discussion
PowerPoint provides a built-in utility that allows
you to check the spelling of all contents in a presentation, including slides,
outlines, notes pages, and handout pages. You can check the entire presentation
for spelling errors at any time. When you start the spelling checker,
PowerPoint begins the spell check at the insertion point.
If the spelling checker does not recognize a word, the word
appears in the Not in dictionary text box. At this point, you have
several options. You can manually correct the word in the Change to
text box, or you can select one of the alternatives in the Suggestions
list. After you have made the correction, you can change just the current
occurrence of the identified text or you can change all occurrences during the
current PowerPoint session.
If the word is not listed in the dictionary, but you know it is
spelled correctly, you can ignore the current occurrence of the identified
text, ignore all occurrences during the current PowerPoint session, or add the
word to the custom dictionary.
|
|
|
|
o
|
The spelling checker does not check embedded objects,
text in clip art, or pictures imported into PowerPoint.
|
|
|
|
|
o
|
It is a good idea to check spelling in Outline
view, where you can check the spelling of all the text in a presentation at
one time.
|
|
|
|
|
o
|
You can click the right mouse button on a word with a
red, wavy line and select a word from the list at the top of the shortcut
menu or select the Spelling command to open the Spelling dialog box.
Other ways you can activate the spelling checker include selecting the Spelling
command from the Tools menu or pressing [F7].
|
|
|
|
C Procedures
|
1. Click the Spelling button  on the Standard
toolbar. on the Standard
toolbar.
|
f Step-by-Step
Start the spelling checker.
Go to the top of the outline, if necessary.
|
Steps
|
Practice Data
|
|
1. Click the Spelling button on the Standard
toolbar.
The Spelling dialog box opens.
|
Click 
|
d Discussion
When the spelling checker identifies a word that is
spelled correctly, you can ignore the highlighted word and continue the spell
check. You can use the Ignore option for proper names and other words
that are not included in the main or custom dictionary. For example, a
presentation may contain text that is not recognized by the spelling checker,
even though it is correctly spelled (for example, your company name).

The Spelling dialog box
|
|
|
|
o
|
You can use the Ignore All option to ignore all
occurrences of an identified word during the current PowerPoint session.
|
|
|
|
C Procedures
|
1. Start the spelling checker, if necessary.
|
|
2. Select Ignore.
|
f Step-by-Step
Ignore a correctly spelled word.
Go to the top of the outline and start the spelling checker, if
necessary.
|
Steps
|
Practice Data
|
|
1. Select Ignore.
The next identified word is highlighted.
|
Click Ignore to
ignore the word SportsGalore
|
d Discussion
During a spelling check, you can use the Change option
to change the current occurrence of an identified word. The Spelling dialog box lists alternative spellings,
if any. For example, if you typed the misspelled word presenttion on a
slide, the spelling checker might suggest the alternative spellings, presentation
and prevention.
You can also change all occurrences of an identified word in
the current presentation. For example, the spelling checker flags the word competative
as misspelled. Since you have used this word on several slides in the presentation, you can use the Change
All option to change all occurrences of competative to competitive.
If the Spelling dialog box does not offer the correct
alternative spelling, you can edit the word directly in the Change to
text box.
C Procedures
|
1. Start the spelling checker, if necessary.
|
|
2. Select the correctly spelled word from the Suggestions list.
|
|
3. Select Change or Change All, as desired.
|
f Step-by-Step
Change a misspelled word.
|
Steps
|
Practice Data
|
|
1. Select the correctly spelled word from the Suggestions
list.
The suggested word appears in the Change to text box.
|
Click Competitive, if
necessary
|
|
2. Select Change or Change All, as desired.
The next identified word appears in the Not in dictionary text box.
|
Click Change
|
In the Change to text box, change Aftermarket to After
Market and select Change All. When the Microsoft PowerPoint message
box indicates that the spelling check is complete, select OK.
d Discussion
In PowerPoint, you can find a word or phrase and replace it
with another word or phrase. You can replace only
the current occurrence of the text or all occurrences. The Replace
feature can save you time because you do not have to manually find each
occurrence and type the replacement text. For example, you could replace all
occurrences of the word growth with the word development
throughout a presentation.
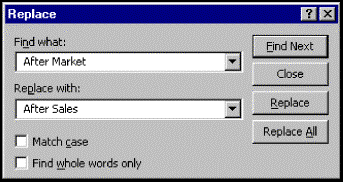
Finding and replacing text
C Procedures
|
1. Select the Edit menu.
|
|
2. Select the Replace command.
|
|
3. Type the text you want to find in the Find what
text box.
|
|
4. Select the Replace with text box.
|
|
5. Type the desired replacement text.
|
|
6. Select Replace or Replace All as desired.
|
|
7. Select OK.
|
|
8. Select Close.
|
f Step-by-Step
Find and replace text in a presentation.
|
Steps
|
Practice Data
|
|
1. Select the Edit menu.
The Edit menu appears.
|
Click Edit
|
|
2. Select the Replace command.
The Replace dialog box opens.
|
Click Replace…
|
|
3. Type the text you want to find in the Find what
text box.
The word appears in the Find what text box.
|
Type After Market
|
|
4. Select the Replace with text box.
The insertion point appears in the Replace with text box.
|
Press [Tab]
|
|
5. Type the desired replacement text.
The replacement word appears in the Replace with text box.
|
Type After Sales
|
|
6. Select Replace or Replace All as desired.
The text is replaced throughout the presentation and a Microsoft
PowerPoint message box opens.
|
Click Replace All
|
|
7. Select OK.
The Microsoft PowerPoint message box closes.
|
Click OK
|
|
8. Select Close.
The Replace dialog box closes.
|
Click Close
|
d Discussion
AutoCorrect can automatically correct
misspelled or incorrectly typed words as you type. You can choose to enable any
or all of the AutoCorrect options. In addition, AutoCorrect can expand
abbreviated text into full words or phrases each time you type the abbreviated
AutoCorrect entry followed by a space.
When typing a capitalized word, it is common to hold the [Shift]
key too long and accidentally capitalize the first two letters of a word. The
Correct TWo INitial CApitals option automatically changes the second
capitalized letter to lowercase.
If the Capitalize first letter of sentence option is
enabled, AutoCorrect automatically capitalizes the first letter of the first
word in each sentence.
The first letter of any of the seven days of the week is
automatically changed to uppercase if the Capitalize names of days
option is enabled.
If you accidentally turn on the [Caps Lock] key while
typing, the Correct accidental use of cAPS LOCK key option automatically
corrects case mistakes.
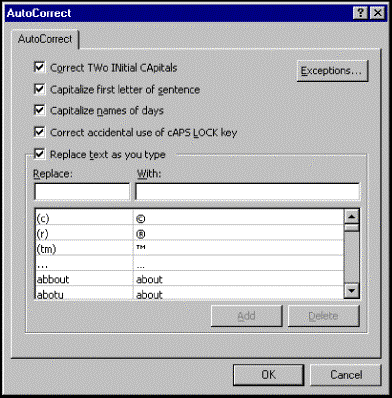
Selecting AutoCorrect options
C Procedures
|
1. Select the Tools menu.
|
|
2. Select the AutoCorrect command.
|
|
3. Select the desired options.
|
|
4. Select OK.
|
f Step-by-Step
Select AutoCorrect options.
|
Steps
|
Practice Data
|
|
1. Select the Tools menu.
The Tools menu appears.
|
Click Tools
|
|
2. Select the AutoCorrect command.
The AutoCorrect dialog box opens.
|
Click AutoCorrect...
|
|
3. Select the desired options.
The option is selected.
|
Click  Capitalize names of days, if
necessary Capitalize names of days, if
necessary
|
|
4. Select OK.
The AutoCorrect dialog box closes and the appropriate options are enabled
or disabled.
|
Click OK
|
d Discussion
Once you have enabled the AutoCorrect options, PowerPoint can
save you time by correcting common mistakes as you type.
The correction may not be made immediately; PowerPoint needs to
sense what is being typed before it can make a change. For example, if you are typing the
name of a day, you must type all the letters in the word and press [Spacebar]
before PowerPoint can capitalize the word.
d Discussion
If you commonly misspell or incorrectly type a word, you
can create an AutoCorrect entry for it. Then, whenever you make that particular
typing error, it is automatically replaced by the correct text. PowerPoint
provides default AutoCorrect entries for a few commonly misspelled words (for
example, teh for the and recieve for receive).
In addition, you can create an AutoCorrect entry for any
frequently used word or phrase. When you type the defined AutoCorrect entry, it
automatically expands into the complete word or phrase. For example, PowerPoint
has provided the AutoCorrect entry incl for the word include.
An AutoCorrect entry name can be up to 31 characters long,
cannot contain any spaces, and is case-sensitive.
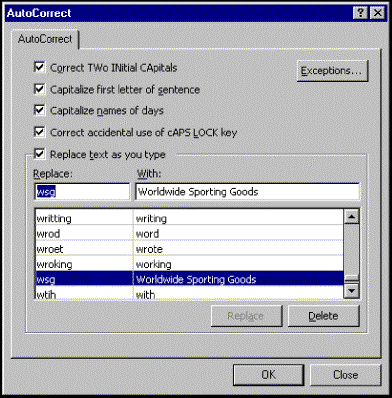
Creating an AutoCorrect entry
C Procedures
|
1. Select the Tools menu.
|
|
2. Select the AutoCorrect command.
|
|
3. Select the Replace text box.
|
|
4. Type the AutoCorrect name in the Replace text box.
|
|
5. Select the With text box.
|
|
6. Type the expanded word or phrase in the With
text box.
|
|
7. Select or deselect options as desired.
|
|
8. Select Add.
|
|
9. Select OK.
|
f Step-by-Step
Create an AutoCorrect entry.
|
Steps
|
Practice Data
|
|
1. Select the Tools menu.
The Tools menu appears.
|
Click Tools
|
|
2. Select the AutoCorrect command.
The AutoCorrect dialog box opens.
|
Click AutoCorrect...
|
|
3. Select the Replace text box.
The Replace text box is selected.
|
Click in the Replace text box, if necessary.
|
|
4. Type the AutoCorrect name in the Replace text box.
The text appears in the Replace text box.
|
Type wsg
|
|
5. Select the With text box.
The With text box is selected.
|
Press [Tab]
|
|
6. Type the expanded word or phrase in the With text box.
The text appears in the With text box.
|
Type Worldwide Sporting Goods
|
|
7. Select or deselect options as desired.
The options are selected or deselected.
|
Click  Replace text as you type, if
necessary Replace text as you type, if
necessary
|
|
8. Select Add.
The AutoCorrect entry is added.
|
Click Add
|
|
9. Select OK.
The AutoCorrect dialog box closes.
|
Click OK
|
On slide 7, add a space after Our Strengths in the
title. Type wsg and press [Spacebar]. Worldwide Sporting Goods
appears on the text line.
Delete Worldwide Sporting Goods from the text line.
d Discussion
When you no longer need an AutoCorrect entry,
you can delete it.
Deleting unnecessary AutoCorrect entries reduces the size of
the list and can save you time in locating AutoCorrect entries.
C Procedures
|
1. Select the Tools menu.
|
|
2. Select the AutoCorrect command.
|
|
3. Select the AutoCorrect entry you want to delete.
|
|
4. Select Delete.
|
|
5. Select OK.
|
f Step-by-Step
Delete an AutoCorrect entry.
Create an AutoCorrect entry that replaces the text wsg
with the text Worldwide Sporting Goods, if necessary.
|
Steps
|
Practice Data
|
|
1. Select the Tools menu.
The Tools menu appears.
|
Click Tools
|
|
2. Select the AutoCorrect command.
The AutoCorrect dialog box opens.
|
Click AutoCorrect...
|
|
3. Select the AutoCorrect entry you want to delete.
The AutoCorrect entry is selected.
|
Scroll as necessary and click wsg
|
|
4. Select Delete.
The entry is removed from the AutoCorrect list, but still appears in the Replace
and With text boxes.
|
Click Delete
|
|
5. Select OK.
The AutoCorrect dialog box closes.
|
Click OK
|
Close WORLD5.PPT.
e Task
Check spelling and change all occurrences of one word to
another. Use the AutoCorrect feature to insert a phrase.
|
1. Open Meeting4.
|
|
2. Start the spelling checker.
|
|
3. Correct Overveiw to read Overview.
|
|
4. Use the Change All option to change all the misspelled proffits
to profits.
|
|
5. Ignore the vs. error. Complete the spelling check.
|
|
6. Use the Replace dialog box to replace all occurrences of profits
with Income. Close the Replace dialog box.
|
|
7. Create an AutoCorrect entry which changes sa into South
America.
|
|
8. On slide 3, click at the end of the Expanded into line.
Type sa and press the [Spacebar]. Notice that AutoCorrect
inserts the text, South America.
|
|
9. Delete the sa AutoCorrect entry.
|
|
10. Close the presentation without saving it.
|
In this lesson, you will
learn how to:
·
Use charts in slides
·
Create a chart
·
Delete data in a datasheet
·
Enter data in a datasheet
·
Close the datasheet
·
Change the chart type
d Discussion
You can use the PowerPoint built-in graphing application,
Microsoft Graph 97, to add a chart to a presentation. Microsoft Graph 97 allows
you to incorporate charts into your presentations without having to import them
from other applications. When you create or edit a chart in PowerPoint, the
Microsoft Graph menu bar, toolbar, and datasheet appear. Included are several
AutoLayouts containing charts from which you can choose.
The datasheet contains the values depicted in the chart and is
composed of rows and columns. You can delete or add rows and columns to the
datasheet as needed. The intersection of a row and a column is called a cell.
You type the chart data into the cells.
The Microsoft Graph charting module allows you to group any
time-based charts by month or year in order to view the appropriate level of
detail for the included time analysis. It also allows you to add explanatory
detail to a chart to enhance presentations. With the charting module, you can
scale fonts and rotate text along the chart axes. In addition, you can add
textures, imported pictures, or gradient fills to chart elements. You can also
add animation to certain chart elements.
|
|
|
|
o
|
You can also insert a chart from Microsoft Excel
directly onto a PowerPoint slide.
|
|
|
|
|
o
|
In order to create smaller files, PowerPoint
automatically compresses graphics and files.
|
|
|
|
d Discussion
When you want to include a chart on a slide,
you usually select a slide layout containing a chart placeholder. For example,
you can select the Text & Chart, Chart & Text, or Chart
layout. However, you can place a chart on any slide layout.
Once you have created the chart, a datasheet appears in which
you enter the values you want to graph. By default, PowerPoint inserts sample
data into the datasheet.
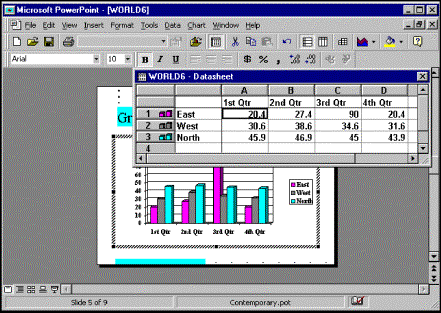
Creating a chart
|
|
|
|
o
|
You can use the Insert Chart button on the Standard
toolbar or the Chart command on the Insert menu to create a
chart on a slide that does not have a chart placeholder.
|
|
|
|
C Procedures
|
1. Double-click the chart placeholder on the
slide.
|
f Step-by-Step
From the Student Data directory, open WORLD6.PPT.
Create a chart on a slide.
Go to slide 5.
|
Steps
|
Practice Data
|
|
1. Double-click the chart placeholder on the
slide.
A chart and datasheet appear.
|
Double-click in the chart
placeholder
|
d Discussion
By default, PowerPoint inserts sample values into the datasheet. You can
delete data from individual cells in the datasheet, selected group of cells,
and entire rows and columns. To remove data from entire rows or columns, you
must select the appropriate row or column heading. For example, if you want to
remove the first quarter sales figures in row 1, you must select the Row 1
heading and then delete the data. If you delete only the values in a row or
column, but not the row or column heading, the row or column still remains in
the chart and datasheet, but it is empty.
|
|
|
|
o
|
To select all the data on a datasheet, click the Select
All button (the gray rectangle in the upper left corner of the datasheet,
where the column and row headings meet).
|
|
|
|
C Procedures
|
1. Open the datasheet.
|
|
2. Select the cells containing the data you want to delete.
|
|
3. Press [Delete].
|
f Step-by-Step
Delete the data in a datasheet.
Go to slide 5 and double-click the chart icon, if necessary.
|
Steps
|
Practice Data
|
|
1. Select the cells containing data you want
to delete.
The cells are selected.
|
Click row heading 1
|
|
2. Press [Delete].
The data is deleted.
|
Press [Delete]
|
Delete the data in rows 2 and 3.
d Discussion
You can enter both text and numeric
data into a cell. The data entered into the first column becomes the legend
data for the chart. This data is normally text. The data entered in the other
cells is used for developing the chart. For example, the first column might
contain the headings Quarter 1, Quarter 2, Quarter 3, and Quarter
4, and the data entered in the other cells would reflect the actual data
for each quarter.
|
|
|
|
o
|
You can press [Tab] to advance to the next
cell.
|
|
|
|
C Procedures
|
1. Open the datasheet.
|
|
2. Select the cell you want to edit.
|
|
3. Enter the desired data into the cell.
|
|
4. Press [Enter].
|
f Step-by-Step
Enter data in a datasheet.
Go to slide 5. Double-click the chart to open the datasheet and
delete all data from datasheet, if necessary.
|
Steps
|
Practice Data
|
|
1. Select the cell you want to edit.
The cell is selected.
|
Click the cell to the right of
row header 1
|
|
2. Enter the desired data into the cell.
The data appears in the cell.
|
Type Region 1
|
|
3. Press [Enter].
The next cell in the column is selected.
|
Press [Enter]
|
Complete the datasheet using the
following information.
|
|
|
A
|
B
|
C
|
D
|
|
|
|
1st Qtr
|
2nd Qtr
|
3rd Qtr
|
4th Qtr
|
|
1
|
Region 1
|
70087
|
88098
|
92456
|
97765
|
|
2
|
Region 2
|
77887
|
69888
|
66775
|
78996
|
|
3
|
Region 3
|
74883
|
76450
|
75854
|
82770
|
d Discussion
When you have finished editing chart data, you can close the datasheet. This option allows you to
view the entire chart.
|
|
|
|
o
|
Once you have closed the datasheet, it no longer opens
automatically when you double-click the chart. To open the datasheet, select
the Datasheet command from the View menu or click the View
Datasheet button on the Microsoft Graph Standard toolbar.
|
|
|
|
C Procedures
|
1. Open the datasheet, if necessary.
|
|
2. Click the Close button on the datasheet.
|
f Step-by-Step
Close the datasheet.
Open the datasheet on slide 5, if necessary.
|
Steps
|
Practice Data
|
|
1. Click the Close button on the
datasheet.
The datasheet closes.
|
Click 
|
Click outside the chart in the work area to deselect it.
d Discussion
You can change the chart type of an existing
chart. PowerPoint offers 14 different chart types with multiple variations on
each one. This option allows you to select the best chart type for your data.
For example, if you want to chart data in bars, you can select a Bar
chart type in any of six variations including: Clustered Bar, Stacked
Bar, or Clustered Bar with a 3-D visual effect.
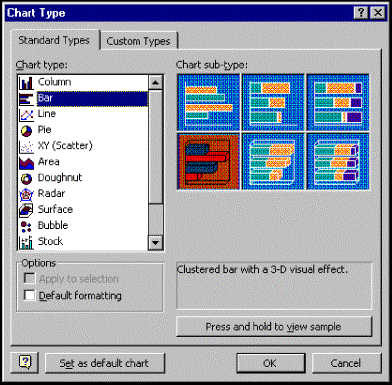
Changing the chart type
|
|
|
|
o
|
To preview the chart type, click the Press and hold
to view sample button in the Chart Type dialog box. A thumbnail of the
chart with the selected type applied appears under Sample.
|
|
|
|
C Procedures
|
1. Double-click the chart you want to edit.
|
|
2. Select the Chart menu.
|
|
3. Select the Chart Type command.
|
|
4. Under Chart type, select the desired
chart type.
|
|
5. Under Chart sub-type, select the desired chart sub-type.
|
|
6. Click and hold the Press and hold to view sample button.
|
|
7. Release the mouse button.
|
|
8. Select OK.
|
f Step-by-Step
Change the chart type.
Go to slide 5, if necessary.
|
Steps
|
Practice Data
|
|
1. Double-click the chart you want to edit.
The Microsoft Graph menu bar and toolbar appear.
|
Double-click the chart, if
necessary
|
|
2. Select the Chart menu.
The Chart menu appears.
|
Click Chart
|
|
3. Select the Chart Type command.
The Chart Type dialog box opens.
|
Click Chart Type…
|
|
4. Under Chart type, select the desired chart type.
The chart type is selected.
|
Click Bar
|
|
5. Under Chart sub-type, select the desired chart sub-type.
The chart sub-type is selected.
|
Click Clustered bar with a 3-D visual effect. (second
row, first chart subtype)
|
|
6. Click and hold the Press and hold to view sample button.
A thumbnail of the chart appears under Sample.
|
Click and hold Press and hold to view sample
|
|
7. Release the mouse button.
The thumbnail closes.
|
Release the mouse button
|
|
8. Select OK.
The Chart Type dialog box closes and the new chart type is applied to the
chart.
|
Click OK
|
Click outside the chart to close Microsoft Graph.
Close WORLD6.PPT.
e Task
Create a chart in a presentation.
|
1. Open Meeting5.
|
|
2. Go to slide 5 and double-click the chart icon.
|
|
3. Delete the data in the datasheet.
|
|
4. Enter data in the datasheet, referring to the table below:
|
|
|
|
A
|
B
|
C
|
D
|
|
|
|
1st Qtr
|
2nd Qtr
|
3rd Qtr
|
4th Qtr
|
|
1
|
1995
|
92851
|
96567
|
93456
|
98665
|
|
2
|
1996
|
94536
|
95648
|
96775
|
100996
|
|
5. Close the datasheet.
|
|
6. Change the chart type to Line and select the Line with
markers displayed at each data value chart sub-type (second row, first
column).
|
|
7. Click outside the chart to exit Microsoft Graph.
|
|
8. Close the presentation without saving it.
|
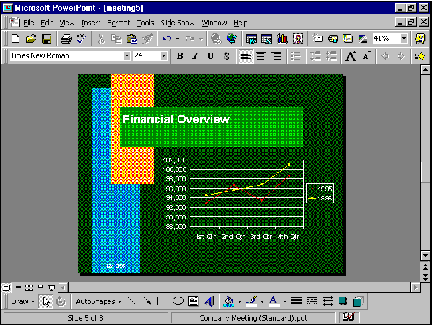
In this lesson, you will
learn how to:
·
Print a presentation
·
Select Page Setup options
·
Print slides
·
Print outlines
·
Print selected slides
d Discussion
In PowerPoint, you can print an entire presentation in color or
in black and white, including slides, outlines, speaker notes, and
handouts. You can select the number of copies you want to print, as well as
choose whether or not to collate the printed material.
Presentations can be exported to overheads in color and black
and white, and even 35mm slides can be created by using a desktop film
recorder. You can also print slides to a file and send the file to a service
bureau that can print your presentation on slides.
d Discussion
You can specify the desired size of the printed slides. In the
Page Setup dialog box, you can select a predetermined size from a list, or you
can manually enter the desired measurements. You can
also choose from portrait or landscape orientation.
The Page Setup options are saved with the presentation.

Selecting Page Setup options
C Procedures
|
1. Select the File menu.
|
|
2. Select the Page Setup command.
|
|
3. Select the Slides sized for list.
|
|
4. Select the desired option.
|
|
5. Under Slides, select the desired orientation option.
|
|
6. Select OK.
|
f Step-by-Step
From the Student Data directory, open WORLD7.PPT.
Select Page Setup options.
|
Steps
|
Practice Data
|
|
1. Select the File menu.
The File menu appears.
|
Click File
|
|
2. Select the Page Setup command.
The Page Setup dialog box opens.
|
Click Page Setup...
|
|
3. Select the Slides sized for list.
A list of options appears.
|
Click Slides sized for 
|
|
4. Select the desired option.
The option appears in the Slides sized for box.
|
Click Letter Paper (8.5x11 in)
|
|
5. Under Slides, select the desired orientation option.
The orientation option is selected.
|
Click  Landscape, if necessary Landscape, if necessary
|
|
6. Select OK.
The Page Setup dialog box closes and the appropriate options are enabled.
|
Click OK
|
d Discussion
PowerPoint provides a variety of methods for printing slides depending upon the features
available with your printer. You can print slides in color, in black and white,
and in gray scales.
You can print copies of the slides at any time while building a
presentation. However, printed copies are particularly useful during the
initial design phase when you can judge the design and content and then use the
copies as layout sheets.
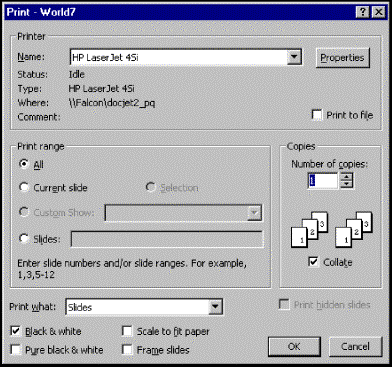
Printing slides
|
|
|
|
o
|
When using printed copies as layout sheets during the
design phase, the Black & White option produces quick, clear
copies that are easy to mark up with either pencil or pen.
|
|
|
|
|
o
|
You can also click the Print button on the Standard
toolbar to print a presentation; however, this option does not open the Print
dialog box. Therefore, you will not be able to select individual print
options.
|
|
|
|
C Procedures
|
1. Select the File menu.
|
|
2. Select the Print command.
|
|
3. Select the Print what list.
|
|
4. Select Slides.
|
|
5. Select OK.
|
f Step-by-Step
Print slides.
|
Steps
|
Practice Data
|
|
1. Select the File menu.
The File menu appears.
|
Click File
|
|
2. Select the Print command.
The Print dialog box opens.
|
Click Print...
|
|
3. Select the Print what list.
A list of available print options appears.
|
Click Print what 
|
|
4. Select Slides.
Slides appears in the Print what box.
|
Click Slides, if necessary
|
|
5. Select OK.
PowerPoint prints each slide in the presentation.
|
Click OK
|
d Discussion
You can print an outline of your presentation.
The printed outline displays the contents of each slide as it appears on screen
in Outline view. For example, if the outline on the screen is collapsed
to display only the slide titles, the printed outline will include only the
slide titles.
C Procedures
|
1. Select the File menu.
|
|
2. Select the Print command.
|
|
3. Select the Print what list.
|
|
4. Select Outline View.
|
|
5. Select OK.
|
f Step-by-Step
Print an outline.
|
Steps
|
Practice Data
|
|
1. Select the File menu.
The File menu appears.
|
Click File
|
|
2. Select the Print command.
The Print dialog box opens.
|
Click Print...
|
|
3. Select the Print what list.
A list of available print options appears.
|
Click Print what 
|
|
4. Select Outline View.
Outline View appears in the Print what box.
|
Click Outline View
|
|
5. Select OK.
PowerPoint prints the outline.
|
Click OK
|
d Discussion
You can print only selected slides. For
example, you can choose to print only slides 1, 4, 5, and 9, or you can print a
range of slides such as slides 3-10. This option saves you from wasting paper
by printing unnecessary slides.
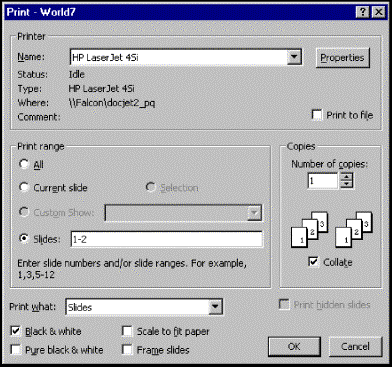
Printing selected slides
C Procedures
|
1. Select the File menu.
|
|
2. Select the Print command.
|
|
3. Under Print range, select the Slides option.
|
|
4. Type the slide numbers or the ranges
you want to print.
|
|
5. Select the Print what list.
|
|
6. Select Slides.
|
|
7. Select OK.
|
f Step-by-Step
Print selected slides.
|
Steps
|
Practice Data
|
|
1. Select the File menu.
The File menu appears.
|
Click File
|
|
2. Select the Print command.
The Print dialog box opens.
|
Click Print...
|
|
3. Under Print range, select the Slides option.
The Slides option is selected.
|
Click  Slides Slides
|
|
4. Type the slide numbers or the ranges you want to print.
The text appears in the Slides text box.
|
Type 1-2
|
|
5. Select the Print what list.
A list of available print options appears.
|
Click Print what 
|
|
6. Select Slides.
Slides appears in the Print what box.
|
Click Slides, if necessary
|
|
7. Select OK.
PowerPoint prints the selected slides.
|
Click OK
|
Close WORLD7.PPT.
e Task
Select page setup options. Print selected slides for a
presentation and print an outline of the presentation.
|
1. Open Meeting6.
|
|
2. Format the page to print slides sized for Letter paper
(8.5x11 in) in Portrait orientation.
|
|
3. Print slides 2, 4, 6, and 7.
|
|
4. Print an outline of the presentation.
|
|
5. Close the presentation.
|
In this lesson, you will
learn how to:
·
Apply design templates
·
Use the Style Checker
·
Format text
·
Format bullets
·
Use the Format Painter
·
Display the rulers
·
Add a tab stop
·
Copy text between slides
·
Move text between slides
·
Delete slide items
·
Use the Undo feature
·
Use the Undo list
d Discussion
You can change the look of presentation slides, without
altering the slide contents, by applying a new design to the presentation. For
example, if you had previously created a new presentation without using a design template, you could
later apply one of the predefined design templates to it.
When a design template is applied to a presentation, it
controls the default appearance of the slides in the presentation including the
default objects, text, colors, and formatting.
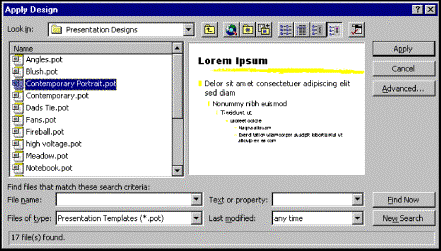
Applying design templates
|
|
|
|
o
|
You can also use the Apply Design command on
the Common Tasks toolbar to open the Apply Design dialog box.
|
|
|
|
|
o
|
When you apply a design template to a presentation
that contains one or more charts, PowerPoint updates the color scheme of the
charts to that of the design template.
|
|
|
|
C Procedures
|
1. Click the Apply Design button  . .
|
|
2. Select the desired design template.
|
|
3. Select Apply.
|
f Step-by-Step
From the Student Data directory, open WORLD8.PPT.
Apply a design template to an existing presentation.
|
Steps
|
Practice Data
|
|
1. Click the Apply Design button.
The Apply Design dialog box opens and displays the contents of the Presentation
Designs folder.
|
Click 
|
|
2. Select the desired design template.
A preview of the selected template appears.
|
Click Contemporary Portrait
|
|
3. Select Apply.
The Apply Design dialog box closes and the design template is applied to
the presentation.
|
Click Apply
|
Scroll through the
presentation or switch to Slide Sorter view to review each slide. Switch
back to Slide view, if necessary.
d Discussion
A presentation that maintains consistency from one slide to
another looks more professional. However, as you make changes to various
slides, you can lose track of the overall appearance of the presentation. To
maintain consistency, you can use the Style Checker to review the presentation
before you save the changes.
By default, the Style Checker checks for three items: spelling,
visual clarity, and case and end punctuation. Visual clarity refers to font
attributes and legibility. If there are too many fonts in a presentation, or if
the fonts are too small, the text can be difficult to read. If there are too
many lines of text or too many bullets in a presentation, the font may be too
small to read or there may be too much information on a slide.
You can use the options available in the Style Checker dialog box to
specify which aspects of the presentation you want the Style Checker to review.
In addition, you can customize the Style Checker in the Style Checker Options
dialog box.
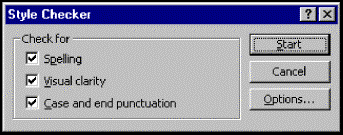
Using the Style Checker
C Procedures
|
1. Select the Tools menu.
|
|
2. Select the Style Checker command.
|
|
3. Under Check for, select or deselect the desired options.
|
|
4. Select Start.
|
|
5. Choose to ignore or change the style inconsistency.
|
|
6. Continue to change or ignore suggestions as necessary to
complete the style check.
|
|
7. Select OK.
|
f Step-by-Step
Use the Style Checker.
|
Steps
|
Practice Data
|
|
1. Select the Tools menu.
The Tools menu appears.
|
Click Tools
|
|
2. Select the Style Checker command.
The Style Checker dialog box opens.
|
Click Style Checker...
|
|
3. Under Check for, select or deselect the desired options.
The options are selected or deselected as appropriate.
|
Click  Spelling Spelling
|
|
4. Select Start.
The Style Checker reviews the presentation and displays the first style
inconsistency, if applicable.
|
Click Start
|
|
5. Choose to ignore or change the style inconsistency.
The Style Checker displays the next style inconsistency, if applicable.
|
Click Ignore
|
|
6. Continue to change or ignore suggestions as necessary to complete
the style check.
When the Style Checker has finished checking the individual slides, the
Style Checker dialog box closes and the Style Checker Summary dialog box
opens with a list of presentation inconsistencies.
|
Click Change
|
|
7. Select OK.
The Style Checker Summary dialog box closes.
|
Click OK
|
d Discussion
Character formatting refers to the font style,
size, effect, and color of text on a slide. You can use each of these text
effects individually or in combination to enhance the design and visual appeal
of a slide. As with all design elements, you should use character formatting
judiciously. Too much color or too many different fonts can distract and
confuse the audience.
You can use options available in the Font dialog box to apply
specific font sizes, styles, special effects, and color to selected text. The Preview
button allows you to see the results of the changes before finalizing them.
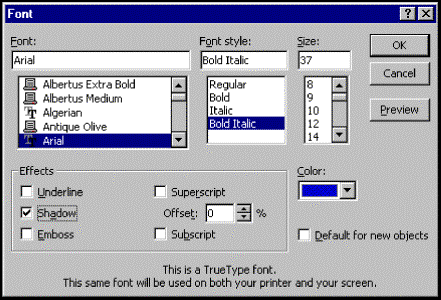
Formatting text
|
|
|
|
o
|
You also can use buttons on the Formatting toolbar
to apply bold, italic, and underline and buttons on the Drawing
toolbar to apply shadow and color.
|
|
|
|
C Procedures
|
1. Select the text box containing the text you want to format.
|
|
2. Select the text you want to format.
|
|
3. Select the Format menu.
|
|
4. Select the Font command.
|
|
5. Select the desired options.
|
|
6. Select OK.
|
f Step-by-Step
Format text by changing character formatting.
Go to slide 1, if
necessary.
|
Steps
|
Practice Data
|
|
1. Select the text box containing the text you
want to format.
The insertion point appears in the text box.
|
Click in the Worldwide
sporting goods text box
|
|
2. Drag to select the text you want to format.
The text is highlighted as you drag.
|
Drag to select the text Worldwide sporting goods
|
|
3. Release the mouse button.
The text is selected.
|
Release the mouse button
|
|
4. Select the Format menu.
The Format menu appears.
|
Click Format
|
|
5. Select the Font command.
The Font dialog box opens.
|
Click Font...
|
|
6. Select the desired options.
The options are selected.
|
Select the options listed below
|
|
7. Select OK.
The Font dialog box closes and the text is formatted according to the
options selected.
|
Click OK
|
In the Font dialog box, select the following
options:
In the Font list
box, select Arial.
In the Font Style list
box, select Bold Italic.
Under Effects,
select the Shadow option.
Select the Color
list, select More Colors and select blue (first row, seventh color).
Capitalize the text Sporting
and Goods.
Click anywhere in the
presentation window to deselect the text box.
d Discussion
A bullet is a symbol that
appears at the left in a line of text and usually indicates an item in a list.
Bullets automatically appear in a Bulleted List text box. You also can
add bullets to existing text in a text box.
You can format the bullet character, size, and color. For
example, you can change a small, black, square bullet to a large, red
checkmark.
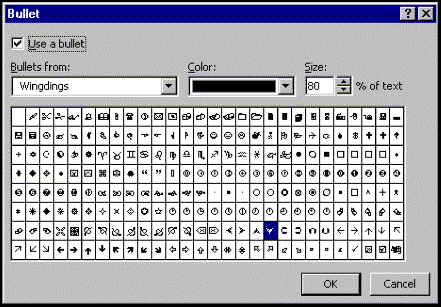
Formatting bullets
C Procedures
|
1. Select the text box containing the bullets you want to modify.
|
|
2. Select the bulleted text you want to modify.
|
|
3. Select the Format menu.
|
|
4. Select the Bullet command.
|
|
5. Select the Bullets from list.
|
|
6. Select the desired font.
|
|
7. Select the desired symbol.
|
|
8. Select the Color list.
|
|
9. Select the desired color.
|
|
10. Enter the desired bullet size in the Size spin box.
|
|
11. Select OK.
|
f Step-by-Step
Format bullets in a text box.
Go to slide 2.
|
Steps
|
Practice Data
|
|
1. Select the text box containing the bullets
you want to modify.
The insertion point appears in the text box.
|
Click the bulleted list
|
|
2. Drag to select the bulleted text you want to modify.
The text is highlighted as you drag.
|
Drag to select the entire bulleted list
|
|
3. Release the mouse button.
The text is selected.
|
Release the mouse button
|
|
4. Select the Format menu.
The Format menu appears.
|
Click Format
|
|
5. Select the Bullet command.
The Bullet dialog box opens.
|
Click Bullet...
|
|
6. Select the Bullets from list.
The Bullets from list appears.
|
Click Bullets from 
|
|
7. Select the desired font.
The font character set appears.
|
Scroll as necessary and click Wingdings
|
|
8. Select the desired symbol.
The symbol is magnified.
|
Click Ú (seventh row, tenth
character from the right)
|
|
9. Select the Color list.
The Color palette appears.
|
Click Color 
|
|
10. Select the desired color.
The color is selected.
|
Click Automatic
|
|
11. Enter the desired bullet size in the Size spin box.
The font size appears in the Size spin box.
|
Click Size  to 80 to 80
|
|
12. Select OK.
The Bullet dialog box closes and the modified bullets appear in the text
box.
|
Click OK
|
Click anywhere in the
presentation window to deselect the text box.
d Discussion
You can use the Format Painter to copy the
formatting of text and apply it to other text. This feature allows you to apply
the exact same formatting to text throughout a presentation without having to
remember exactly which effects had been applied. You can apply the formatting
to a single character or to a whole paragraph.
|
|
|
|
o
|
To apply formatting to multiple items, you can
double-click the Format Painter button so that the Format Painter
remains activated until you click the button again to disable it.
|
|
|
|
C Procedures
|
1. Select the text box containing the formats you want to copy.
|
|
2. Select the text containing the formats you want to copy.
|
|
3. Click the Format Painter button  . .
|
|
4. Select the text to which you want to apply the formats.
|
f Step-by-Step
Use the Format Painter to apply text formats.
Go to slide 3.
|
Steps
|
Practice Data
|
|
1. Select the text box containing the formats
you want to copy.
The insertion point appears in the text box.
|
Click the Supporting retail
partners text box
|
|
2. Drag to select the text containing the formats you want to copy.
The text is highlighted as you drag.
|
Drag to select the text Supporting retail partners
|
|
3. Release the mouse button.
The text is selected.
|
Release the mouse button
|
|
4. Click the Format Painter button.
The mouse pointer changes into an I-beam with a paint brush when it is
positioned in the presentation window.
|
Click 
|
|
5. Drag to select the text to which you want to apply the formats.
The text is highlighted as you drag.
|
Drag to select the text Worldwide sporting goods
|
|
6. Release the mouse button.
The formats are applied to the text.
|
Release the mouse button
|
Click anywhere in the presentation
window to deselect the text box.
d Discussion
You can display horizontal and vertical rulers in Slide
and Notes Page views. With the rulers displayed, you can easily see the
position of objects on a slide. You can also use the rulers to size objects to exact measurements.
In addition, when a text box is selected, the rulers display the text box
margins and tabs, allowing you to easily adjust them.
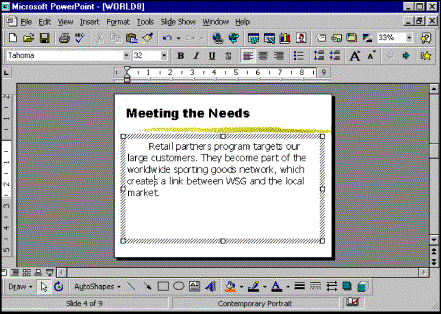
Displaying the rulers
C Procedures
|
1. Switch to Slide view.
|
|
2. Select the View menu.
|
|
3. Select the Ruler command.
|
f Step-by-Step
Display the rulers.
Go to slide 4.
|
Steps
|
Practice Data
|
|
1. Switch to Slide view.
The current slide appears in Slide view.
|
Click  ,
if necessary ,
if necessary
|
|
2. Select the View menu.
The View menu appears.
|
Click View
|
|
3. Select the Ruler command.
The vertical and horizontal rulers appear in the presentation window.
|
Click Ruler
|
d Discussion
PowerPoint sets default text box tab stops at one-inch
intervals. Default tab stops appear as small gray markers on the lower border
of the horizontal ruler. You can set new tab stops by clicking the ruler or
readjust the default tab stops by dragging the markers.
The four possible types of tabs (left, center, right, and
decimal) and their descriptions are listed in the following table:
|
Tab type
|
Symbol
|
Description
|
|
Left
|

|
Lines up the left edge of the
text to the tab stop. This is the default tab type.
|
|
Center
|

|
Centers the text under the tab stop.
|
|
Right
|

|
Lines up the right edge of the text to the tab stop.
|
|
Decimal
|

|
Lines up decimal points or periods to the tab stop.
|
The tab button, located in the upper left corner of the slide
window, determines which type of tab you set. Clicking the tab button cycles
through the four different tab types.
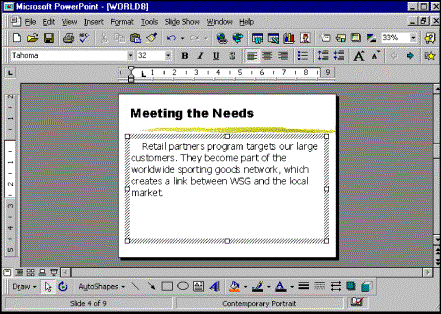
Adding a left tab stop
|
|
|
|
o
|
You can remove a tab stop by dragging the symbol away
from the ruler.
|
|
|
|
C Procedures
|
1. Switch to Slide view.
|
|
2. Display the rulers.
|
|
3. Select the text box you want to format.
|
|
4. Click the tab button as necessary to select the desired tab
type.
|
|
5. Click on the horizontal ruler at the desired position for the
tab stop.
|
f Step-by-Step
Add a tab stop using the ruler.
Go to slide 4. Switch to Slide
view and display the rulers, if necessary.
|
Steps
|
Practice Data
|
|
1. Select the text box you want to format.
The insertion point appears in the text box and the horizontal ruler
displays the default tab stops.
|
Click the Retail partners
program... text box
|
|
2. Click the tab button as necessary to select the desired tab
type.
The tab symbol appears on the tab button.
|
Click to  ,
if necessary ,
if necessary
|
|
3. Click on the horizontal ruler at the desired position for the
tab stop.
The tab symbol appears on the horizontal ruler and the text adjusts
to the new tab stop.
|
Click at .5 inch on the ruler
|
Click anywhere in the
presentation window to deselect the text box. Select the Ruler command
on the View menu to hide the rulers.
d Discussion
You can easily copy text on one slide and place it on a
different slide. In this way, you do not have to retype it.
When you copy text, you copy the formatting as well.
|
|
|
|
o
|
Copied text is stored in the Windows Clipboard until
you copy other text into the Clipboard or close Windows. This feature allows
you to paste the same text into more than one location without having to copy
it each time.
|
|
|
|
|
|
|
|
x
|
If you do not select a text box into which to paste
the text, it is pasted into a new text box in the center of the current slide
and it adopts the default text formats.
|
|
|
|
C Procedures
|
1. Select the text box containing the text you want
to copy.
|
|
2. Select the text you want to copy.
|
|
3. Click the Copy button  . .
|
|
4. Go to the slide in which you want to paste the text.
|
|
5. Select the text box or placeholder into which you want to paste
the text.
|
|
6. Click the Paste button  . .
|
f Step-by-Step
Copy text from one slide to another.
Go to slide 7.
|
Steps
|
Practice Data
|
|
1. Select the text box containing the text you
want to copy.
The insertion point appears in the text box.
|
Click the bulleted list
|
|
2. Drag to select the text you want to copy.
The text is highlighted as you drag.
|
Drag to select the text from Fast delivery to After
sales support
|
|
3. Release the mouse button.
The text is selected.
|
Release the mouse button
|
|
4. Click the Copy button.
The text is copied to the Windows Clipboard.
|
Click 
|
|
5. Go to the slide in which you want to paste the text.
The slide appears.
|
Click 
|
|
6. Select the text box or placeholder into which you want to paste
the text.
The insertion point appears in the placeholder.
|
Click the Click to add text placeholder
|
|
7. Click the Paste button.
The text appears in the placeholder.
|
Click 
|
Click in the presentation
window to deselect the text box.
d Discussion
You can easily move text from one slide to
another. You do not have to delete it on one slide and retype it.
When you move text, you move the formatting as well.
|
|
|
|
o
|
Cut text is stored in the Windows Clipboard until you
cut or copy other text to the Clipboard. This feature allows you to paste the
same text in more than one location.
|
|
|
|
|
|
|
|
x
|
If you do not select a text box before you paste the
text, the text is pasted into a new text box in the center of the slide and
it adopts the default text formats.
|
|
|
|
C Procedures
|
1. Select the text box containing the text you want to move.
|
|
2. Select the text you want to move.
|
|
3. Click the Cut button  . .
|
|
4. Go to the slide in which you want to paste the text.
|
|
5. Click the text box at the location where you want to paste the
text.
|
|
6. Click the Paste button  . .
|
f Step-by-Step
Move text from one slide to another.
Go to slide 7.
|
Steps
|
Practice Data
|
|
1. Select the text box containing the text you
want to move.
The insertion point appears in the text box.
|
Click the bulleted list
|
|
2. Drag to select the text you want to move.
The text is highlighted as you drag.
|
Drag to select the last text line, The following
week’s specials are announced by the end of this week
|
|
3. Release the mouse button.
The text is selected.
|
Release the mouse button
|
|
4. Click the Cut button.
The text is moved to the Windows Clipboard.
|
Click 
|
|
5. Go to the slide in which you want to paste the text.
The slide appears.
|
Click 
|
|
6. Click the text box at the location where you want to paste the
text.
The insertion point appears in the text box.
|
Click after the t in support
|
|
7. Click the Paste button.
The text appears in the text box.
|
Click 
|
Position the insertion
point in front of the text The following... and press [Enter] to
create a new bulleted line.
Click anywhere in the
presentation window to deselect the text box.
d Discussion
You can delete any item on a slide (titles, body text, or
graphic objects, for instance), but you must first select the item you want to
delete. For example, if you first select a text box, the entire text box is
deleted. However, if you first select text in a text box, only the selected
text is deleted.
C Procedures
|
1. Select the item you want to delete or the text
box from which you want to delete text.
|
|
2. Select the text you want to delete, if
necessary.
|
|
3. Press [Delete].
|
f Step-by-Step
Delete a slide item.
Go to slide 2.
|
Steps
|
Practice Data
|
|
1. Select the item you want to delete or the
text box from which you want to delete text.
The item or the text box is selected.
|
Click the bulleted list
|
|
2. Drag to select the text you want to delete, if necessary.
The text is highlighted as you drag.
|
Drag to select the text Products, value, quality,
and service
|
|
3. Release the mouse button.
The text is selected.
|
Release the mouse button
|
|
4. Press [Delete].
The item or the text is deleted.
|
Press [Delete]
|
Click anywhere in the
presentation window to deselect the text box.
d Discussion
If you perform a task and then decide that it was not what you
wanted to do, you can reverse the action using the Undo feature. You can use the Undo
feature to reverse text formatting, text deletion, object insertion, and many
other PowerPoint tasks.
Be aware that not all actions can be undone. If the previous
action cannot be undone, the Undo button or command appears grayed and
is unavailable.
|
|
|
|
o
|
PowerPoint also has a Redo feature that allows
you to restore the results of an action after you have used the Undo feature
to reverse it.
|
|
|
|
C Procedures
|
1. Click the Undo button  . .
|
f Step-by-Step
Use the Undo
feature to reverse the previous action.
Go to slide 2. Delete the
first line of text in the bulleted list, Products, value, quality, and
service, if necessary.
|
Steps
|
Practice Data
|
|
1. Click the Undo button.
The previous action is undone.
|
Click 
|
d Discussion
In PowerPoint, you can use the Undo feature to reverse
up to 150 previous actions. The Undo list on the Standard toolbar
displays previous actions, with the most recent action at the top of the list.
When you undo a previous action, PowerPoint
reverses the selected action and all actions performed after it.
You can use the Maximum number of undos option on the Edit
page of the Options dialog box to specify the maximum number of actions you
want to be able to undo.
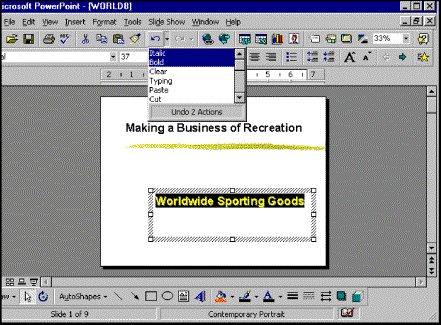
Using the Undo list
C Procedures
|
1. Click the arrow on the Undo button  . .
|
|
2. Select the previous action you want to undo.
|
f Step-by-Step
Use the Undo list.
To put some actions in the
Undo list, go to slide 1, select the text in the title text box and
click the Bold button. Then, select all the text in the Worldwide
Sporting Goods text box and click the Italic button.
|
Steps
|
Practice Data
|
|
1. Click the arrow on the Undo button.
The Undo list appears.
|
Click 
|
|
2. Select the previous action you want to undo.
All actions above the selected action are undone.
|
Click Bold
|
Close WORLD8.PPT.
e Task
Change the design of an existing presentation. Check the
presentation for inconsistencies, change character and bullet formats, and use
the Format Painter to copy and apply text formatting. Display the vertical and
horizontal rulers, change a tab setting, move text from one slide to another,
delete text, and use the Undo feature.
|
1. Open Meeting7.
|
|
2. Apply the Pulse design template to the presentation.
|
|
3. On slide 1, format the Annual Meeting text with the
following formats:
Font: Arial
Style: Bold
Size: 48
|
|
4. Use the Format Painter to copy the Annual Meeting formats
to the Agenda text on slide 2.
|
|
5. On slide 2, format the bullets. Use the Symbol font and
select the diamond shape (fifth row, fourth symbol from the right). Change
the size to 75% of text.
|
|
6. Use the Style Checker to review the presentation for
inconsistencies. Make the suggested changes for the first three
inconsistencies (which involve end punctuation). Do not change the
punctuation for slide 6.
|
|
7. On slide 6, display the rulers and set a left tab at .5 inch.
|
|
8. On slide 7, select the text of the last three bullets and move
it to slide 8.
|
|
9. On slide 10, delete the Reiterate key goals bullet text.
|
|
10. Use the Undo feature to reverse the previous action.
|
|
11. Hide the rulers.
|
|
12. Close the presentation without saving it.
|
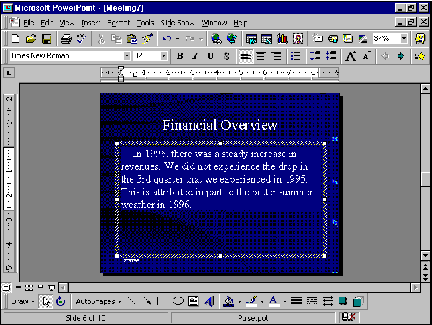
In this lesson, you will
learn how to:
·
Use clip art
·
Insert clip art
·
Reposition clip art
·
Crop clip art
·
Resize clip art
·
Use AutoClipArt
d Discussion
You can use clip art to add interest and
visual impact to a presentation. Clip art can clarify information, illustrate a
point, or merely add an attractive feature that makes a slide more interesting.
The PowerPoint Clip Gallery contains hundreds of professionally
designed illustrations that can be freely incorporated into your presentations.
These illustrations include people, animals, landscapes, banners, various types
of equipment and tools, food, and various symbols.
You also can purchase clip art libraries that specialize in
specific types of images, such as education, business, or particular
industries.
In addition to clip art, the Clip Gallery contains many
pictures, sounds, and video clips you can insert quickly to create a multimedia
presentation.
Once you have inserted a clip into a presentation, you can
resize the image, crop or cut portions of the image away, or change the colors
in the image. You also can move the image, make copies of it, and add text to
it.
|
|
|
|
o
|
The Clip Gallery comes complete with its own Help
system, specific to inserting and using clip art.
|
|
|
|
|
o
|
You can use the Find Clip feature to search the
Clip Gallery for the desired clip.
|
|
|
|
d Discussion
You can add clips to any slide. If the
slide layout includes a clip art placeholder, PowerPoint places the selected
clip into it. For example, if a slide is based on the Text & Clip Art or
the Clip Art & Text AutoLayout, PowerPoint inserts the clip into the
clip art placeholder on the slide. On slides without a clip art placeholder,
PowerPoint places the clip in the center of the slide. You can insert more than
one clip onto a slide.
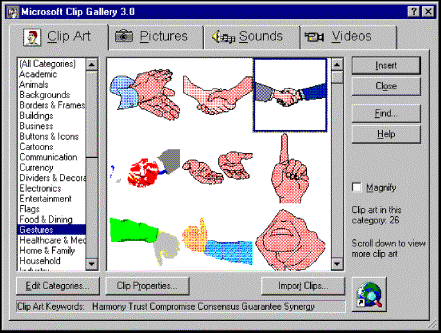
Inserting clip art
|
|
|
|
o
|
You also can insert pictures, sounds, and video clips
onto a slide.
|
|
|
|
C Procedures
|
1. Click the Insert Clip Art button  . .
|
|
2. Select the Clip Art tab.
|
|
3. Select the desired clip art category.
|
|
4. Select the desired clip.
|
|
5. Select Insert.
|
f Step-by-Step
From the Student Data directory, open WORLD9.PPT.
Insert clip art onto a slide.
Go to slide 2. Move the Common
Tasks toolbar in order to display the entire Standard toolbar, if
necessary.
|
Steps
|
Practice Data
|
|
1. Click the Insert Clip Art button.
The Microsoft Clip Gallery 3.0 dialog box opens.
|
Click 
|
|
2. Select the Clip Art tab.
The Clip Art page appears.
|
Click the Clip Art tab, if necessary
|
|
3. Select the desired clip art category.
The clips in the selected category appear.
|
Click Gestures
|
|
4. Select the desired clip.
The clip is selected.
|
Click the shaking hands clip (first row, third column)
|
|
5. Select Insert.
The clip appears on the slide and the Picture toolbar appears.
|
Click Insert
|
d Discussion
When you insert a clip onto a slide, PowerPoint may not place
it exactly where you want it to appear. You can
reposition clip art as desired on the slide.
C Procedures
|
1. Select the clip you want to reposition.
|
|
2. Drag the clip to the desired location.
|
|
3. Release the mouse button.
|
f Step-by-Step
Reposition clip art on a slide.
Go to slide 2, if
necessary.
|
Steps
|
Practice Data
|
|
1. Select the clip you want to reposition.
The clip is selected.
|
Click the shaking hands clip
|
|
2. Drag the clip to the desired location.
An image of the clip moves as you drag.
|
Drag the clip to the lower right corner of the slide
|
|
3. Release the mouse button.
The clip appears in the new location.
|
Release the mouse button
|
Click outside of the clip
to deselect it.
d Discussion
You can crop a clip by reducing the size of the graphic box.
Cropping differs from sizing. When you crop a
picture, you are not changing the size of the picture; you are actually cutting
information out of it. For example, if a clip displays two people, you can crop
it so that only one person appears in the clip.
When you activate the Crop feature, the mouse pointer
changes into a cropping tool.
|
|
|
|
o
|
You can only crop a graphic at 90° angles.
|
|
|
|
|
o
|
You can crop uniformly around the center of a graphic
by pressing [Ctrl] as you drag.
|
|
|
|
C Procedures
|
1. Click the clip to select it.
|
|
2. Click the Crop button  on the Picture toolbar. on the Picture toolbar.
|
|
3. Drag the desired sizing handle towards the
center of the clip.
|
|
4. Release the mouse button.
|
f Step-by-Step
Crop clip art on a slide.
Go to slide 2, if
necessary.
|
Steps
|
Practice Data
|
|
1. Click the clip to select it.
The clip is selected and the Picture toolbar appears.
|
Click the shaking hands clip,
if necessary
|
|
2. Click the Crop button on the Picture toolbar.
The mouse pointer changes into the cropping tool when it is positioned in
the slide window.
|
Click 
|
|
3. Drag the desired sizing handle towards the center of the clip.
An image of the clip moves as you drag.
|
Drag the sizing handle on the middle right side to the
left about one-half inch
|
|
4. Release the mouse button.
The clip is cropped.
|
Release the mouse button
|
Move the Picture toolbar,
if necessary. Then, crop the left side of the clip about one-half inch as well.
Click outside of the clip
to deselect it.
d Discussion
You can resize clip art on a slide.
You can resize a clip to make it larger or smaller to meet your needs. For
example, if you insert a clip onto a slide that contains several lines of text,
you might want to make the image smaller so that it does not hide any text. You
can increase or decrease the size of a clip, either proportionately or
disproportionately.
You can resize clip art using the mouse, or you can use the
Format Picture dialog box to size it more precisely. This dialog box allows you
to size, rotate, and scale clip art proportionally. The Lock aspect ratio option
allows you to maintain the aspect ratio of the height and width. The Relative
to original picture size option allows you to correct the aspect ratio of a
changed image. The Best scale for slide show option allows PowerPoint to
determine the optimum image size for a slide show presentation. The Preview button
allows you to review the changes before applying them.
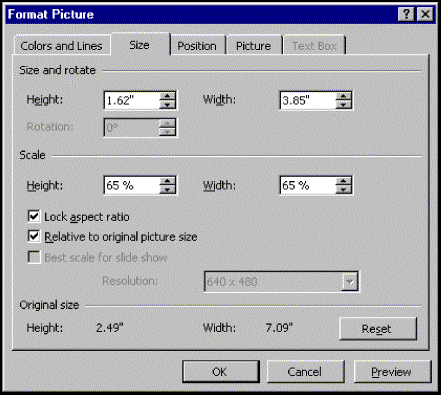
Resizing clip art
|
|
|
|
o
|
You can also drag any sizing handle to resize an
image.
|
|
|
|
C Procedures
|
1. Click the clip to select it.
|
|
2. Select the Format menu.
|
|
3. Select the Picture command.
|
|
4. Select the Size tab.
|
|
5. Select the Lock aspect ratio option.
|
|
6. Under Scale, enter the desired height in the Height
spin box.
|
|
7. Select OK.
|
f Step-by-Step
Resize clip art on a slide.
Go to slide 2, if
necessary.
|
Steps
|
Practice Data
|
|
1. Click the clip to select it.
The clip is selected and the Picture toolbar appears.
|
Click the shaking hands clip
|
|
2. Select the Format menu.
The Format menu appears.
|
Click Format
|
|
3. Select the Picture command.
The Format Picture dialog box opens.
|
Click Picture…
|
|
4. Select the Size tab.
The Size page appears.
|
Click the Size tab
|
|
5. Select the Lock aspect ratio option.
The option is selected.
|
Click  Lock aspect ratio, if
necessary Lock aspect ratio, if
necessary
|
|
6. Under Scale, enter the desired height in the Height
spin box.
The height appears in the Height spin box.
|
Click Height  to 65 to 65
|
|
7. Select OK.
The Format Picture dialog box closes and the clip is resized.
|
Click OK
|
Move the clip to the
center of the slide below the text box, if necessary. Then, deselect the clip.
d Discussion
If you want to insert clip art on a slide, but you are not sure
which clip you want to add, you can use the AutoClipArt feature.
PowerPoint scans the presentation, searching for keywords that relate to clips
in the Clip Gallery. For example, if your presentation contains text
such as powerful, PowerPoint searches the Clip Gallery and identifies
clip art that, in some way, depicts that concept.
In the AutoClipArt dialog box, you can select a keyword and the
slide on which you want to insert the clip. When you select the View Clip
Art button, PowerPoint searches the Clip Gallery and then displays the
results of the find in the Microsoft Clip Gallery 3.0 dialog box. You can then
select the clip you want to add and insert it onto the slide.
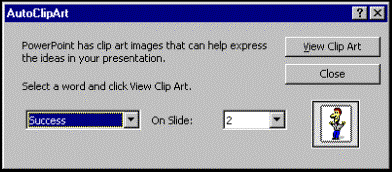
Using AutoClipArt
C Procedures
|
1. Select the Tools menu.
|
|
2. Select the AutoClipArt command.
|
|
3. Under Select a word and click View Clip Art., select the
word list.
|
|
4. Select the desired keyword.
|
|
5. Click the On Slide list.
|
|
6. Select the slide on which you want to insert the clip art.
|
|
7. Select View Clip Art.
|
|
8. Select the clip you want to add.
|
|
9. Select Insert.
|
|
10. Select Close.
|
f Step-by-Step
Use AutoClipArt to find a clip.
Go to slide 1.
|
Steps
|
Practice Data
|
|
1. Select the Tools menu.
The Tools menu appears.
|
Click Tools
|
|
2. Select the AutoClipArt command.
The AutoClipArt dialog box opens.
|
Click AutoClipArt…
|
|
3. Under Select a word and click View Clip Art., select the
word list.
A list of keywords appears.
|
Click Success 
|
|
4. Select the desired keyword.
The keyword is selected.
|
Click Support
|
|
5. Click the On Slide list.
A list of available slides appears.
|
Click On Slide 
|
|
6. Select the slide on which you want to insert the clip art.
The slide is selected.
|
Click 8
|
|
7. Select View Clip Art.
The Microsoft Clip Gallery 3.0 dialog box opens.
|
Click View Clip Art
|
|
8. Select the clip you want to add.
The clip is selected.
|
Click the third clip (first row, third clip)
|
|
9. Select Insert.
The Microsoft Clip Gallery 3.0 dialog box closes.
|
Click Insert
|
|
10. Select Close.
The AutoClipArt dialog box closes and the clip appears on the slide.
|
Click Close
|
Move the clip to the lower
right corner of the slide and resize it as desired.
Click outside of the clip
to deselect it.
Close WORLD9.PPT.
e Task
Insert, resize, and move clip art in a presentation. Use
AutoClipArt to select a clip.
|
1. Open Meeting8 and go to slide 3.
|
|
2. Insert clip art from the Clip Gallery. Select the Sports
& Leisure category and the Bullseye clip (first row, second
clip).
|
|
3. Resize the clip to 2 inches in both height and width.
|
|
4. Move the clip to the lower right corner of the slide.
|
|
5. Activate AutoClipArt. Select Goal and slide 9, and
view the clip art.
|
|
6. Insert the blue ribbon (first row, first clip) and then move the
clip to the lower right corner of the slide.
|
|
7. Close the presentation without saving it.
|
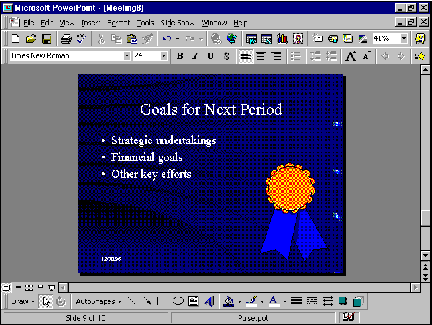
In this lesson, you will
learn how to:
·
Switch to Slide Sorter view
·
Select multiple slides
·
Move slides
·
Duplicate slides
·
Copy slides
·
Delete slides - Slide Sorter
d Discussion
Slide Sorter view displays all the slides in a
presentation in miniature, complete with text, colors, and graphics. In Slide
Sorter view, you can rearrange the slides in any order, add transitions to
slides, and set slide show timings.
Although you cannot edit the contents of a slide in Slide
Sorter view, you can evaluate the presentation for its overall appearance
and visual impact.
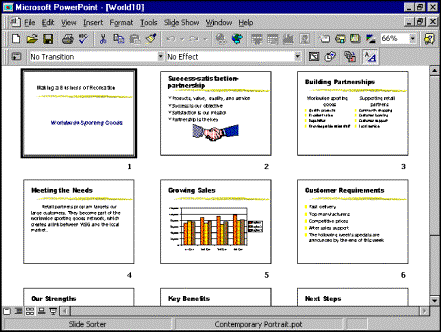
Slide Sorter view
|
|
|
|
o
|
You can also switch to Slide Sorter view by
selecting the Slide Sorter command on the View menu.
|
|
|
|
C Procedures
|
1. Click the Slide Sorter View button  located to the left of the horizontal
scroll bar. located to the left of the horizontal
scroll bar.
|
f Step-by-Step
From the Student Data directory, open WORLD10.PPT.
Switch to Slide Sorter view.
|
Steps
|
Practice Data
|
|
1. Click the Slide Sorter View button
located to the left of the horizontal scroll bar.
The presentation appears in Slide Sorter view.
|
Click 
|
d Discussion
In order to perform any action on a slide in Slide Sorter
view, you must first select it. You can select more than one slide at a time;
selected slides are indicated by a dark border. You do not need to select
contiguous slides. For example, you can
select slides 1, 3, and 5 without selecting slides 2 and 4.
You can select slides using the mouse or a combination of mouse
clicks and the keyboard. You use the mouse in combination with the [Shift]
key to select multiple slides.
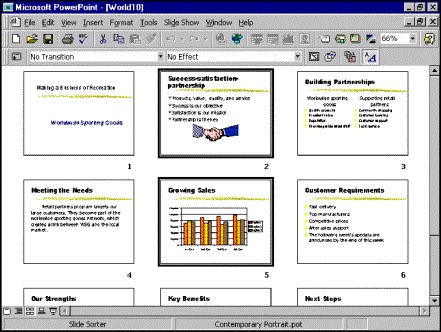
Selecting multiple slides
|
|
|
|
o
|
Unlike Outline view, which allows you to select
only multiple contiguous slides, you can select both multiple contiguous and
non-contiguous slides in Slide Sorter view.
|
|
|
|
C Procedures
|
1. Switch to Slide Sorter view.
|
|
2. Click the first slide you want to select.
|
|
3. To select multiple slides, hold [Shift], click the
additional slides you want to select, and release [Shift].
|
f Step-by-Step
Select multiple slides in Slide Sorter view.
Switch to Slide Sorter
view, if necessary.
|
Steps
|
Practice Data
|
|
1. Click the first slide you want to select.
A black border appears around the slide.
|
Click slide 2
|
|
2. To select multiple slides, hold [Shift], click the
additional slides you want to select, and release [Shift].
The slides are selected.
|
Hold [Shift], click slide 5, and release [Shift]
|
Click anywhere between
slides to deselect the slides.
d Discussion
Slide Sorter view provides a convenient way to move a slide
to a new location in a presentation. For example, you can move slide 2 so that
it appears after slide 3. PowerPoint automatically renumbers the slides.
You can also select and move multiple slides at one time. This
process makes it easy for you to rearrange your presentation for maximum
impact.
C Procedures
|
1. Switch to Slide Sorter view.
|
|
2. Select the slide(s) you want to move.
|
|
3. Drag the slide to the desired location.
|
|
4. Release the mouse button.
|
f Step-by-Step
Move slides in Slide
Sorter view.
Switch to Slide Sorter
view, if necessary.
|
Steps
|
Practice Data
|
|
1. Select the slide(s) you want to move.
The slide(s) are selected.
|
Click slide 3
|
|
2. Drag the slide to the desired location.
The mouse pointer changes into a box outline with an arrow and a vertical
bar appears between slides as you drag.
|
Drag slide 3 between slides 5 and 6
|
|
3. Release the mouse button.
The slide(s) appear in the new location and the slides are renumbered
accordingly.
|
Release the mouse button
|
Click anywhere between
slides to deselect the slide.
d Discussion
You can duplicate slides in Slide Sorter view. This
option is particularly useful when you need to create similar slides.
For example, if a slide contains a title and layout you would like to appear on
another slide, you can duplicate the original slide.
|
|
|
|
o
|
The Duplicate command on the Edit menu
places the duplicate slide next to the original slide.
|
|
|
|
|
o
|
To duplicate multiple slides, hold [Shift],
click the slides you want to duplicate, and release [Shift] to select
multiple slides before you execute the Duplicate feature.
|
|
|
|
C Procedures
|
1. Switch to Slide Sorter view.
|
|
2. Select the slide(s) you want to duplicate.
|
|
3. Select the Edit menu.
|
|
4. Select the Duplicate command.
|
f Step-by-Step
Duplicate a slide in Slide Sorter view.
Switch to Slide Sorter
view, if necessary.
|
Steps
|
Practice Data
|
|
1. Select the slide(s) you want to duplicate.
The slide(s) are selected.
|
Click slide 3
|
|
2. Select the Edit menu.
The Edit menu appears.
|
Click Edit
|
|
3. Select the Duplicate command.
Duplicate(s) of the selected slide(s) appear and the slides are renumbered
accordingly.
|
Click Duplicate
|
Click anywhere between
slides to deselect the slide.
d Discussion
You can copy slides without changing views. In Slide
Sorter view, you can copy a slide to a new location in a presentation. For
example, if you want the title and text of a slide to appear in two places in a
presentation, you can copy the slide.
You can also select and copy multiple slides at one time.
|
|
|
|
o
|
You cannot edit a slide in Slide Sorter view.
|
|
|
|
|
o
|
To copy multiple slides, hold [Shift], click
the slides you want to copy, and release [Shift] before you execute the
Copy feature.
|
|
|
|
C Procedures
|
1. Switch to Slide Sorter view.
|
|
2. Select the slide(s) you want to copy.
|
|
3. Hold [Ctrl] and drag the slide(s) to the desired
location.
|
|
4. Release the mouse button and release [Ctrl].
|
f Step-by-Step
Copy a slide in Slide Sorter view.
Switch to Slide Sorter
view, if necessary.
|
Steps
|
Practice Data
|
|
1. Select the slide(s) you want to copy.
The slide(s) are selected.
|
Click slide 1
|
|
2. Hold [Ctrl] and drag the slide(s) to the desired
location.
A vertical line appears as you drag.
|
Hold [Ctrl] and drag slide 1 between slides 5
and 6
|
|
3. Release the mouse button and release [Ctrl].
Copies of the selected slide(s) appear in the new location and the slides
are renumbered accordingly.
|
Release the mouse button and release [Ctrl]
|
Click anywhere between
slides to deselect the slide.
d Discussion
In Slide Sorter view, you can easily see the order of
the slides in a presentation. You can use Slide Sorter view to identify
unnecessary slides (such as duplicated
slides) or slides you no longer need. You can easily delete slides in Slide
Sorter view.
C Procedures
|
1. Switch to Slide Sorter view.
|
|
2. Select the slide(s) you want to delete.
|
|
3. Press [Delete].
|
f Step-by-Step
Delete a slide in Slide Sorter view.
Switch to Slide Sorter
view, if necessary.
|
Steps
|
Practice Data
|
|
1. Select the slide(s) you want to delete.
The slide(s) are selected.
|
Click slide 6
|
|
2. Press [Delete].
The slide(s) are deleted.
|
Press [Delete]
|
Close WORLD10.PPT.
e Task
Use Slide Sorter view to rearrange the slides in a
presentation.
|
1. Open Meeting9.
|
|
2. Switch to Slide Sorter view.
|
|
3. Move slide 6 before slide 5.
|
|
4. Copy slide 8 and place it between slides 4 and 5.
|
|
5. Duplicate slide 4.
|
|
6. Delete slides 5 and 6.
|
|
7. Close the presentation without saving it.
|
In this lesson, you will
learn how to:
·
Run a slide show
·
Display the shortcut menu
·
Navigate to a slide
·
Use the pen to annotate
·
Change the pen color
·
Add speaker notes
·
Add action items
·
End a slide show
d Discussion
You can use a slide show
to display a PowerPoint presentation on or from your computer. The Slide Show
view allows you to preview a presentation. You can view individual slides, or
you can view the slide show in sequence to assess the flow of the presentation.
Running a slide show is
one of the most effective ways to evaluate the impact of a presentation before
adding your own information, illustrations, and designs. For example, you can
run a slide show to determine if the individual slides are placed in the most
appropriate order for emphasizing the points you are trying to make in the
presentation. In addition, many of PowerPoint’s predesigned presentations
contain instructional slides that can stimulate new ideas, directions, and
alternatives you might find useful.
|
|
|
|
o
|
You can also run a slide show by selecting the Slide
Show command from the View menu.
|
|
|
|
|
o
|
In Slide Sorter view, the slide show begins
with the selected slide or with the slide to the left of the vertical line.
|
|
|
|
|
o
|
You also can use the mouse button to advance the slide
show to the next slide.
|
|
|
|
|
o
|
When you advance past
the last slide in a slide show, the slide show ends and the previous view
appears.
|
|
|
|
C Procedures
|
1. Click the Slide Show button  located to the left of the horizontal
scroll bar. located to the left of the horizontal
scroll bar.
|
|
2. Press [Spacebar] as needed to view each slide in the
presentation.
|
f Step-by-Step
From the Student Data directory, open WORLD13.PPT.
Run a slide show.
|
Steps
|
Practice Data
|
|
1. Click the Slide Show button located
to the left of the horizontal scroll bar.
The current slide appears in Slide Show view.
|
Click 
|
|
2. Press [Spacebar] as needed to view each slide in the
presentation.
The next slide appears each time you press [Spacebar] and the slide
show ends automatically after the last slide has appeared.
|
Press [Spacebar] as needed until the slide show
ends
|
d Discussion
During a slide show, the
shortcut menu provides options that allow you to navigate the slide show, view
speaker notes, change the pointer to a pen, and change the screen, among
others.
You can access the
shortcut menu using either the mouse or the button that appears in the lower
left corner of the screen during a slide show.
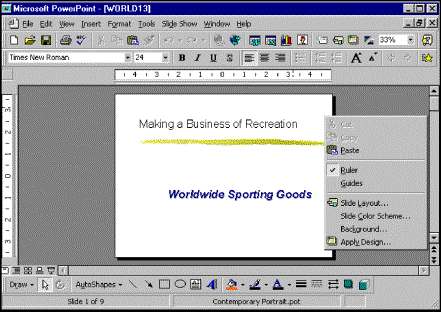
The slide show shortcut menu
|
|
|
|
o
|
You can display the shortcut menu by clicking the
right mouse button.
|
|
|
|
|
o
|
You may have to move the mouse on the screen to
display the button in a slide show.
|
|
|
|
C Procedures
|
1. Click the right mouse button.
|
f Step-by-Step
Display the slide show shortcut menu.
Begin the slide show with
slide 1.
|
Steps
|
Practice Data
|
|
1. Click the right mouse button.
The slide show shortcut menu appears.
|
Click the right mouse button
|
Click anywhere on the
screen to close the shortcut menu.
d Discussion
When you navigate a slide show using the mouse or keyboard, you
generally view the slides in order, one by one. The shortcut menu provides options that
allow you to move directly to another slide anywhere in a presentation.
You can use the Go submenu to access both the Slide
Navigator dialog box and the By Title submenu. The Slide Navigator
dialog box lists all the slides in the presentation as well as which slide was
last viewed. The By Title submenu displays all the slide titles in a
presentation and also provides access to the Slide Navigator dialog box.
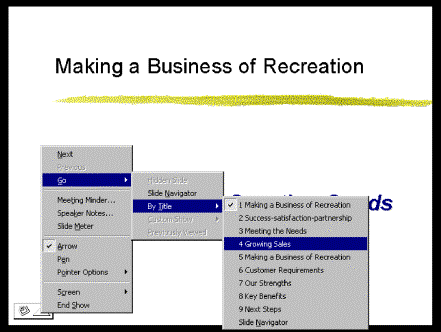
Navigating to a slide
C Procedures
|
1. Begin a slide show.
|
|
2. Click the right mouse button.
|
|
3. Point to the Go command.
|
|
4. Point to the By Title command.
|
|
5. Select the title of the slide you want to view.
|
f Step-by-Step
Navigate to a slide in a slide show.
Begin the slide show with
slide 1.
|
Steps
|
Practice Data
|
|
1. Click the right mouse button.
The slide show shortcut menu appears.
|
Click right mouse button
|
|
2. Point to the Go command.
The Go submenu appears.
|
Point to Go
|
|
3. Point to the By Title command.
The By Title submenu appears.
|
Point to By Title
|
|
4. Select the title of the slide you want to view.
The selected slide appears.
|
Click 4 Growing Sales
|
d Discussion
You can annotate your slides during a slide show. PowerPoint’s Pen
tool allows you to write or draw on the
current slide. For example, you can emphasize your message by drawing an arrow
to a particular text line or slide element. The annotations are temporary; once
you leave the slide, they disappear.
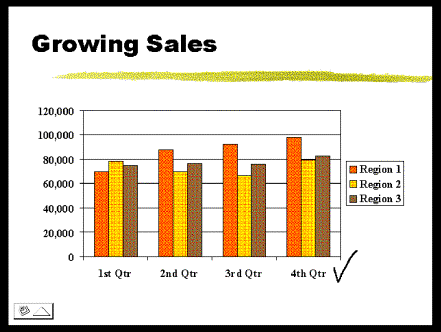
Annotating a slide
|
|
|
|
o
|
You can press [Shift] as you draw to draw a
straight line with the annotation tool.
|
|
|
|
|
o
|
You can press [Shift+E] to erase annotation
drawings without leaving a slide.
|
|
|
|
C Procedures
|
1. Begin the slide show.
|
|
2. Click the right mouse button.
|
|
3. Select the Pen command.
|
|
4. Drag to create the desired annotation.
|
|
5. Release the mouse button.
|
|
6. When you have finished annotating, press [Esc].
|
f Step-by-Step
Use the pen to annotate a slide in a slide show.
Begin the slide show and go to slide 4.
|
Steps
|
Practice Data
|
|
1. Click the right mouse button.
The slide show shortcut menu appears.
|
Click the right mouse button
|
|
2. Select the Pen command.
The mouse pointer changes into a pencil.
|
Click Pen
|
|
3. Drag to create the desired annotation.
A line appears as you drag.
|
Drag to create a check mark to the right of 4th Qtr
|
|
4. Release the mouse button.
The annotation appears.
|
Release the mouse button
|
|
5. When you have finished annotating, press [Esc].
The mouse pointer changes into an arrow.
|
Press [Esc]
|
Press [Shift+E] to
erase the annotation.
d Discussion
Although the default pen color is black, there are a number of
other colors from which you can select. You may want to change
the pen color if, for example, you have a slide with a dark background which
makes it difficult to see annotations made with a black pen color.
|
|
|
|
o
|
When you exit a slide show, the pen color
automatically returns to black.
|
|
|
|
C Procedures
|
1. Begin the slide show.
|
|
2. Click the right mouse button.
|
|
3. Point to the Pointer Options command.
|
|
4. Point to the Pen Color command.
|
|
5. Select the desired pen color.
|
f Step-by-Step
Changing the pen color.
Begin the slide show and
go to slide 4.
|
Steps
|
Practice Data
|
|
1. Click the right mouse button.
The slide show shortcut menu appears.
|
Click the right mouse button
|
|
2. Point to the Pointer Options command.
The Pointer Options submenu appears.
|
Point to Pointer Options
|
|
3. Point to the Pen Color command.
The Pen Color submenu appears.
|
Point to Pen Color
|
|
4. Select the desired pen color.
The pen color is selected.
|
Click Red
|
Use the pen to draw a
circle around the words 4th Qtr.
Press [Shift+E] to
erase the annotation.
d Discussion
You can add speaker notes to slides during
a slide show. To save time, you can add speaker notes when you rehearse the
slide show instead of going to Notes Page view to create them.
You create speaker notes in the Speaker Notes dialog box.
Adding a speaker note
C Procedures
|
1. Begin the slide show.
|
|
2. Click the right mouse button.
|
|
3. Select the Speaker Notes command.
|
|
4. Type the desired text.
|
|
5. Select Close.
|
f Step-by-Step
Add speaker notes to a slide.
Begin the slide show and
go to slide 4, if necessary.
|
Steps
|
Practice Data
|
|
1. Click the right mouse button.
The slide show shortcut menu appears.
|
Click right mouse button
|
|
2. Select the Speaker Notes command.
The Speaker Notes dialog box opens.
|
Click Speaker Notes...
|
|
3. Type the desired text.
The text appears in the Speaker Notes dialog box.
|
Type Mention the continued growth throughout the
year
|
|
4. Select Close.
The Speaker Notes dialog box closes.
|
Click Close
|
d Discussion
You can create action items during
a slide show. Action items can be points you want to emphasize during a slide
show or a checklist of details you want to make sure to cover.
When you enter action items during a slide show, they
automatically appear as the last slide in the presentation. When you reach the
last slide in the slide show, you can then review the action items with your
audience.
When you create an action item, you can enter a description, a
name to whom the action item is assigned, and a due date.
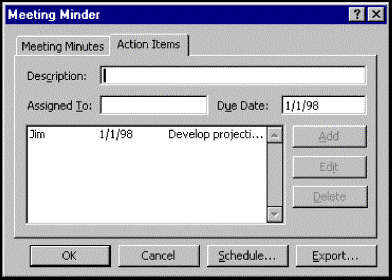
Adding an action item
C Procedures
|
1. Begin the slide show.
|
|
2. Click the right mouse button.
|
|
3. Select the Meeting Minder command.
|
|
4. Select the Action Items tab.
|
|
5. Type the description of the action item in the Description
text box.
|
|
6. Select the Assigned To text box.
|
|
7. Type the name of the person to whom the action is assigned.
|
|
8. Select the Due Date text box.
|
|
9. Type the due date for the action item.
|
|
10. Select Add.
|
|
11. Select OK.
|
f Step-by-Step
Add an action item to a slide during a slide show.
Begin the slide show and
go to slide 4, if necessary.
|
Steps
|
Practice Data
|
|
1. Click the right mouse button.
The slide show shortcut menu appears.
|
Click right mouse button
|
|
2. Select the Meeting Minder command.
The Meeting Minder dialog box opens.
|
Click Meeting Minder...
|
|
3. Select the Action Items tab.
The Action Items page appears.
|
Click the Action Items tab
|
|
4. Type the description of the action item in the Description
text box.
The text appears in the Description text box.
|
Type Develop projections for next year
|
|
5. Select the Assigned To text box.
The insertion point appears in the Assigned To text box.
|
Press [Tab]
|
|
6. Type the name of the person to whom the action is assigned.
The text appears in the Assigned To text box.
|
Type Jim
|
|
7. Select the Due Date text box.
The date in the Due Date text box is selected.
|
Double-click in the Due Date text box
|
|
8. Type the due date for the action item.
The date appears in the Due Date text box.
|
Type 1/1/98
|
|
9. Select Add.
The information appears in the list box.
|
Click Add
|
|
10. Select OK.
The Meeting Minder dialog box closes.
|
Click OK
|
Add the following action
item to slide 6: Speak with customers to discover their interest. Assign
the item to Sue with a due date of 7/17/97.
Advance to the last slide
in the slide show. Notice that all action items appear on the last slide.
d Discussion
You may want to end a slide show before you have finished
viewing it. For example, you may notice a mistake you want to fix.
When you end a slide show, the current slide
appears in the previous view. You can then make any necessary changes.
|
|
|
|
o
|
You can press [Esc] to end a slide show at any
time.
|
|
|
|
C Procedures
|
1. Begin the slide show.
|
|
2. Click the right mouse button.
|
|
3. Select the End Show command.
|
f Step-by-Step
End a slide show.
Begin the slide show, if
necessary.
|
Steps
|
Practice Data
|
|
1. Click the right mouse button.
The slide show shortcut menu appears.
|
Click the right mouse button
|
|
2. Select the End Show command.
The slide show ends and the current slide appears in the previous view.
|
Click End Show
|
Close WORLD13.PPT.
e Task
Run a slide show. Add annotations, a speaker note, and an
action item.
|
1. Open Meetng11.
|
|
2. Click the Slide Show button to begin the slide show.
|
|
3. View slides 1 through 4.
|
|
4. Use the slide show shortcut menu and the Go command to go
to slide 8, Key Spending Areas.
|
|
5. Use the Pen tool to annotate slides 8 and 9. Draw a black
line under the first bullet point in slide 8. Draw red checkmarks next to the
bullets in slide 9.
|
|
6. Add the following speaker note to slide 9: Discuss
anticipated trends for next period.
|
|
7. Advance to slide 10. Add the following action item: Prioritize
goals for the next period. Assign the action item to Bill with a
due date of 11/1/97.
|
|
8. Use the slide show shortcut menu to end the slide show.
|
|
9. Go to slide 12 to view the action item.
|
|
10. Close the presentation without saving it.
|
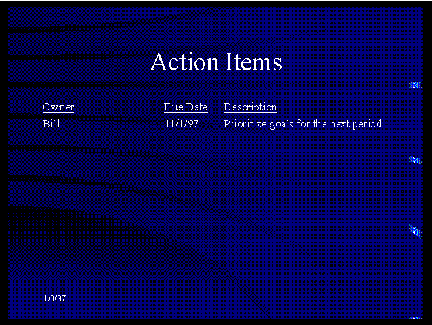
In this lesson, you will
learn how to:
·
Switch to Notes Page view
·
Add a note to a slide
·
Edit a slide object
·
Edit text in a notes box
·
Format a notes box
·
Resize a notes box
·
Move a notes box
d Discussion
A notes page displays an image of the current slide and a notes box.
You can enter critical points you want to emphasize during a presentation in
the notes box and then print a copy of the notes page for reference. In Notes
Page view, you can resize, move, edit, and copy both the notes box and the
slide image.
Notes Page view
|
|
|
|
o
|
You can also switch to Notes Page view by
selecting the Notes Page command from the View menu.
|
|
|
|
|
o
|
The notes page appears as a full page, making it
difficult to read the text. You can use the Zoom list to magnify the
page.
|
|
|
|
|
o
|
To print notes pages, open the Print dialog box and
select Notes Pages from the Print what list.
|
|
|
|
C Procedures
|
1. Click the Notes Page View button  located to the left of the horizontal scroll bar. located to the left of the horizontal scroll bar.
|
f Step-by-Step
From the Student Data directory, open WORLD12.PPT.
Switch to Notes Page view.
Go to slide 1, if
necessary.
|
Steps
|
Practice Data
|
|
1. Click the Notes Page View button
located to the left of the horizontal scroll bar.
The slide appears in Notes Page view.
|
Click 
|
d Discussion
A notes page contains a copy of the slide and a notes box in which
you can enter information to which you want to refer when giving a
presentation. The notes box allows you to use common word processing features,
such as word-wrapping, bolding, adjusting the font size, and applying bullets
to text.
Adding a note to a slide
|
|
|
|
o
|
The notes page appears as a full page. You can use the
Zoom list to magnify the page so that you can see the text.
|
|
|
|
C Procedures
|
1. Switch to Notes Page view.
|
|
2. Position the insertion point
in the notes box.
|
|
3. Type the desired note text.
|
f Step-by-Step
Add a note to a slide in Notes Page view.
Switch to Notes Page view
and go to slide 1. Magnify the view to 66%, if necessary.
|
Steps
|
Practice Data
|
|
1. Position the insertion point in the notes
box.
The insertion point appears in the notes box.
|
Click in the notes box
|
|
2. Type the desired note text.
The text appears in the notes box.
|
Type Successful strategies for winning, keeping
customers
|
Click outside of the notes
box to deselect it. Return the notes page to full page view (33% zoom).
d Discussion
There may be times when you notice something on a slide you
want to change. If you are in Notes Page view and decide
to edit a slide, PowerPoint automatically switches to Slide view. You
can then return to Notes Page view, if desired.
C Procedures
|
1. Switch to Notes Page view.
|
|
2. Click the right mouse button on the slide object you want to
edit.
|
|
3. Select the Edit Slide Object command.
|
|
4. Make the desired changes to the slide object.
|
f Step-by-Step
Edit a slide object on a notes page.
Switch to Notes Page view
and go to slide 1, if necessary.
|
Steps
|
Practice Data
|
|
1. Click the right mouse button on the slide
object you want to edit.
A shortcut menu appears.
|
Click the right mouse button on
the slide object
|
|
2. Select the Edit Slide Object command.
The slide appears in Slide view.
|
Click Edit Slide Object
|
|
3. Make the desired changes to the slide object.
The changes to the slide object appear on the slide.
|
Make the changes indicated below
|
Make the following change
to slide 1:
Type the word out after the word Business in the slide title. Add
spaces as needed.
Return to Notes Page view.
d Discussion
You can edit or apply formatting to notes on a notes
page using the notes box in Notes Page view. You may need to zoom the
notes page depending on the change you are making. For example, you can easily
select all the text and bold it without zooming, but to proofread the text, you
must magnify it to make it easier to read.
Editing text in a notes box
C Procedures
|
1. Switch to Notes Page view.
|
|
2. Select the note text you want to edit.
|
|
3. Make the desired edits.
|
f Step-by-Step
Edit text in a notes box.
Switch to Notes Page view
and go to slide 1. Zoom to 66%, if necessary.
|
Steps
|
Practice Data
|
|
1. Select the note text you want to edit.
The note text is selected.
|
Double-click the word keeping
|
|
2. Make the desired edits.
The edits appear in the notes box.
|
Type maintaining
|
Deselect the notes box and
return the notes page to full page view (33% zoom).
Select all the text in the
notes box and apply bold formatting. Then, click outside of the notes box to
deselect it.
d Discussion
You can format a notes box on a notes
page by adding a fill or border color and/or changing the size and position of
the notes box. In addition, you can adjust a notes box to fit the size of the
text and/or rotate the text 90o.
Formatting a notes box
C Procedures
|
1. Switch to Notes Page view.
|
|
2. Select the notes box you want to format.
|
|
3. Click the right mouse button on the text in the notes box.
|
|
4. Select the Format AutoShape command.
|
|
5. Select the Colors and Lines tab.
|
|
6. Select the desired list of options, if necessary.
|
|
7. Select the desired option.
|
|
8. Select OK.
|
f Step-by-Step
Format a notes box.
Switch to Notes Page view
and go to slide 1, if necessary.
|
Steps
|
Practice Data
|
|
1. Select the notes box you want to format.
The notes box is selected.
|
Click in the notes box
|
|
2. Click the right mouse button on the text in the notes box.
A shortcut menu appears.
|
Click the right mouse button on the text in the notes
box
|
|
3. Select the Format AutoShape command.
The Format AutoShape dialog box opens.
|
Click Format AutoShape...
|
|
4. Select the Colors and Lines tab.
The Colors and Lines page appears.
|
Click the Colors and Lines tab, if necessary
|
|
5. Select the desired list of options, if necessary.
A list of options or a color palette appears.
|
Click Color  under Fill under Fill
|
|
6. Select the desired option.
The option or color appears in the corresponding box.
|
Click Yellow (fourth row, third column)
|
|
7. Select OK.
The Format AutoShape dialog box closes and the fill color appears in the
notes box.
|
Click OK
|
Open the Format AutoShape
dialog box and select Black from the Color list under Line.
Click outside of the notes box to deselect it.
d Discussion
You can change the size of both a slide object and a notes box
in Notes Page view. This is useful when you want to discuss a slide in
detail. You could increase the size of a notes
box in order to include all the items you want to mention during the
presentation.
If a slide contains two important but distinct topics, you
could enter each topic in its own notes box. In order to add a second notes
box, you need to reduce the size of the existing notes box or the size of the
slide object.

Resizing a notes box
|
|
|
|
o
|
You can also change the size of a notes box on the Size
page of the Format AutoShape dialog box.
|
|
|
|
C Procedures
|
1. Switch to Notes Page view.
|
|
2. Select the notes box you want to resize.
|
|
3. Point to a sizing handle.
|
|
4. Drag the sizing handle as needed to resize the notes box.
|
|
5. Release the mouse button.
|
f Step-by-Step
Resize a notes box.
Switch to Notes Page view
and go to slide 1, if necessary.
|
Steps
|
Practice Data
|
|
1. Select the notes box you want to resize.
The notes box is selected.
|
Click in the notes box
|
|
2. Point to a sizing handle.
The mouse pointer changes into a black, double-headed arrow.
|
Point to the top right sizing handle
|
|
3. Drag the sizing handle as needed to resize the notes box.
An image of the notes box appears as you drag.
|
Drag the top right sizing handle until the notes box
is approximately two inches square
|
|
4. Release the mouse button.
The notes box is resized.
|
Release the mouse button
|
Click outside of the notes
box to deselect it
d Discussion
You can move both a slide image and a notes box on a notes
page. This option is useful when you want to place additional
items on a notes page. For example, if you wanted to place two note boxes on a
notes page, you could copy the existing notes box and then move the notes boxes
as desired. You could then add notes on two different subjects, using a notes
box for each subject.
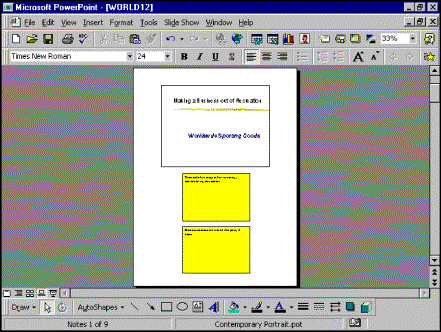
Moving a notes box
C Procedures
|
1. Switch to Notes Page view.
|
|
2. Select the notes box you want to move.
|
|
3. Point to a border of the notes box.
|
|
4. Drag the notes box to the desired location.
|
|
5. Release the mouse button.
|
f Step-by-Step
Move a notes box.
Switch to Notes Page view
and go to slide 1, if necessary.
|
Steps
|
Practice Data
|
|
1. Select the notes box you want to move.
The notes box is selected.
|
Click the notes box
|
|
2. Drag the notes box to the desired location.
An image of the notes box appears as you drag.
|
Drag the notes box to the center of the page
|
|
3. Release the mouse button.
The notes box appears in the new location.
|
Release the mouse button
|
Select the notes box, if
necessary, and click the Copy button. When you click the Paste
button, a copy of the notes box appears on top of the original. Arrange the
notes boxes so that one appears above the other in the center of the page.
Select the text in the
bottom notes box and replace it with the following text: Discuss success
stories of the past, if time..
Click outside of the notes
box to deselect it.
Close WORLD12.PPT.
e Task
Create, edit, and format a notes page.
|
1. Open Meetng11.
|
|
2. Go to slide 2 and switch to Notes Page view.
|
|
3. Increase the magnification to 66%.
|
|
4. Enter the following text in the notes box: Introduce CEO,
President, and Vice President.
|
|
5. Bold the text in the notes box.
|
|
6. Select the text in the notes box and replace it with the
following text: Introduce the CEO (Earl Nickel), the President (Ted
Smith), and the Vice President (Sherry Harvey).
|
|
7. Add a Teal fill color (second row, fifth column) to the
notes box and a Dark Blue border (first row, sixth color).
|
|
8. Change the height of the notes box to approximately two inches.
|
|
9. Move the notes box to the bottom of the page.
|
|
10. Close the presentation without saving it.
|

In this lesson, you will
learn how to:
·
View multiple presentations
·
Copy text between windows
·
Copy slides between windows
·
Move slides between windows
d Discussion
You can display multiple presentations in the program
window. For example, you may have a presentation that contains a products and
services overview and another one that outlines your company's marketing plan.
You could open both presentations and arrange the windows side-by-side in order
to view their similarities or inconsistencies.
If you display multiple presentations, you can move text or
slides from one presentation to another. You can view multiple presentations in
Slide, Slide Sorter, or Outline view, but not while
running a slide show. You must open all the presentations you want to view
before you can arrange them on the screen in the program window.
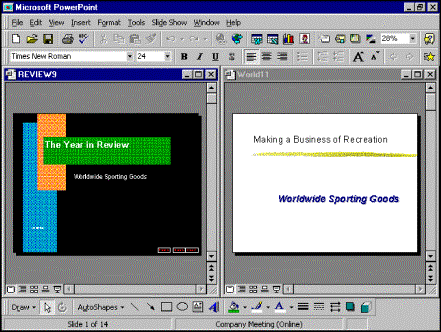
Viewing multiple presentations
C Procedures
|
1. Open multiple presentations.
|
|
2. Select the Window menu.
|
|
3. Select the Arrange All command.
|
f Step-by-Step
From the Student Data directory, open WORLD11.PPT and
REVIEW9.PPT.
View multiple presentations
at one time.
|
Steps
|
Practice Data
|
|
1. Select the Window menu.
The Window menu appears.
|
Click Window
|
|
2. Select the Arrange All command.
The presentation windows appear side-by-side.
|
Click Arrange All
|
d Discussion
You can copy text from one presentation and paste it into
another. Both presentations must be open in order to perform this task. For
example, if one presentation overviews your company's products and services and another presentation
outlines your company's marketing plan, the content of some slides might
overlap. You could arrange the presentation windows side-by-side so that you
can quickly copy slide text from one presentation to another.
|
|
|
|
o
|
If text is selected when you use the Paste feature,
the pasted text overwrites the selected text.
|
|
|
|
C Procedures
|
1. Select the presentation from which you want to copy text.
|
|
2. Select the text you want to copy.
|
|
3. Click the Copy button  . .
|
|
4. Select the presentation into which you want to paste the data.
|
|
5. Select the text you want to replace.
|
|
6. Click the Paste button  . .
|
f Step-by-Step
Copy text from one
presentation and paste it into another.
View both presentations
using the Arrange All command. Switch both presentations to Slide view.
In WORLD11, go to slide 2 and in REVIEW9, go to slide 3.
|
Steps
|
Practice Data
|
|
1. Select the presentation from which you want
to copy text.
The presentation window is activated and the text box is selected.
|
Click the word Products in
the WORLD11 presentation window
|
|
2. Drag to select the text you want to copy.
The text is highlighted as you drag.
|
Drag to select Products, value, quality, and
service
|
|
3. Release the mouse button.
The text is selected.
|
Release the mouse button
|
|
4. Click the Copy button.
The text is copied to the Windows Clipboard.
|
Click 
|
|
5. Select the presentation into which you want to paste the data.
The presentation window is activated and the text box is selected.
|
Click the word State in the REVIEW9
presentation window
|
|
6. Drag to select the text you want to replace.
The text is highlighted as you drag.
|
Drag to select the text State who we are
|
|
7. Release the mouse button.
The text is selected.
|
Release the mouse button
|
|
8. Click the Paste button.
The pasted text appears in the destination presentation.
|
Click 
|
d Discussion
You can copy a slide from one
presentation window and paste it into another. Copying slides between
presentation windows is easier if you first open both presentations.
It is usually easier to switch to Slide Sorter view to
copy slides between presentations.
|
|
|
|
o
|
Pasted slides adopt the formatting of the destination
presentation.
|
|
|
|
C Procedures
|
1. Open multiple presentations, arrange them side-by-side, and
switch them to Slide Sorter view.
|
|
2. Select the presentation containing the slide you want to copy.
|
|
3. Select the slide you want to copy.
|
|
4. Click the Copy button  . .
|
|
5. Select the presentation into which you want to paste the slide.
|
|
6. Select the slide after which you want to paste the slide.
|
|
7. Click the Paste button  . .
|
f Step-by-Step
Copy a slide from one presentation and paste it into another.
Arrange both presentations
side-by-side and switch both presentations to Slide Sorter view, if
necessary.
|
Steps
|
Practice Data
|
|
1. Select the presentation containing the
slide you want to copy.
The presentation window is activated.
|
Click the WORLD11 presentation
window
|
|
2. Select the slide you want to copy.
The slide is selected.
|
Scroll as necessary and click slide 3
|
|
3. Click the Copy button.
The slide is copied to the Windows Clipboard.
|
Click 
|
|
4. Select the presentation into which you want to paste the slide.
The presentation window is activated.
|
Click the REVIEW9 presentation window
|
|
5. Select the slide after which you want to paste the slide.
The slide is selected.
|
Scroll as necessary and click slide 3
|
|
6. Click the Paste button.
The copied slide appears in the destination presentation.
|
Click 
|
Notice that the pasted
slide adopts the formatting of the destination presentation.
d Discussion
You can drag a slide from one presentation and drop it
into another. Both presentations must be open in order to perform this action.
It is usually easier to use Slide Sorter view when
dragging slides between presentations.
|
|
|
|
o
|
To duplicate a slide, press [Ctrl] as you drag.
|
|
|
|
|
o
|
If you drag a slide containing a chart from one
presentation to a presentation using a different color scheme, PowerPoint
updates the chart to the color scheme of the destination presentation.
|
|
|
|
C Procedures
|
1. Open multiple presentations, arrange them side-by-side, and
switch them to Slide Sorter view.
|
|
2. Select the presentation containing the
slide you want to move.
|
|
3. Select the slide you want to move.
|
|
4. Drag the slide to the desired location in the destination
presentation.
|
|
5. Release the mouse button.
|
f Step-by-Step
Move a slide from one presentation to another.
Arrange both presentations
side-by-side, switch both presentations to Slide Sorter view, and
display slide 6 on both presentations, if necessary.
|
Steps
|
Practice Data
|
|
1. Select the presentation containing the
slide you want to move.
The presentation window is activated.
|
Click in the WORLD11 presentation
window, if necessary
|
|
2. Select the slide you want to move.
The slide is selected.
|
Click slide 6
|
|
3. Drag the slide to the desired location in the destination
presentation.
A vertical line appears as you drag.
|
Drag slide 6 to slide 6 in the REVIEW9 presentation
window
|
|
4. Release the mouse button.
The slide is moved to the destination location.
|
Release the mouse button
|
Move the slide back to the
WORLD11 presentation window, below slide 5.
Close WORLD11.PPT and REVIEW9.PPT.
e Task
Copy text between presentations. Copy and move slides between
presentations.
|
1. Open Meetng10 and Review10.
|
|
2. Arrange the presentations side-by-side on the screen.
|
|
3. On slide 11 of Review10, copy the bulleted lines, Gross
margin and Compare company to rest of market.
|
|
4. Select the MEETNG10 presentation window and go to slide 7. Paste
the text at the end of the existing bulleted lines.
|
|
5. Switch both presentations to Slide Sorter view.
|
|
6. Move slide 12 from the Review10 presentation to the Meetng10
presentation, after slide 7.
|
|
7. Close both presentations without saving them.
|
In this lesson, you will
learn how to:
·
Use online help
·
View ScreenTips
·
Use Help Contents
·
Use the Help Index
·
Use Help Find
d Discussion
If you need assistance on any PowerPoint topic or task, you can
use the extensive PowerPoint Help facility. There are several
ways in which you can get help, all of which are available on the Help
menu. One way is using the Microsoft PowerPoint Help command, which
launches the Office Assistant. You can also use the Contents and Index command,
which allows you to scroll through a table of contents, browse an alphabetical
index of help topics, or search for a specific word or phrase.
The What’s This? command can be used to display a
ScreenTip.
If you have World Wide Web access on the Internet, you can use
the Microsoft on the Web submenu to connect to web sites directly from
PowerPoint. You can download free programs, access on-line support, and get the
latest Microsoft product information from a web site - all without leaving
PowerPoint.
You can use the About Microsoft PowerPoint command to
view copyright and licensing information about the program. The About Microsoft
PowerPoint window contains a System Info button that displays
information about your computer and a Tech Support button that provides
help on getting product support.
d Discussion
If you are unsure of the name and
function of a menu command or of a button, you can use a ScreenTip to view either its
name or description. You can access ScreenTips by selecting the What’s This?
command from the Help menu.
ScreenTips for toolbars are activated by default, as long as
you have enabled the option in the Customize dialog box. To view a ScreenTip
for a button, you point to the desired button and the button name appears.
When ScreenTips are activated, the mouse pointer appears with a
question mark.
|
|
|
|
o
|
You can also access ScreenTips by pressing [Shift+F1]
and then pointing to or clicking the item for which you want to view a
ScreenTip.
|
|
|
|
C Procedures
|
1. Select the Help menu.
|
|
2. Select the What's This? command.
|
|
3. Point to the button or command with which you want
help.
|
|
4. Click the mouse button on the button or command with which you
want help.
|
f Step-by-Step
View a ScreenTip for a button.
Create a blank
presentation, if necessary.
|
Steps
|
Practice Data
|
|
1. Select the Help menu.
The Help menu appears.
|
Click Help
|
|
2. Select the What's This? command.
The ScreenTips are activated.
|
Click What's This?
|
|
3. Point to the button or command with which you want help.
The name of the button or command appears in a ScreenTip.
|
Point to 
|
|
4. Click the mouse button on the button or command with which you
want help.
The description of the button or command appears in a ScreenTip.
|
Click the mouse button
|
Click anywhere in the
presentation window to hide the ScreenTip.
d Discussion
The Help Topics: Microsoft PowerPoint
dialog box, accessible from the Contents and Index command on the Help
menu, provides three tabs, Contents, Index, and Find.
The Contents page displays a list of general help
topics. From this list, you can select a help topic for a particular group of
features or functions. This page is structured like a standard table of
contents. The table is expandable; when you double-click a topic, related
subtopics appear. When you display the help topic you want to view, it appears
in a help window.

Using Help Contents
C Procedures
|
1. Select the Help menu.
|
|
2. Select the Contents and Index command.
|
|
3. Select the Contents tab.
|
|
4. Select the desired topic.
|
|
5. Select the desired subtopic.
|
|
6. Select Display.
|
f Step-by-Step
Use Help Contents to display information on a specific help topic.
|
Steps
|
Practice Data
|
|
1. Select the Help menu.
The Help menu appears.
|
Click Help
|
|
2. Select the Contents and Index command.
The Help Topics: Microsoft PowerPoint dialog box opens.
|
Click Contents and Index
|
|
3. Select the Contents tab.
The Contents page appears.
|
Click the Contents tab, if necessary
|
|
4. Select the desired topic.
The selected topic expands and a list of subtopics appears.
|
Double-click  Getting Help Getting Help
|
|
5. Select the desired subtopic.
The subtopic is selected.
|
Click Show or hide toolbar ScreenTips
|
|
6. Select Display.
The pertinent help window opens.
|
Click Display
|
Click the Close
button to close the help window.
d Discussion
The PowerPoint Help system includes an alphabetical index of
available help topics on the Index page of the Help Topics: Microsoft
PowerPoint dialog box. You can search for
a specific help topic or subtopic and display the appropriate help window.
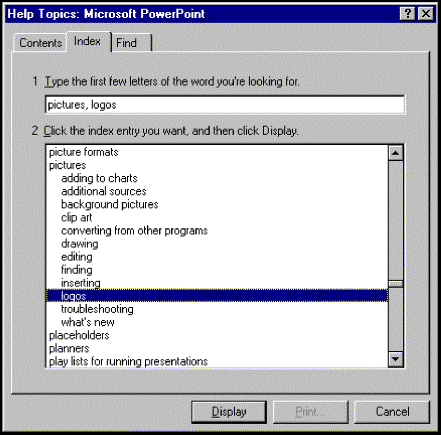
Using the Help Index
C Procedures
|
1. Select the Help menu.
|
|
2. Select the Contents and Index command.
|
|
3. Select the Index tab.
|
|
4. Type the topic for which you want to search.
|
|
5. Select the desired subtopic.
|
|
6. Select Display.
|
f Step-by-Step
Use the Help Index to display information on a help topic.
|
Steps
|
Practice Data
|
|
1. Select the Help menu.
The Help menu appears.
|
Click Help
|
|
2. Select the Contents and Index command.
The Help Topics: Microsoft PowerPoint dialog box opens.
|
Click Contents and Index
|
|
3. Select the Index tab.
The Index page appears.
|
Click the Index tab
|
|
4. Type the topic for which you want to search.
The closest alphabetical entry appears.
|
Type pictures
|
|
5. Select the desired subtopic.
The desired subtopic is selected.
|
Click logos
|
|
6. Select Display.
The pertinent help window opens.
|
Click Display
|
Click the Close
button to close the help window.
d Discussion
You can use the Find page of the Help Topics: Microsoft
PowerPoint dialog box to quickly locate help topics using one or more keywords.
The Find page allows you to search for specific words or phrases
contained in the help topics, as opposed to searching the Index, which is a
list of topic names.
When PowerPoint has completed the search, the total number of
topics found appears in the lower left corner of the Help Topics: Microsoft
PowerPoint dialog box.
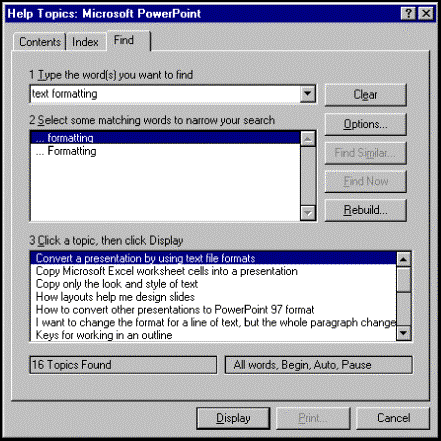
Using Help Find
|
|
|
|
o
|
The first time you select the Find tab, the
Find Setup Wizard dialog box opens and prompts you to build the word list. To
perform this task, select the Minimize database size (recommended)
option, if necessary, and then select Next. Select Finish to
begin building the word list.
|
|
|
|
C Procedures
|
1. Select the Help menu.
|
|
2. Select the Contents and Index command.
|
|
3. Select the Find tab.
|
|
4. Type the word or phrase for which you want to
search.
|
|
5. Select the desired word from the 2 Select some matching words
to narrow you search list box.
|
|
6. Select the desired help topic in the 3 Click a topic, then
click Display list box.
|
|
7. Select Display.
|
f Step-by-Step
Use Help Find to search for and display information on a help topic.
|
Steps
|
Practice Data
|
|
1. Select the Help menu.
The Help menu appears.
|
Click Help
|
|
2. Select the Contents and Index command.
The Help Topics: Microsoft PowerPoint dialog box opens.
|
Click Contents and Index
|
|
3. Select the Find tab.
The Find page appears.
|
Click the Find tab
|
|
4. Type the word or phrase for which you want to search.
Variations of the keyword(s) appear in the 2 Select some matching words
to narrow you search list box.
|
Type formatting
|
|
5. Select the desired word from the 2 Select some matching words
to narrow you search list box.
A list of help topics containing the keyword(s) appears.
|
Click formatting
|
|
6. Select the desired help topic in the 3 Click a topic, then
click Display list box.
The help topic is selected.
|
Click Copy only the look and style of text
|
|
7. Select Display.
The pertinent help window opens.
|
Click Display
|
Click the Close
button to close the help window.
e Task
Use the Help menu commands to find and display
information.
|
1. Point to any toolbar button and view the button name in a
ScreenTip.
|
|
2. Using Help Contents, display help information about
printing a presentation outline.
|
|
3. Close the help window.
|
|
4. Using Help Index, get help information on formatting
text. Display the help subtopic bullets, and then the topic add,
change or remove a bullet.
|
|
5. Close the help window.
|
|
6. Using Help Find, use the keyword, clip art, to get
help on inserting clip art from the Clip Gallery.
|
|
7. Close the help window.
|
In this lesson, you will
learn how to:
·
Customize presentations
·
Use color schemes
·
Apply a color scheme
·
Customize a color scheme
·
Apply a scheme to all slides
·
Customize the slide background
·
Save a custom template
·
Delete a custom template
d Discussion
You can customize PowerPoint presentations using a variety
of features, such as custom color schemes and slide backgrounds.
A color scheme is used throughout a presentation to give it a
consistent look. You can use one of the preset color schemes available in
PowerPoint, or you can create your own color scheme.
The slide background provides an attractive appearance to the
presentation and also provides consistency across slides when applied to an
entire presentation. You can use one of the preset backgrounds available in
PowerPoint, or you can create a custom background and apply it to one or more
slides.
Once you create a custom color scheme and slide background for
a presentation, you can save the presentation as a custom template so that it
can be used for other presentations.
d Discussion
A color scheme is a set
of eight colors that coordinate the colors in a presentation (such as
background, text, line, shadow, and accent colors). Color schemes can give a
presentation a consistent and harmonious appearance. All presentations
(including blank presentations) use a color scheme.
PowerPoint design templates include their own color schemes.
You can select a preset color scheme, or you can create your own custom color
scheme. You can change any color in a color scheme and apply the change to the
entire presentation or to individual slides.
You can also copy a color scheme from one presentation to
another.
|
|
|
|
o
|
You can also use color schemes to coordinate the
colors in charts and tables or to recolor pictures you have added to slides.
|
|
|
|
d Discussion
You can modify an existing
color scheme, select another preset color scheme,
or create your own color scheme. You can change any color in a color scheme and
apply the change to the entire presentation or to individual slides. You can
also apply another preset color scheme to the entire presentation or to
individual slides. For example, you can apply a preset color scheme to the
title slide without applying the color scheme to the rest of the slides in the
presentation.
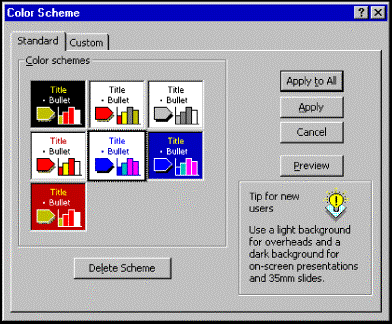
The Color Scheme dialog box
|
|
|
|
o
|
If you choose to preview the new color scheme from the
Color Scheme dialog box, the preview appears in the selected slide. If
necessary, you can move the Color Scheme dialog box to a different location
in order to see the preview of the color scheme in the presentation.
|
|
|
|
C Procedures
|
1. Select the slide using the color scheme you want to change.
|
|
2. Select the Format menu.
|
|
3. Select the Slide Color Scheme command.
|
|
4. Select the Standard tab.
|
|
5. Under Color schemes, select the desired color scheme.
|
|
6. Select Preview.
|
|
7. Select Apply.
|
f Step-by-Step
From the Student Data directory, open WORLD13.PPT.
Apply a color scheme to an individual
slide.
Switch to Slide Sorter view, if necessary.
|
Steps
|
Practice Data
|
|
1. Select the slide using the color scheme you
want to change.
The slide is selected.
|
Click slide 1, if necessary
|
|
2. Select the Format menu.
The Format menu appears.
|
Click Format
|
|
3. Select the Slide Color Scheme command.
The Color Scheme dialog box opens.
|
Click Slide Color Scheme...
|
|
4. Select the Standard tab.
The Standard page appears.
|
Click the Standard tab, if necessary
|
|
5. Under Color schemes, select the desired color scheme.
The color scheme is selected.
|
Click the color scheme in the middle of the second row
|
|
6. Select Preview.
The preview appears in the selected slide.
|
Click Preview
|
|
7. Select Apply.
The Color Scheme dialog box closes and the new color scheme is applied to
the selected slide.
|
Click Apply
|
d Discussion
If none of the standard color schemes meets your needs, you can create a custom
color scheme.
When creating a custom color scheme, you can change as many
elements in the color scheme as desired. Color scheme elements include Background,
Text & lines, Shadows, Title text, Fills, and
three different Accent colors. For example, you can select a preset
color scheme and then change the color of the title text that appears on the
selected slide.
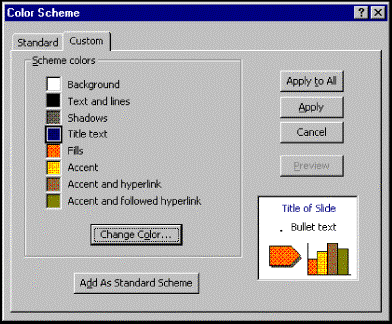
Customizing a color scheme
C Procedures
|
1. Select the slide using the color scheme you want to customize.
|
|
2. Select the Format menu.
|
|
3. Select the Slide Color Scheme command.
|
|
4. Select the Custom tab.
|
|
5. Under Scheme colors, select the color box for the element
you want to change.
|
|
6. Select Change Color.
|
|
7. Select the Standard tab.
|
|
8. Select the desired color.
|
|
9. Select OK.
|
|
10. Select Apply or Apply to All as desired.
|
f Step-by-Step
Customize a color scheme.
Switch to Slide Sorter view, if necessary.
|
Steps
|
Practice Data
|
|
1. Select the slide using the color scheme you
want to customize.
The slide is selected.
|
Click slide 2
|
|
2. Select the Format menu.
The Format menu appears.
|
Click Format
|
|
3. Select the Slide Color Scheme command.
The Color Scheme dialog box opens.
|
Click Slide Color Scheme...
|
|
4. Select the Custom tab.
The Custom page appears.
|
Click the Custom tab, if necessary
|
|
5. Under Scheme colors, select the color box for the element
you want to change.
The color box is selected.
|
Click the Title text color box
|
|
6. Select Change Color.
The Color dialog box for the selected slide element opens.
|
Click Change Color...
|
|
7. Select the Standard tab.
The Standard page appears.
|
Click the Standard tab, if necessary
|
|
8. Select the desired color.
The color is selected and a sample appears in the lower right corner of
the Color dialog box.
|
Click navy blue (last color on the first row of the
color hexagon)
|
|
9. Select OK.
The Color dialog box for the selected slide element closes.
|
Click OK
|
|
10. Select Apply or Apply to All as desired.
The Color Scheme dialog box closes and the customized color scheme is
applied to the selected slide only or to all the slides.
|
Click Apply
|
d Discussion
It is often quicker to apply a color scheme to a single slide when you are
previewing possible color schemes for a presentation. However, once you have
selected the desired color scheme, you should apply it to all the slides in the
presentation at once to ensure a uniform look.
|
|
|
|
o
|
You can also create a custom color scheme and apply it
to all the slides in a presentation.
|
|
|
|
C Procedures
|
1. Select any slide.
|
|
2. Select the Format menu.
|
|
3. Select the Slide Color Scheme command.
|
|
4. Select the Standard tab.
|
|
5. Under Color schemes, select the desired color scheme.
|
|
6. Select Apply to All.
|
f Step-by-Step
Apply a color scheme to all slides in a presentation.
Switch to Slide Sorter view, if necessary.
|
Steps
|
Practice Data
|
|
1. Select any slide.
The slide is selected.
|
Click slide 2, if necessary
|
|
2. Select the Format menu.
The Format menu appears.
|
Click Format
|
|
3. Select the Slide Color Scheme command.
The Color Scheme dialog box opens.
|
Click Slide Color Scheme...
|
|
4. Select the Standard tab.
The Standard page appears.
|
Click the Standard tab, if necessary
|
|
5. Under Color schemes, select the desired color scheme.
The color scheme is selected.
|
Click the color scheme in the middle of the second row
|
|
6. Select Apply to All.
The Color Scheme dialog box closes and the new color scheme is applied to
all the slides.
|
Click Apply to All
|
d Discussion
The slide background provides an attractive appearance and the
appropriate context for a presentation. You can customize a background for
professional, contemporary, or subject-specific presentations. You can apply
the background changes to a single slide or, for consistency throughout a
presentation, to all slides.
You can apply a variety of fill effects to the slide
background. You can add or change colors, shading, patterns, texture, or
pictures. For example, you can change the background fill of slides to a marble
texture or a checkerboard pattern.
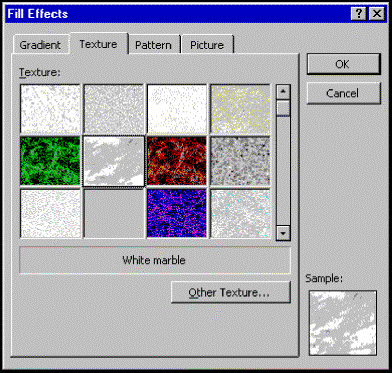
Customizing the slide background
C Procedures
|
1. Select any slide.
|
|
2. Select the Format menu.
|
|
3. Select the Background command.
|
|
4. Select the Background fill list.
|
|
5. Select Fill Effects to display additional fill effects.
|
|
6. Select the tab of the fill effect attribute you want to
customize.
|
|
7. Select the desired option.
|
|
8. Select OK.
|
|
9. Select Apply or Apply to all as desired.
|
f Step-by-Step
Customize the slide background.
|
Steps
|
Practice Data
|
|
1. Select any slide.
The slide is selected.
|
Click slide 1
|
|
2. Select the Format menu.
The Format menu appears.
|
Click Format
|
|
3. Select the Background command.
The Background dialog box opens.
|
Click Background...
|
|
4. Select the Background fill list.
A list of background fills appears.
|
Click Background fill 
|
|
5. Select Fill Effects to display additional fill effects.
The Fill Effects dialog box opens.
|
Click Fill Effects...
|
|
6. Select the tab of the fill effect attribute you want to
customize.
The appropriate page appears.
|
Click the Texture tab
|
|
7. Select the desired option.
The option is selected.
|
Click White Marble (second row, second column)
|
|
8. Select OK.
The Fill Effects dialog box closes and a preview of the background appears
in the slide in the Background dialog box.
|
Click OK
|
|
9. Select Apply or Apply to all as desired.
The Background dialog box closes and the customized slide background is
applied to the selected slide only or to all the slides.
|
Click Apply to all
|
d Discussion
Once you have made changes to or
customized the color scheme and slide background of a presentation, you can
save the changed presentation as a custom template. You can use this template
to create a new presentation or format an existing presentation. You can use
the Save As command to save a custom template.
Although you can save a custom template to any folder, you must
use the Look in list to locate the template when you want to apply it to
an existing presentation. If you store your custom template in either the program
files\microsoft office\templates or program files\microsoft
office\templates\presentation designs folders, PowerPoint will include it
in the New Presentation dialog box when you create a new presentation.
C Procedures
|
1. Select the File menu.
|
|
2. Select the Save As command.
|
|
3. Type a name for the template in the File name text box.
|
|
4. Select the Save as type list.
|
|
5. Select Presentation Template.
|
|
6. Select the folder where you want to store the template.
|
|
7. Select Save.
|
f Step-by-Step
Save a custom template.
|
Steps
|
Practice Data
|
|
1. Select the File menu.
The File menu appears.
|
Click File
|
|
2. Select the Save As command.
The Save As dialog box opens.
|
Click Save As…
|
|
3. Type a name for the template in the File name text box.
The name appears in the File name text box.
|
Type custom13
|
|
4. Select the Save as type list.
A list of file types appears.
|
Click Save as type 
|
|
5. Select Presentation Template.
Presentation Template appears in the Save as type box.
|
Click Presentation Template
|
|
6. Select the folder where you want to store the template.
The folder is selected.
|
Double-click Templates, if necessary
|
|
7. Select Save.
The Save As dialog box closes and the custom template is saved.
|
Click Save
|
Open Review13 and use the Apply Design dialog box to
apply the custom template to the existing presentation. If necessary, use the Look
in list to find the Templates folder. Close all open files without
saving the changes.
d Discussion
You can delete a custom template
that you created but no longer use. Deleting unused templates saves file
storage space and time spent looking through a long list of templates, many of
which you may not use anymore.
|
|
|
|
o
|
If you know the folder where a template is stored, you
can delete it using the shortcut menu in the Open dialog box in PowerPoint or
in Windows Explorer.
|
|
|
|
|
|
|
|
x
|
You cannot use the Undo feature to restore a
template you have accidentally deleted. However, if the template was deleted
to the Recycle Bin, you can use the Undo Delete command in the Recycle
Bin to restore the template.
|
|
|
|
C Procedures
|
1. Select the File menu.
|
|
2. Select the New command.
|
|
3. Select the tab where the icon for the custom template appears.
|
|
4. Click the right mouse button on the icon for the custom template
you want to delete.
|
|
5. Select the Delete command.
|
|
6. Select Yes to confirm the deletion.
|
f Step-by-Step
Delete a custom template.
|
Steps
|
Practice Data
|
|
1. Select the File menu.
The File menu appears.
|
Click File
|
|
2. Select the New command.
The New Presentation dialog box opens.
|
Click New...
|
|
3. Select the tab where the icon for the custom template appears.
The appropriate page appears.
|
Click the General tab, if necessary
|
|
4. Click the right mouse button on the icon for the custom template
you want to delete.
A shortcut menu appears.
|
Click the right mouse button on the Custom13 icon
|
|
5. Select the Delete command.
The Confirm File Delete message box opens.
|
Click Delete
|
|
6. Select Yes to confirm the deletion.
The Confirm File Delete message box closes, the custom template is
deleted, and the icon is removed from the appropriate page in the New
Presentation dialog box.
|
Click Yes
|
Select Cancel to close the New Presentation dialog box.
e Task
Apply a standard and custom color scheme to a presentation.
View available background patterns. Save a presentation as a custom template
and apply the template to an existing presentation.
|
1. Open Meetng13.
|
|
2. Switch to Slide Sorter view, if necessary.
|
|
3. Select a new, standard color scheme (second row, second column)
from the Color Scheme dialog box for slide 1 and preview it.
|
|
4. Apply a new color scheme (first row, first column) to slide 1.
|
|
5. Create a custom color scheme for the presentation by changing
the Title text of the color scheme used in slide 1 to a shade of red
(last row, last color on the color hexagon).
|
|
6. Apply the custom color scheme to all the slides in the
presentation.
|
|
7. Open the Fill Effects dialog box from the Background dialog box.
|
|
8. View the available background patterns on the Pattern page.
|
|
9. Close the Fill Effects and Background dialog boxes without
making any changes.
|
|
10. Run the slide show and view the new color scheme. Advance the
slide show, as necessary.
|
|
11. Save the file to the Templates folder as a presentation
template named Meettemp.
|
|
12. Open Train13 and apply the Meettemp template to the
presentation.
|
|
13. Close all open presentations without saving them.
|
|
14. Open the New Presentation dialog box and use the shortcut menu to
delete the Meettemp template. Close the New Presentation dialog box.
|
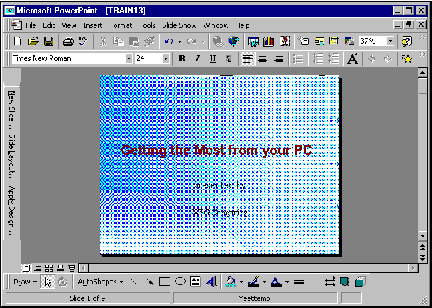
In this lesson, you will
learn how to:
·
Work with the slide master
·
Format the slide master
·
Add a slide placeholder
·
Work with the title master
·
Format the title master
·
Work with the notes master
·
Format the notes master
·
Add a notes placeholder
·
Format the handout master
·
Add a handout placeholder
·
Print handouts
d Discussion
The slide master controls the
overall look of the slides in a presentation. As you add slides to a
presentation, each new slide is automatically formatted according to the slide
master. The slide master can contain clip art or pictures, date and time
information, automatic slide numbering, and any other information you want to
appear on each slide in the presentation.
When you insert an object such as a clip art image or a picture
into the slide master, the object appears on all the slides in the presentation
except the title slide. For example, you can insert a picture of a globe on the
slide master and it will appear on all presentation slides, except the title
slide.
You can make changes to the slide master at any time-before
creating slides, as you create the presentation, or after you have finished
entering information. You can usually get a better idea of what you want to
include in the slide master after you have entered the information.
Although the slide master ensures a consistent look for your
presentation, every slide does not have to incorporate the slide master
formatting. You can make changes to individual slides. These modified slides
will retain the changes, even if you change the slide master. For example, you
can change the color scheme of a particular slide so that it is different than
the color scheme used in the slide master.
The slide master does not contain actual text. Rather, it
contains placeholder text. As a result, you cannot enter or edit text in the
slide master.
The different areas of the slide
master are listed in the following table:
|
Area
|
Description
|
|
Title
Area
|
The Title Area is located at
the top of the slide. You can change the attributes of the title text (font type,
font size, alignment, style, etc.), as well as the attributes of the Title
Area (fill, line, shadow, placement, etc.). If desired, you can insert
objects such as clip art into the Title Area.
|
|
Object Area
|
The Object Area is located in the body of the slide.
You can change text attributes (font type, font size, alignment, style,
etc.), as well as the attributes of the Object Area (fill, line, shadow,
placement, etc.). You can format each text level with different attributes.
If desired, you can insert objects such as clip art into the Object Area.
|
|
Date Area
|
The Date Area is located in the lower left corner of
the slide. You can change the look and position of the date. You can specify
that the date and time are automatically updated each time the presentation
is opened, or you can enter a fixed date and time. In addition, you can
choose whether or not to display the time and date on the title slide.
|
|
Footer Area
|
The Footer Area is located in the lower center of the
slide. You can change the look and position of the footer. You can choose
whether or not to display the footer text on the title slide.
|
|
Number Area
|
The Number Area is located in the lower right corner
of the slide. You can change the position of the slide numbering, as well as
the format of the numbers. You can choose whether or not to display the slide
number on the title slide.
|
d Discussion
In order to format the slide master, you must switch
to Slide Master view. Slide Master view displays placeholders for
the Title, Object, Date, Footer, and Number Areas.
In Slide Master view, you can change the font, add
graphics, and modify other attributes of the slides in the presentation.
If you make formatting changes to the slide master, the changes
are applied to all slides in the presentation, except the title slide. For
example, if you change the master slide title text to the bold format, the
title text on all presentation slides, except those based on the title slide,
will appear in the bold format.
Since the slide master contains only placeholder text, you
cannot add text to it. If you want specific text to appear on every slide, you
must insert a graphic object (in this case, a text box) to hold the text.
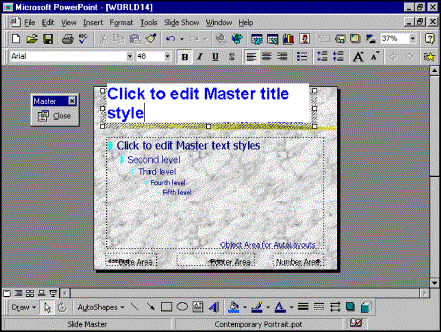
Slide Master view
|
|
|
|
o
|
When you hold the [Shift] key and switch to
different views using the View buttons to the left of the horizontal
scroll bar, the views become master views.
|
|
|
|
|
o
|
To switch to Slide Master view, you can also
select any slide except the title slide, hold the [Shift] key, click
the Slide Master button to the far left of the horizontal scroll bar,
and release the [Shift] key.
|
|
|
|
|
o
|
To exit Slide Master view, click the Close
button on the Master toolbar or any of the View buttons to the
left of the horizontal scroll bar.
|
|
|
|
C Procedures
|
1. Select the View menu.
|
|
2. Point to the Master command.
|
|
3. Select the Slide Master command.
|
|
4. Click in the desired area.
|
|
5. Format the selected area, as desired.
|
f Step-by-Step
From the Student Data directory, open WORLD14.PPT.
Format the slide master.
Switch to Slide Sorter view and select slide 2, if
necessary.
|
Steps
|
Practice Data
|
|
1. Select the View menu.
The View menu appears.
|
Click View
|
|
2. Point to the Master command.
The Master submenu appears.
|
Point to Master
|
|
3. Select the Slide Master command.
The slide master appears.
|
Click Slide Master
|
|
4. Click in the desired area.
The insertion point appears in the selected area.
|
Click in Click to edit Master title style
|
|
5. Format the selected area, as desired.
The slide master is formatted accordingly.
|
Click 
|
Format the title text in the Title Area of the slide master to
Arial, 48 points.
Switch to Slide Sorter view to view the changes. Notice
that the formatting is applied to all the slides in the presentation, except
the title slide.
d Discussion
If you want the date and time, a
footer, and slide numbers to appear in the presentation, you add them to the
slide master using the Header and Footer dialog box.
You can enter a fixed date and time, or you can choose an
automatic date and time that is updated each time the presentation is opened.
You can also select a date and time format.
If you add a footer, you must type the desired footer text in
the Footer text box.
The date and time, footer, and slide numbers are placeholders
that appear in every slide. If desired, you can select the Don’t show on
title slide option to prevent the placeholders from appearing on the title
slide.
You must switch to Slide Master view to change the font,
add graphics, or modify other attributes. You can assign different attributes
to each placeholder.
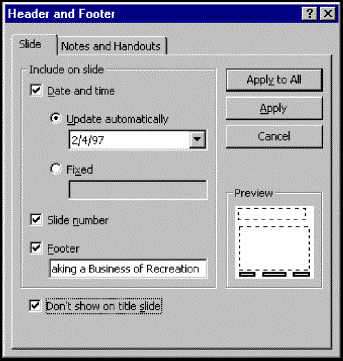
Adding placeholder information to the slide master
C Procedures
|
1. Select the View menu.
|
|
2. Select the Header and Footer command.
|
|
3. Select the Slide tab.
|
|
4. Select the desired options.
|
|
5. Select the Don’t show on title slide option to omit the
placeholder information on the title slide.
|
|
6. Select Apply or Apply to All as desired.
|
f Step-by-Step
Add placeholder information to the slide master.
Switch to Slide Sorter view and select slide 2, if
necessary.
|
Steps
|
Practice Data
|
|
1. Select the View menu.
The View menu appears.
|
Click View
|
|
2. Select the Header and Footer command.
The Header and Footer dialog box opens.
|
Click Header and Footer…
|
|
3. Select the Slide tab.
The Slide page appears.
|
Click the Slide tab, if necessary
|
|
4. Select the Date and time option.
The Date and time option is selected.
|
Click  Date and time Date and time
|
|
5. Select the Slide number option.
The Slide number option is selected.
|
Click  Slide number Slide number
|
|
6. Select the Update automatically option.
The Update automatically option is selected.
|
Click  Update automatically Update automatically
|
|
7. Select the Footer option.
The Footer option is selected.
|
Click  Footer Footer
|
|
8. Type the desired footer text.
The text appears in the Footer text box.
|
Type Making a Business of Recreation
|
|
9. Select the Don’t show on title slide option to omit the
placeholder information on the title slide.
The Don’t show on title slide option is selected.
|
Click  Don’t show on title slide Don’t show on title slide
|
|
10. Select Apply or Apply to All as desired.
The Header and Footer dialog box closes and the options are applied to the
selected slide only or to all the slides.
|
Click Apply to All
|
Notice that no options are applied to slide 1, the title slide.
d Discussion
The title master controls the look
of the title slide in a presentation. You can format text, or add clip art or
pictures to the title master. In addition, you can insert date and time
information, automatic slide numbering, and any other information you want to
appear on the title slide.
You can make changes to the title master at any time-before
you create the slide, as you create the presentation, or after you have
finished entering information. You can usually get a better idea of what you
want to include in the title master after you have entered all the information.
The title master does not contain actual text. Rather, it
contains placeholder text. As a result, you cannot enter or edit text in the
title master.
Since you can use the Title Slide layout for more than
one slide, formatting or objects that are included on the title master will
appear on all slides in the presentation using the Title Slide layout.
The different areas of the title
master are listed in the following table:
|
Area
|
Description
|
|
Title Area
|
The Title Area is located at
the top of the slide. You can change the attributes of the title text (font
type, font size, alignment, style, etc.), as well as the attributes of the
Title Area (fill, line, shadow, placement, etc.). If desired, you can insert
objects such as clip art into the Title Area.
|
|
Subtitle Area
|
The Subtitle Area is located below the Title Area. You
can change the attributes of the subtitle text (font type, font size,
alignment, style, etc.), as well as the attributes of the Subtitle Area
(fill, line, shadow, placement, etc.). If desired, you can insert objects
such as clip art into the Subtitle Area.
|
|
Date Area
|
The Date Area is located in the lower left corner of
the slide. You can change the look and position of the date. You can specify
that the date and time are automatically updated each time the presentation
is opened, or you can enter a fixed date and time. In addition, you can
choose whether or not to display the time and date on the title slide.
|
|
Footer Area
|
The Footer Area is located in the lower center of the
slide. You can change the look and position of the footer. You can choose
whether or not to display the footer text on the title slide.
|
|
Number Area
|
The Number Area is located in the lower right corner
of the slide. You can change the position of the slide numbering, as well as
the format of the numbers. You can choose whether or not to display the slide
number on the title slide.
|
d Discussion
In order to format the title master, you must switch
to Title Master view. Title Master view displays placeholders for
the Title, Subtitle, Date, Footer, and Number Areas. In Title Master
view, you can edit the different areas of the title slide.
In Title Master view, you change the font, add graphics,
and modify other attributes of the slides in the presentation.
Since the title master contains only placeholder text, you
cannot add text to it. If you want specific text to appear on the title slide,
you must insert a graphic object (in this case, a text box) to hold the text.
Changes made to the title master affect the title slide only;
the other slides in the presentation are not affected. For example, if you insert
a picture of a globe on the title master and not on the slide master, the globe
will appear only on the title slide.

Title Master view
|
|
|
|
o
|
When you hold the [Shift] key and switch to
different views using the View buttons to the left of the horizontal
scroll bar, the views become master views.
|
|
|
|
|
o
|
To switch to Title Master view, you can also
select the title slide, hold the [Shift] key, click the View Title
Master button to the far left of the horizontal scroll bar, and release
the [Shift] key.
|
|
|
|
|
o
|
To exit Title Master view, click the Close
button on the Master toolbar or any of the View buttons to the
left of the horizontal scroll bar.
|
|
|
|
C Procedures
|
1. Select the View menu.
|
|
2. Point to the Master command.
|
|
3. Select the Title Master command.
|
|
4. Click in the desired area.
|
|
5. Format the selected area, as desired.
|
f Step-by-Step
Format the title master.
Switch to Slide Sorter view and select slide 1, the
title slide, if necessary.
|
Steps
|
Practice Data
|
|
1. Select the View menu.
The View menu appears.
|
Click View
|
|
2. Point to the Master command.
The Master submenu appears.
|
Point to Master
|
|
3. Select the Title Master command.
The title master appears.
|
Click Title Master
|
|
4. Click in the desired area.
The insertion point appears in the selected area.
|
Click in Click to edit Master title style
|
|
5. Format the selected area, as desired.
The title master is formatted accordingly.
|
Click 
|
Switch to Slide Sorter view to view the changes. Notice
that the formatting is only applied to slide 1, the title slide.
d Discussion
The notes master defines the formatting for all
notes pages in a presentation. If you want specific text, pictures, or special
formatting to appear on all the notes pages in a presentation, you should add
them to the notes master.
You can make changes to the notes master at any time-before
creating notes, as you enter the notes, or after you have finished entering
information. You can usually get a better idea of what you want to include in
the notes master after you have entered all the notes information.
Since the notes master contains only placeholder text, you
cannot add text to it. If you want specific text to appear on every slide, you
must insert a graphic object (in this case, a text box) to hold the text.
The different areas of the notes master are
listed in the following table:
|
Area
|
Description
|
|
Header
Area
|
The Header Area is located in
the upper left corner of the notes page. You can change the look and position
of the header. You can choose whether or not to display the header on the
notes pages.
|
|
Date Area
|
The Date Area is located in the upper right corner of
the notes page. You can change the look and position of the date. You can
specify that the date and time are updated automatically on the notes pages,
or you can enter a fixed date and time.
|
|
Slide Image
|
An image of the slide appears in the upper portion of
the notes page. You cannot edit the slide image from the notes master or in Notes
Page view.
|
|
Notes Body Area
|
The Notes Body Area appears below the slide image on a
notes page. You can change the attributes of the notes text, including font
type, font size, alignment, and color. You can format each text level with
different attributes.
|
|
Footer Area
|
The Footer Area is located in the lower left corner of
the notes page. You can change the look and position of the footer.
|
|
Number Area
|
The Number Area is located in the lower right corner
of the notes page. You can change the position of the page numbering, as well
as the format of the numbers.
|
d Discussion
In order to format the notes master, you
must switch to Notes Master view. Notes Master view displays
placeholders for the Header, Date, Slide Image, Notes Body, Footer, and Number
Areas.
You can modify the notes master to create a uniform layout and
format for your notes. You can change the font, modify paragraph spacing, add
graphics, and change other attributes of the notes master. You can also assign
different attributes to each element of the notes master. The changes you make
to the notes master will affect all notes pages in a presentation. For example,
if you can change the format of a selected level of text in the notes master to
the italic format, the format of that level of text on all the notes pages will
appear in the italic format.
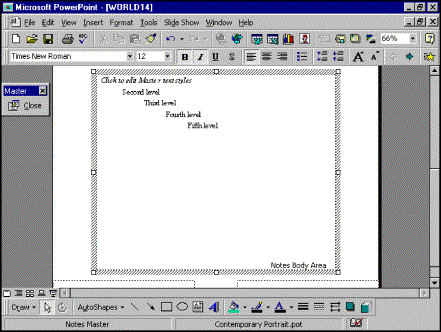
Notes Master view
|
|
|
|
o
|
When you hold the [Shift] key and switch to
different views using the View buttons to the left of the horizontal
scroll bar, the views become master views.
|
|
|
|
|
o
|
To switch to Notes Master view, you can also
select any slide, hold the [Shift] key, click the View Notes Master
button fourth from the left of the horizontal scroll bar, and release the
[Shift] key.
|
|
|
|
|
o
|
To exit Notes Master view, click the Close
button on the Master toolbar or any of the View buttons to the
left of the horizontal scroll bar.
|
|
|
|
|
o
|
In some cases, pre-existing text may not update
automatically. To update pre-existing text, click the Notes Layout
button on the Common Tasks toolbar and select the Reapply master option
while in Notes Page view.
|
|
|
|
C Procedures
|
1. Select the View menu.
|
|
2. Point to the Master command.
|
|
3. Select the Notes Master command.
|
|
4. Zoom the view, if necessary.
|
|
5. Click in the desired area.
|
|
6. Position the insertion point in the line of text you want to
format, if necessary.
|
|
7. Format the selected area, as desired.
|
f Step-by-Step
Format the notes master.
Switch to Slide Sorter view and select slide 2, if
necessary.
|
Steps
|
Practice Data
|
|
1. Select the View menu.
The View menu appears.
|
Click View
|
|
2. Point to the Master command.
The Master submenu appears.
|
Point to Master
|
|
3. Select the Notes Master command.
The notes master appears.
|
Click Notes Master
|
|
4. Select the Zoom list on the Standard toolbar.
A list of zoom options appears.
|
Click Zoom 
|
|
5. Select the desired zoom option.
The presentation zooms in or out.
|
Click 66%
|
|
6. Click in the desired area.
The desired area is selected.
|
Click in the Notes Body Area
|
|
7. Position the insertion point in the line of text you want to
format, if necessary.
The insertion point appears in the desired line of text.
|
Click in Click to edit Master text styles
|
|
8. Format the selected area, as desired.
The notes master is formatted accordingly.
|
Click 
|
Switch to Notes Page view to view the changes. Zoom the Notes
Page view to 33%.
If it becomes necessary to update pre-existing text, click the Notes
Layout button on the Common Tasks toolbar and select the Reapply
master option.
d Discussion
If you want the date and time, a header or
footer, and page numbers to appear on the notes pages, you can add them to the
notes master using the Header and Footer dialog box.
You can enter a fixed date and time, or you can choose an
automatic date and time that is updated on the notes pages each time the
presentation is opened. You can also select a date and time format.
If you add a header or footer, you must type the desired header
or footer text in the appropriate text box.
You must switch to Notes Master view to change the font,
add graphics, or modify other attributes. You can assign different attributes
to each placeholder in the notes master.
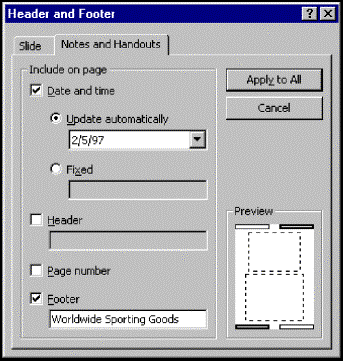
Adding placeholder information to the notes master
C Procedures
|
1. Select the View menu.
|
|
2. Select the Header and Footer command.
|
|
3. Select the Notes and Handouts tab.
|
|
4. Select the desired options.
|
|
5. Select Apply to All.
|
f Step-by-Step
Add placeholder information to the notes master.
Switch to Notes Page view, if necessary.
|
Steps
|
Practice Data
|
|
1. Select the View menu.
The View menu appears.
|
Click View
|
|
2. Select the Header and Footer command.
The Header and Footer dialog box opens.
|
Click Header and Footer…
|
|
3. Select the Notes and Handouts tab.
The Notes and Handouts page appears.
|
Click the Notes and Handouts tab, if necessary
|
|
4. Select the Date and time option.
The Date and time option is selected.
|
Click  Date and time, if necessary Date and time, if necessary
|
|
5. Select the Update automatically option.
The Update automatically option is selected.
|
Click  Update automatically, if
necessary Update automatically, if
necessary
|
|
6. Select the Footer option.
The Footer option is selected.
|
Click  Footer Footer
|
|
7. Type the desired footer text.
The text appears in the Footer text box.
|
Type Worldwide Sporting Goods
|
|
8. Select Apply to All.
The Header and Footer dialog box closes and the options are applied to the
notes master.
|
Click Apply to All
|
Zoom the Notes Page view to 25%. Click the Next Slide
button to view the header and footer on subsequent slides. Zoom the Notes
Page view to 33%.
d Discussion
Handouts are printed copies of a presentation that you can
distribute to the audience. The audience can use the handouts to take notes, or
they can refer to them after seeing the slide show.
The handout master determines the appearance of
all handout pages. Any text or graphic element you place in the handout master
appears on all handout pages.
In order to format the handout master, you must switch to Handout
Master view. Handout Master view displays placeholders for the
Title, Object, Date, Footer, and Number Areas. In Handout Master view,
you can edit the different areas and the changes will appear on the printed
handout pages.
You can also change the background color of the handout master.
Dotted lines on the handout master indicate the position and
relative size of the slides. The Handout Master toolbar allows you to
view the positioning of two, three, or six slides per page, or the positioning
of an outline.
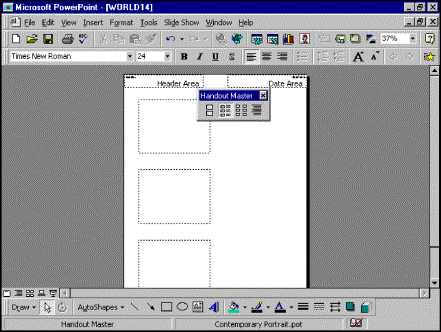
Handout Master view
|
|
|
|
o
|
When you hold the [Shift] key and switch to
different views using the View buttons to the left of the horizontal
scroll bar, the views become master views.
|
|
|
|
|
o
|
To switch to Handout Master view, you can also
select any slide, hold the [Shift] key, click the View Handout
Master button third from the left of the horizontal scroll bar, and
release the [Shift] key.
|
|
|
|
|
o
|
To exit Handout Master view, click the Close
button on the Master toolbar or any of the View buttons to the
left of the horizontal scroll bar.
|
|
|
|
|
o
|
You cannot display the actual handouts on the screen.
You can only view the printed handouts.
|
|
|
|
|
o
|
By default, the handout master contains all the
placeholders listed in the Handout Master Layout dialog box. To remove any of
these placeholders, you must delete them from the handout master. You can
access the Handout Master Layout dialog box from the Common Tasks
toolbar.
|
|
|
|
C Procedures
|
1. Select the View menu.
|
|
2. Point to the Master command.
|
|
3. Select the Handout Master command.
|
|
4. Select the desired button on the Handout Master toolbar.
|
f Step-by-Step
Format the handout master.
Switch to Slide Sorter view, if necessary.
|
Steps
|
Practice Data
|
|
1. Select the View menu.
The View menu appears.
|
Click View
|
|
2. Point to the Master command.
The Master submenu appears.
|
Point to Master
|
|
3. Select the Handout Master command.
Handout Master view appears.
|
Click Handout Master
|
|
4. Select the desired button on the Handout Master toolbar.
The corresponding handout positioning appears on the handout.
|
Click 
|
d Discussion
If you want the date and time, header
or footer, and page numbers to appear on the handouts, you can add them to the
handout master using the Header and Footer dialog box. Any options selected in
the Header and Footer dialog box appear on all handout pages. For example, you
can add a page number to the handout master so that all the printed handouts
will contain page numbers.
You can enter a fixed date and time, or you can choose an
automatic date and time that is updated on the handouts each time the
presentation is opened. You can also select a date and time format.
You must switch to Handout Master view to change the
font, add graphics, or modify other attributes. You can assign different attributes
to each placeholder in the handout master.
|
|
|
|
o
|
You cannot display the actual handouts on the screen.
You can only view the printed handouts.
|
|
|
|
C Procedures
|
1. Select the View menu.
|
|
2. Select the Header and Footer command.
|
|
3. Select the Notes and Handouts tab.
|
|
4. Select the desired options.
|
|
5. Select Apply or Apply to All as desired.
|
f Step-by-Step
Add placeholder information to the handout master.
Switch to Handout Master view, if necessary.
|
Steps
|
Practice Data
|
|
1. Select the View menu.
The View menu appears.
|
Click View
|
|
2. Select the Header and Footer command.
The Header and Footer dialog box opens.
|
Click Header and Footer…
|
|
3. Select the Notes and Handouts tab.
The Notes and Handouts page appears.
|
Click the Notes and Handouts tab, if necessary
|
|
4. Select the Header option.
The Header option is selected.
|
Click  Header Header
|
|
5. Type the desired header text.
The text appears in the Header text box.
|
Type Participant Copy
|
|
6. Select the Page number option.
The Page number option is selected.
|
Click  Page number Page number
|
|
7. Select Apply or Apply to All as desired.
The Header and Footer dialog box closes and the options are applied to the
selected handout only or to all the handouts.
|
Click Apply to All
|
d Discussion
The printed handouts display slide images that
appear smaller than the original slides. You can designate two, three, or six
slides per handout page. The more slides you designate, the smaller the slides
appear on the printed page.
When printing handouts, you must select a handouts option from
the Print what list. You should also select the Frames Slides
option, particularly if your slides are printed in black and white. Otherwise,
the white background of your slides will blend into the white paper.
|
|
|
|
o
|
You cannot display the actual handouts on the screen.
You can only view the printed handouts.
|
|
|
|
C Procedures
|
1. Select the File menu.
|
|
2. Select the Print command.
|
|
3. Select the Print what list.
|
|
4. Select the desired handouts print option.
|
|
5. Select the Frame Slides option.
|
|
6. Select OK.
|
f Step-by-Step
Print handouts of a presentation.
|
Steps
|
Practice Data
|
|
1. Select the File menu.
The File menu appears.
|
Click File
|
|
2. Select the Print command.
The Print dialog box opens.
|
Click Print...
|
|
3. Select the Print what list.
A list of print options appears.
|
Click Print what 
|
|
4. Select the desired handouts print option.
The print option appears in the Print what box.
|
Click Handouts (3 slides per page)
|
|
5. Select the Frame slides option.
The Frame slides option is selected.
|
Click  Frame slides, if necessary Frame slides, if necessary
|
|
6. Select OK.
The Print dialog box closes and PowerPoint prints the handouts.
|
Click OK
|
Close WORLD14.PPT.
e Task
Edit the slide, title, notes, and handout masters.
|
1. Open Meetng14.
|
|
2. Switch to Slide Master view.
|
|
3. Format the slide master title as Arial and bold.
|
|
4. Add the slide number and an automatic date to all the slides in
the slide master, except the title slide.
|
|
5. Switch to Slide Sorter view to view the changes.
|
|
6. Select the title slide and switch to Title Master view.
|
|
7. Center align the title master title.
|
|
8. Switch to Slide Sorter view to view the changes.
|
|
9. Switch to Notes Master view.
|
|
10. Add an automatic date and the footer Annual
Meeting to all the notes pages.
|
|
11. Switch to Notes Page view to view the changes. Zoom the
view to 66% and scroll, as necessary, to view the automatic date and footer.
Zoom the view back to 33%.
|
|
12. Switch to Handout Master view and show the positioning of
three handouts per page.
|
|
13. Add the header Technology Conference
to all the handouts.
|
|
14. Close the presentation without saving it.
|
In this lesson, you will
learn how to:
·
Use special effects
·
Select animation effects
·
Set custom animation
·
Select transition effects
·
Set slide transitions
·
Rehearse transition timings
·
Set up a slide show
·
Hide a slide
d Discussion
When you create a presentation in PowerPoint,
you automatically create a slide show. You can customize a slide show by adding
any of the special effects listed in the following table:
|
Special Effect
|
Description
|
|
Slide Timing
|
You can set the slide show to advance slides
automatically rather than manually. You can also designate the amount of time
each slide is displayed.
|
|
Slide Transitions
|
You can add transition effects to the slide show. For
example, you can add the Dissolve transition, which causes one slide
image to fall away in small pieces until the next slide is visible. PowerPoint
includes over 40 different transitions.
|
|
Text Introduction
|
You can display text in a selected slide object at
different levels. For example, you can select to introduce the text all at
once, a word at a time, or a letter at a time. You can also introduce text
according to the paragraph level you specify.
|
|
Animation and Sound Effects
|
You can apply a variety of animation and sound effects
to selected slide text or objects.
|
|
Hidden slides
|
Hidden slides do not appear when you run a slide show.
You can put more detailed information on a slide and hide it, using it in the
presentation only when desired.
|
|
|
|
|
o
|
It is beneficial to view the slides in Slide Sorter
view before you add transitions, timings, and alter text introduction so that
you can see the slides and their effects.
|
|
|
|
d Discussion
Animation effects control when and how text
appears on a slide during a presentation. Effects such as motion, direction,
and sound add interest to a slide and capture the attention of the audience.
The Animation Effects toolbar contains a variety of
effects you can apply to selected slide objects. For example, you can apply the
Drop In animation effect to a selected text block. During a slide show,
the text will “drop” onto the slide one word at a time.
You can also animate graphics, sounds, movies, and other slide
objects

The Animation Effects toolbar
|
|
|
|
o
|
You also can apply animation effects from the Custom
Animation dialog box.
|
|
|
|
C Procedures
|
1. Switch to Slide view.
|
|
2. Go to the slide containing the object you want to animate.
|
|
3. Select the object you want to animate.
|
|
4. Click the Animation Effects button  on the Formatting toolbar. on the Formatting toolbar.
|
|
5. Click the desired effect.
|
f Step-by-Step
From the Student Data directory, open WORLD15.PPT.
Select animation effects for an
object.
Switch to Slide view and go to slide 1, if necessary.
|
Steps
|
Practice Data
|
|
1. Select the object you want to animate.
The object is selected.
|
Click in the Worldwide
Sporting Goods text box
|
|
2. Click the Animation Effects button on the Formatting
toolbar.
The Animation Effects toolbar appears.
|
Click 
|
|
3. Click the desired effect.
The desired effect is applied to the object.
|
Click 
|
Preview the slide in Slide Show view. Press [Spacebar]
to advance the animation. Exit the slide show after you have viewed the applied
effect.
d Discussion
In addition to applying animation
effects to an object, you can build a slide with individual lines of text and
special effects. The Custom Animation feature provides a range of
animation effects, text introduction, and appearance options. For example, you
can apply the Fly From Bottom custom effect to a selected text block so
that during a slide show, the text will appear to “fly” quickly onto the slide
from the bottom.

The Custom Animation dialog box
|
|
|
|
o
|
In order to use the Custom Animation feature,
you must first select the object you want to animate.
|
|
|
|
C Procedures
|
1. Switch to Slide view.
|
|
2. Display the Animation Effects toolbar.
|
|
3. Go to the slide containing the object you want to animate.
|
|
4. Select the object you want to animate.
|
|
5. Click the Custom Animation button  on the Animation Effects toolbar. on the Animation Effects toolbar.
|
|
6. Select the Effects tab.
|
|
7. Select the Entry animation and sound list.
|
|
8. Select the desired option.
|
|
9. Select the After animation list.
|
|
10. Select the desired option.
|
|
11. Select or deselect the desired options under Introduce text.
|
|
12. Select OK.
|
f Step-by-Step
Set custom animation options.
Switch to Slide view, go to slide 2, and display the Animation
Effects toolbar, if necessary.
|
Steps
|
Practice Data
|
|
1. Select the object you want to animate.
The object is selected.
|
Click in the bulleted list text
block
|
|
2. Click the Custom Animation button on the Animation
Effects toolbar.
The Custom Animation dialog box opens.
|
Click 
|
|
3. Select the Effects tab.
The Effects page appears.
|
Click the Effects tab
|
|
4. Select the Entry animation and sound list.
A list of effects appears.
|
Click Entry animation and sound 
|
|
5. Select the desired option.
The option is selected.
|
Click Fly From Bottom
|
|
6. Select the After animation list.
A list of options appears.
|
Click After animation 
|
|
7. Select the desired option.
The option is selected.
|
Click Follow Text and Lines Scheme Color
(first row, second column)
|
|
8. Select the desired option under Introduce text.
The option is selected.
|
Click  Grouped by 1st level paragraphs,
if necessary Grouped by 1st level paragraphs,
if necessary
|
|
9. Select or deselect any additional options under Introduce
text.
The options are selected or deselected.
|
Click  In reverse order to
deselect it, if necessary In reverse order to
deselect it, if necessary
|
|
10. Select OK.
The Custom Animation dialog box closes and the custom animation options
are set.
|
Click OK
|
Apply the same custom animation settings to the bulleted list
text block on slide 5.
Close the Animation Effects toolbar.
Go to slide 1 and run the slide show to see the effects. Press [Spacebar]
to advance the animation and the slides.
d Discussion
Slide transition effects control how a slide appears
during a slide show.
Slides can appear in pieces, in strips, or all at once. They
can slide or wipe onto a screen diagonally, horizontally, or vertically. They
can uncover from various directions. You can choose from more than forty
transition effects. For example, you can choose the Fade Through Black
transition effect for a selected slide so that the slide fades to black before
advancing to the next slide.
In order to select a slide transition effect, you must first
select the slide to which you want to add the transition effect.
|
|
|
|
o
|
In Slide Sorter view, icons appear beneath each
slide. The specific transition effects for the selected slide appear on the Slide
Sorter toolbar. You can click the small icon below a slide to view its
transition effects.
|
|
|
|
C Procedures
|
1. Switch to Slide Sorter view.
|
|
2. Select the slide to which you want to
add transition effects.
|
|
3. Select the Slide Transition Effects list on the Slide
Sorter toolbar.
|
|
4. Select the desired transition effect.
|
f Step-by-Step
Select slide transition effects.
Switch to Slide Sorter view, if necessary.
|
Steps
|
Practice Data
|
|
1. Select the slide to which you want to add
transition effects.
The slide is selected.
|
Click slide 4
|
|
2. Select the Slide Transition Effects list on the Slide
Sorter toolbar.
A list of slide transition effects appears.
|
Click Slide Transition Effects 
|
|
3. Select the desired transition effect.
The slide transition effect is selected and the option is applied to the
selected slide.
|
Scroll as necessary and click Dissolve
|
Apply the Fade Through Black slide transition effect to
slides 6, 7, and 8.
Click the icon under each slide to view the transition effects.
Select slide 1 and run the slide show to see the effects. Press [Spacebar]
to advance the animation and the slides.
d Discussion
After selecting a slide
transition effect, you can use the Slide Transition dialog box to set the speed
at which the transition occurs. When you change the transition speed, a preview
box illustrates the transition and the timing.
You can also set the transition to advance to the next slide
automatically after a selected period of time, as well as add optional sound
effects to the transition.
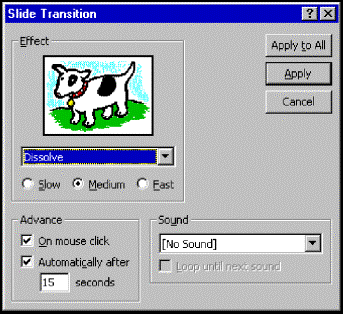
The Slide Transition dialog box
|
|
|
|
o
|
In order for a slide show to run automatically using
preset slide timings, you must select the Using timing, if present
option in the Set Up Show dialog box before running the slide show.
|
|
|
|
C Procedures
|
1. Switch to Slide Sorter view.
|
|
2. Select the slide to which you want
to add transition settings.
|
|
3. Click the Slide Transition button  on the Slide Sorter toolbar. on the Slide Sorter toolbar.
|
|
4. Under Effect, select the desired option.
|
|
5. Under Advance, select the desired option.
|
|
6. Type the desired number of seconds in the seconds text
box.
|
|
7. Select Apply or Apply to All as desired.
|
f Step-by-Step
Set slide transitions.
Switch to Slide Sorter view, if necessary.
|
Steps
|
Practice Data
|
|
1. Select the slide to which you want to add
transition settings.
The slide is selected.
|
Click slide 4
|
|
2. Click the Slide Transition button on the Slide Sorter
toolbar.
The Slide Transition dialog box opens.
|
Click 
|
|
3. Under Effect, select the desired option.
The option is selected.
|
Click  Medium Medium
|
|
4. Under Advance, select the desired option.
The option is selected.
|
Click  Automatically after Automatically after
|
|
5. Type the desired number of seconds in the seconds text
box.
The number appears in the seconds text box.
|
Type 15
|
|
6. Select Apply or Apply to All as desired.
The Slide Transition dialog box closes and the options are applied to the
selected slide only or to all the slides.
|
Click Apply
|
Notice that the slide timing appears next to the icon below
slide 4.
d Discussion
You can create a slide show in which the
animation effects and transitions advance automatically after a set period of
time. You can manually enter the transition time for each animation effect or
slide transition, or you can use the rehearsal feature to set timings
automatically.
In addition, you can use the rehearsal feature to adjust slide
timings manually or set new timings for a slide.
If you choose to rehearse the slide timings, the slide show
begins and the Rehearsal dialog box opens in the lower right corner of the
screen. The timer begins automatically. You click the Advance button to
execute the animation effects in the current slide and to move to the next
slide when the current slide has been completely displayed. You can click the Pause
button to pause the timer, or you can click the Repeat button to reset
the timer to zero for the current slide in order to rehearse it again.

Rehearsing slide transition timings
C Procedures
|
1. Switch to Slide Sorter view.
|
|
2. Click the Rehearse Timings
button  on the Slide Sorter toolbar. on the Slide Sorter toolbar.
|
|
3. To pause the timer, click the Pause button.
|
|
4. To end a pause and continue the timer, click the Pause
button again.
|
|
5. To reset the timer for the current slide, click Repeat.
|
|
6. Click the Advance button as needed to set the animation
effects and slide timings for the presentation.
|
|
7. After you have viewed the last slide, select Yes to
accept the slide timings.
|
|
8. Select Yes to review the timings in Slide Sorter
view.
|
f Step-by-Step
Rehearse slide transition
timings.
Switch to Slide Sorter view, if necessary.
|
Steps
|
Practice Data
|
|
1. Click the Rehearse Timings button on
the Slide Sorter toolbar.
The slide show begins and the Rehearsal dialog box opens in the lower
right corner of the screen.
|
Click 
|
|
2. To pause the timer, click the Pause button again.
The timer stops running.
|
Click 
|
|
3. To end a pause and continue the timer, click the Pause
button again.
The timer continues running.
|
Click 
|
|
4. To reset the timer for the current slide, click Repeat.
The timer is reset to zero.
|
Click Repeat
|
|
5. Click the Advance button as needed to set the animation
effects and slide timings for the presentation.
The animation effects or slides appear until a Microsoft PowerPoint
message box opens.
|
Click  as necessary as necessary
|
|
6. After you have viewed the last slide, select Yes to
record the slide timings.
The first Microsoft PowerPoint message box closes and a second Microsoft
PowerPoint message box opens.
|
Click Yes
|
|
7. Select Yes to review the timings in Slide Sorter
view.
The second Microsoft PowerPoint message box closes and the slide
timings appear below the slides.
|
Click Yes
|
d Discussion
Once you have added animation effects
and transitions, you can run the slide show automatically, using the timings
you have previously set.
In order to run a slide show automatically and select other
related options, you should open the Set Up Show dialog box. In this dialog
box, you can designate the type of show you want to set up.
In the Set Up Show dialog box, you can select from several
options, including the range of slides you want to appear in the slide show and
whether to run a manual or a timed slide show. You can also choose to run a
slide show continuously, run it without narration or animation, and select a
pen color for annotations.

The Set Up Show dialog box
|
|
|
|
o
|
If you previously rehearsed and recorded slide timings
for use when you run the slide show, the Using timings, if present
option will be selected as the default under Advance slides in the Set
Up Show dialog box.
|
|
|
|
C Procedures
|
1. Select the Slide Show menu.
|
|
2. Select the Set Up Show command.
|
|
3. Under Show type, select the type of slide show you want
to set up.
|
|
4. Under Slides, select the desired option.
|
|
5. Under Advance slides, select a slide advance option.
|
|
6. Select OK.
|
f Step-by-Step
Set up a slide show to run
automatically.
|
Steps
|
Practice Data
|
|
1. Select the Slide Show menu.
The Slide Show menu appears.
|
Click Slide Show
|
|
2. Select the Set Up Show command.
The Set Up Show dialog box opens.
|
Click Set Up Show...
|
|
3. Under Show type, select the type of slide show you want
to set up.
The type of show is selected.
|
Click  Presented by a speaker (full screen), if necessary Presented by a speaker (full screen), if necessary
|
|
4. Under Slides, select the desired option.
The option is selected.
|
Click  All, if necessary All, if necessary
|
|
5. Under Advance slides, select a slide advance option.
A slide advance option is selected.
|
Click  Using timings, if present, if
necessary Using timings, if present, if
necessary
|
|
6. Select OK.
The Set Up Show dialog box closes and the options to run the slide show
are automatically set.
|
Click OK
|
Run the slide show.
d Discussion
Normally, when you give a presentation, every slide in the presentation
appears. However, there may be times when you do not want to show all the
slides to the audience.
Although you can hide slides in any view, Slide Sorter
view is recommended. In Slide Sorter view, all hidden slides display a
hidden slide indicator and, as a result, are easy to identify.
|
|
|
|
o
|
In Slide Sorter view, you can also use the Hide
Slide button on the Slide Sorter toolbar to hide or unhide a
slide.
|
|
|
|
C Procedures
|
1. In any view, go to the
slide you want to hide.
|
|
2. Select the Slide Show menu.
|
|
3. Select the Hide Slide command.
|
f Step-by-Step
Hide a slide.
Switch to Slide Sorter view, if necessary.
|
Steps
|
Practice Data
|
|
1. Go to the slide you want to hide.
The slide is selected.
|
Click slide 5
|
|
2. Select the Slide Show menu.
The Slide Show menu appears.
|
Click Slide Show
|
|
3. Select the Hide Slide command.
The Hide Slide command is selected and the slide is
set to be hidden during the slide show.
|
Click Hide Slide
|
Switch to Slider Sorter view, if necessary. Notice that
a hidden slide icon appears under slide 5.
Select slide 1 and run the slide show. Notice that the hidden
slide does not appear in the slide show.
In Slide Sorter view, select slide 5 and click
the Hide Slide button on the Slide Sorter toolbar to
unhide the slide.
Close WORLD15.PPT.
e Task
Design a slide show with animation effects, transition effects,
and automatic timings.
|
1. Open Meetng15.
|
|
2. Go to slide 2 in Slide view and select the bulleted list
text block. Use the Drop In button on the Animation Effects toolbar
to animate the text. Close the Animation Effects toolbar.
|
|
3. Go to slide 4 in Slide view. Select the bulleted list
text block. From the Effects page in the Custom Animation dialog box,
add the Blinds Horizontal entry animation effect and introduce text
grouped by first level paragraphs.
|
|
4. Go to slide 8 in Slide view. Select the bulleted list
text block and select the same effects as slide 4.
|
|
5. Switch to Slide Sorter view.
|
|
6. Set the following transition effects for the slides indicated
below:
|
|
Slide
|
Effect
|
|
1
|
Random Bars Vertical
|
|
5
|
Strips Left-Down
|
|
6
|
Box In
|
|
7
|
Checkerboard Across
|
|
7. Rehearse the slide show to set the slide timings.
|
|
8. Hide slide 10.
|
|
9. Set up the show to loop continuously until [Esc] is
pressed and show all the slides using the slide timings you set. Make sure
that the Show without animation option is not selected.
|
|
10. Go to slide 1. Run the slide show using the automatic timings.
Press [Esc] to exit the loop.
|
|
11. Close the presentation without saving it.
|
In this lesson, you will
learn how to:
·
Create a custom show
·
Jump to another presentation
·
Use the Slide Finder
·
Expand a slide
·
Create a summary slide - Slide Sorter
d Discussion
You can create a custom presentation for
several audiences using PowerPoint's Custom Shows feature. You can
create one presentation that contains all the slides, and then group them into
several named subsets for different audiences. You can specify a custom order
for each slide show and display individual slides in multiple shows.
For example, you can create one presentation that contains a
general slide show which applies to all departments in a company and two
separate custom shows, one for the sales department and one for the marketing
department. You can show the general slide show and then jump to the custom
show that is specific to the individual department.
You can preview a custom show from the Custom Shows dialog box.
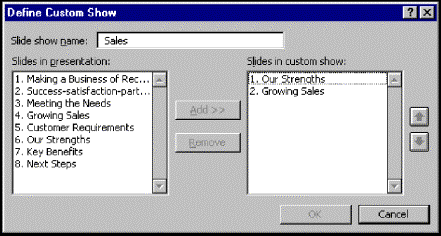
Creating a custom show
C Procedures
|
1. Select the
Slide Show menu.
|
|
2. Select the Custom Shows command.
|
|
3. Select New.
|
|
4. Type a name for the custom show in the Slide show name
text box.
|
|
5. Select the first slide you want to include in the show.
|
|
6. Select Add.
|
|
7. Select any additional slides you want to include in the custom
show.
|
|
8. Select Add.
|
|
9. Select a slide in the Slides in custom show list box.
|
|
10. Remove or rearrange the slide, as desired.
|
|
11. Select OK.
|
|
12. Select Show to preview the custom show.
|
|
13. Select Close to close the Custom Shows dialog box.
|
f Step-by-Step
From the Student Data directory, open WORLD16.PPT.
Create a custom show.
|
Steps
|
Practice Data
|
|
1. Select the Slide Show menu.
The Slide Show menu appears.
|
Click Slide Show
|
|
2. Select the Custom Shows command.
The Custom Shows dialog box opens.
|
Click Custom Shows...
|
|
3. Select New.
The Define Custom Show dialog box opens.
|
Click New...
|
|
4. Type a name for the custom show in the Slide show name
text box.
The name appears in the Slide show name text box.
|
Type Sales
|
|
5. Select the first slide you want to include in the show.
The slide is selected.
|
Click 4. Growing Sales
|
|
6. Select Add.
The slide appears in the Slides in custom show list box.
|
Click Add >>
|
|
7. Select any additional slides you want to include in the custom
show.
The slides are selected.
|
Click 6. Our Strengths
|
|
8. Select Add.
The slide appears in the Slides in custom show list box.
|
Click Add >>
|
|
9. Select a slide in the Slides in custom show list box.
The slide is selected.
|
Click 1. Growing Sales
|
|
10. Remove or rearrange the slide, as desired.
The slide is removed or rearranged.
|
Click 
|
|
11. Select OK.
The Define Custom Show dialog box closes.
|
Click OK
|
|
12. Select Show to preview the custom show.
PowerPoint runs the custom show.
|
Click Show
|
|
13. Select Close to close the Custom Shows dialog box.
The Custom Shows dialog box closes and the custom show is created.
|
Click Close
|
Create another custom show named Marketing. Add 5.
Customer Requirements as the first slide and 4. Growing Sales as
the second slide.
Preview the new custom show. Close the Custom Shows dialog box.
Close WORLD16.PPT.
d Discussion
You can create a hyperlink to a different presentation. Linking to other
presentations allows you to cover various topics, provide further details as
requested by the audience, or ensure that you have enough material for the
presentation.
You can create hyperlinks to more than one presentation. If you
do not click the hyperlink text or object, the slide show ignores it and
continues with the next slide in the regular sequence.
|
|
|
|
o
|
Once you click hyperlink text during a slide show, the
text changes to another color.
|
|
|
|
|
o
|
Objects that are set as hyperlinks to other
presentations do not appear highlighted.
|
|
|
|
|
|
|
|
x
|
If you use more than one computer to give a presentation
that contains a hyperlink to another file or presentation, select the Use
relative path option so that the absolute location of the hyperlink will
not be embedded.
|
|
|
|
C Procedures
|
1. Switch to
Slide view.
|
|
2. Go to the slide on which you
want to create a hyperlink.
|
|
3. Select the object you want to use to initiate the hyperlink.
|
|
4. Select the Slide Show menu.
|
|
5. Select the Action Settings command.
|
|
6. Select the Mouse Click tab.
|
|
7. Select the Hyperlink to option.
|
|
8. Select the Hyperlink to list.
|
|
9. Select Other PowerPoint Presentation.
|
|
10. Select the Look in list.
|
|
11. Select the drive where the desired file is located.
|
|
12. Select the folder where the desired file is located.
|
|
13. Select the desired file.
|
|
14. Click OK to close the Hyperlink to Other PowerPoint
Presentation dialog box.
|
|
15. Select the slide to which you want to link.
|
|
16. Select OK to close the Hyperlink To Slide dialog box.
|
|
17. Select the Use relative path for hyperlink option.
|
|
18. Select OK to close the Action Settings dialog box.
|
f Step-by-Step
From the Student Data directory, open WORLD16c.PPT.
Jump to another presentation.
Switch to Slide view and go to slide 2, if necessary.
|
Steps
|
Practice Data
|
|
1. Select the object you want to use to
initiate the hyperlink.
The object is selected.
|
Click the title text Success
|
|
2. Select the Slide Show menu.
The Slide Show menu appears.
|
Click Slide Show
|
|
3. Select the Action Settings command.
The Action Settings dialog box opens.
|
Click Action Settings...
|
|
4. Select the Mouse Click tab.
The Mouse Click page appears.
|
Click the Mouse Click tab, if necessary
|
|
5. Select the Hyperlink to option.
The Hyperlink to option is selected.
|
Click  Hyperlink to Hyperlink to
|
|
6. Select the Hyperlink to list.
A list of options appears.
|
Click Hyperlink to 
|
|
7. Select Other PowerPoint Presentation.
The Hyperlink to Other PowerPoint Presentation dialog box opens.
|
Click Other PowerPoint Presentation...
|
|
8. Select the Look in list.
A list of available drives appears.
|
Click Look in 
|
|
9. Select the drive where the desired file is located.
A list of available folders appears.
|
Click the student data drive
|
|
10. Select the folder where the desired file is located.
A list of files in the folder appears.
|
Double-click to select the student data folder
|
|
11. Select the desired file.
The file is selected and a preview of the first slide appears next to the
list of files.
|
Review16
|
|
12. Select OK to close the Hyperlink to Other PowerPoint
Presentation dialog box.
The Hyperlink to Other PowerPoint Presentation dialog box closes and the
Hyperlink To Slide dialog box opens.
|
Click OK
|
|
13. Select the slide to which you want to link.
The slide is selected.
|
Scroll, if necessary, and click 12. Key Spending
Areas
|
|
14. Select OK to close the Hyperlink to Slide dialog box.
The Hyperlink To Slide dialog box closes.
|
Click OK
|
|
15. Select the Use relative path for hyperlink option.
The Use relative path for hyperlink option is selected.
|
Click  Use relative path for hyperlink Use relative path for hyperlink
|
|
16. Select OK to close the Action Settings dialog box.
The Action Settings dialog box closes and the hyperlink text appears
underlined and in a different color.
|
Click OK
|
Go to slide 1 and run the slide show. When you reach slide 2,
click the hyperlink text, Success, to jump to the other presentation.
Press [Esc] to return to the original slide show. Press [Esc] again
to exit the slide show.
d Discussion
The Slide Finder allows you to search
for a particular slide from several existing
presentations without having to open the presentations. You can use the Slide
Finder to find, preview, and insert slides from existing presentations. You can
copy selected slides or an entire presentation to insert into the current
presentation. For example, you know that an existing presentation has one or
more slides that may be worthwhile to use in your presentation. You can use the
Slide Finder to locate the desired slides and copy them to the current
presentation.
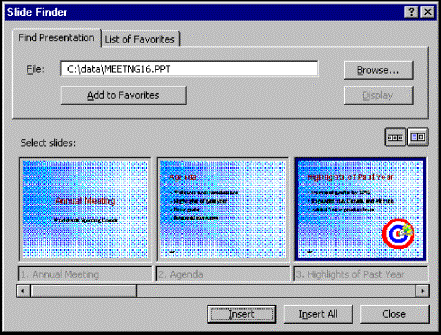
The Slide Finder dialog box
|
|
|
|
o
|
You can select the Insert All button in the
Slide Finder dialog box to copy every slide in the selected file to the
current presentation.
|
|
|
|
|
o
|
If you think you might use slides from a particular
presentation in several other presentations, you can click the Add to
Favorites button in the Slide Finder dialog box. This button adds the
presentation to your list of favorite presentations.
|
|
|
|
C Procedures
|
1. Select the slide in the current presentation after which you want to insert another slide.
|
|
2. Select the Insert menu.
|
|
3. Select the Slides from File command.
|
|
4. Select the Find Presentation tab.
|
|
5. Select Browse.
|
|
6. Select the Look in list.
|
|
7. Select the drive where the desired file is located.
|
|
8. Select the folder where the desired file is located.
|
|
9. Select the desired file.
|
|
10. Select Open.
|
|
11. Select Display to display the slides in the Slide Finder.
|
|
12. Click the scroll right arrow on the scroll bar to view additional
slides.
|
|
13. Click a slide to select it.
|
|
14. Select Insert to insert the selected slide.
|
|
15. Select Close to close the Slide Finder dialog box.
|
f Step-by-Step
Use Slide Finder to
copy a slide from one presentation to
another.
Switch to Slide Sorter view, if necessary.
|
Steps
|
Practice Data
|
|
1. Select the slide in the current
presentation after which you want to insert another slide.
The slide is selected.
|
Click slide 4
|
|
2. Select the Insert menu.
The Insert menu appears.
|
Click Insert
|
|
3. Select the Slides from Files command.
The Slide Finder dialog box opens.
|
Click Slides from Files...
|
|
4. Select the Find Presentation tab.
The Find Presentation page appears.
|
Click the Find Presentation tab, if necessary
|
|
5. Select Browse.
The Insert Slides From Files dialog box opens.
|
Click Browse...
|
|
6. Select the Look in list.
A list of available drives appears.
|
Click Look in 
|
|
7. Select the drive where the desired file is located.
A list of available folders appears.
|
Click the student data drive
|
|
8. Select the folder where the desired file is located.
A list of files in the folder appears.
|
Double-click to select the student data folder
|
|
9. Select the desired file.
The file is selected.
|
Meetng16
|
|
10. Select Open.
The Insert Slides From Files dialog box closes and the presentation
name and path appear in the File text box of the Slide Finder dialog
box.
|
Click Open
|
|
11. Select Display to display the slides in the Slide Finder.
The first three slides preview under Select slides.
|
Click Display
|
|
12. Click the scroll right arrow on the scroll bar to view additional
slides.
Additional slides appear in the preview.
|
Click 
|
|
13. Click a slide to select it.
A dark border appears around the selected slide.
|
Click slide 3. Highlights of Past Year
|
|
14. Select Insert to insert the selected slide.
The slide is inserted into the presentation.
|
Click Insert
|
|
15. Select Close to close the Slide Finder dialog box.
The Slide Finder dialog box closes and the slide appears in the
presentation.
|
Click Close
|
Notice that the slide is inserted after slide 4.
d Discussion
You can use the Expand Slide command to automatically expand
paragraphs or crowded bullet points on one slide to multiple slides. Each
paragraph or top-level bullet point in the bulleted list becomes a title on a
new slide. The subpoints from the original bulleted list become bullets on the
corresponding new slides.
The Expand Slide command is useful if you want to break
out the original bullet points or paragraphs so that they become separate
topics on individual slides. For example, if a slide contains several bullet
points that list the steps needed to complete a process, you can expand the
slide so that each step is addressed in an individual slide. When you expand a
slide, the original slide remains intact.
|
|
|
|
o
|
You should use the Expand Slide command on Slide
Sorter or Outline view to automatically see the new slides created
from an expansion.
|
|
|
|
C Procedures
|
1. Switch to Slide Sorter or Outline
view.
|
|
2. Select the slide you want to expand.
|
|
3. Select the Tools menu.
|
|
4. Select the Expand Slide command.
|
f Step-by-Step
Expand a slide into several slides.
Switch to Slide Sorter view, if necessary.
|
Steps
|
Practice Data
|
|
1. Select the slide you want to expand.
The slide is selected.
|
Click slide 9
|
|
2. Select the Tools menu.
The Tools menu appears.
|
Click Tools
|
|
3. Select the Expand Slide command.
Each paragraph or top-level bullet point on the selected slide appears as
a title on a new slide.
|
Click Expand Slide
|
If necessary, scroll down to view the newly created slides.
d Discussion
You can wrap up a presentation by creating a
single summary slide. The Summary Slide button on the Slide Sorter toolbar
allows you to create a summary slide using slide titles from a selection of
slides. For example, you can select slides that address the major topics of a
presentation and use the Summary Slide button to create a summary slide
from those slides only.
The summary slide contains bulleted titles from the selected
slides. PowerPoint inserts the summary slide in front of the first selected
slide.
|
|
|
|
o
|
You can create a summary slide for use as an agenda
slide.
|
|
|
|
|
o
|
You can create a hyperlinked table of contents by
creating links from each slide title on the summary slide to its corresponding
slide number. Then, you can easily jump to a slide by clicking the
appropriate title on the summary slide.
|
|
|
|
C Procedures
|
1. Switch to Slide Sorter or Outline
view.
|
|
2. Select the first slide title you
want to include on the summary slide.
|
|
3. Hold [Shift], click any additional slide titles you want
to include, and release [Shift].
|
|
4. Click the Summary Slide button  on the Slide Sorter or Outlining
toolbar. on the Slide Sorter or Outlining
toolbar.
|
f Step-by-Step
Create a summary slide from selected slide
titles.
Switch to Slide Sorter view, if necessary.
|
Steps
|
Practice Data
|
|
1. Select the first slide title you want to
include on the summary slide.
The slide is selected.
|
Click slide 2
|
|
2. Hold [Shift], click any additional slide titles you want
to include, and release [Shift].
The slide(s) are selected.
|
Hold [Shift], click slides 3 through 9, and
release [Shift]
|
|
3. Click the Summary Slide button on the Slide Sorter
or Outlining toolbar.
The summary slide appears in the presentation.
|
Click 
|
Notice that the summary slide is inserted before slide 2.
Close WORLD16c.PPT.
e Task
Create a custom show for a single department. Add hyperlinks to
other slides and presentations. Find, insert, and expand slides. Create a
summary slide.
|
1. Open Meetng16.
|
|
2. Create a custom show named Finance. Include the following
slides in the custom show:
|
|
Slide
|
Title
|
|
5
|
Financial Overview
|
|
6
|
Financial Overview
|
|
7
|
Revenue and Profit
|
|
8
|
Key Spending Areas
|
|
3. Preview the custom show Finance. Then, close the Custom
Shows dialog box.
|
|
4. Switch to Slide view, if necessary. Go to slide 3 and
select the bullseye clip art object.
|
|
5. Create a hyperlink to slide 6. Financial Overview.
(Hint: Use the Action Settings dialog box.)
|
|
6. Go to slide 6 and select the blue ribbon clip art object.
|
|
7. Create a hyperlink on slide 6 back to slide 3 (Last Slide
Viewed).
|
|
8. Go to slide 1 and run the slide show. From slide 3, jump to
slide 6 and then back to slide 3 using the hyperlinked clip art objects.
Finish viewing the slide show.
|
|
9. Go to slide 8 and select the title text Key.
|
|
10. Create a text hyperlink to jump from slide 8. Key Spending
Areas in Meetng16 to slide 7. Key Benefits in Sales16.
Use a relative path for the hyperlink.
|
|
11. Go to slide 2. Draw an action button to the right of the bullet
text Financial Overview. Select the Forward or Next action
button design.
|
|
12. Create a hyperlink from the action button on slide 2 to the Finance
custom show.
|
|
13. Go to slide 1 and run the slide show. From slide 2, use the
action button to jump to the Finance custom show. From the Key
Spending Areas slide, use the hyperlink text Key to jump to the
designated slide (7. Key Benefits) in Sales16. Finish viewing
the presentation.
|
|
14. Switch to Slide Sorter view, if necessary, and select
slide 10.
|
|
15. Use the Slide Finder to display and insert slide 8. Next Steps
from Sales16 into Meetng16.
|
|
16. Expand slide 10. Goals for Next Period.
|
|
17. Select slides 3, 4, 5, 7, 8, 9, 10 and 14, and create a summary
slide.
|
|
18. Close the presentation without saving it.
|
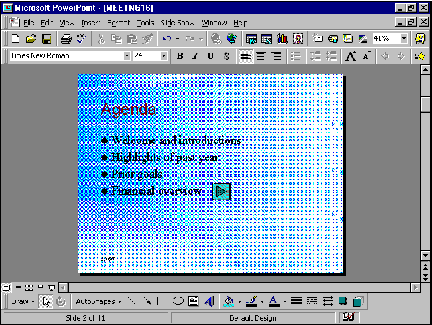
In this lesson, you will
learn how to:
·
Use Meeting Minder
·
Use the Pack and Go Wizard
·
Use the PowerPoint Viewer
d Discussion
You may find it helpful to take minutes and add notes to your
notes pages during an informal presentation. You can use the Meeting Minder to add reminders that you can
view after the presentation or during later presentations. For example,
audience members may pose interesting points or come up with good ideas during
a presentation. You can record their comments as meeting minutes while
the presentation is in progress.
The meeting minutes added to a presentation using the Meeting
Minder appear on your computer screen only. Whether you are delivering an
electronic presentation via a large screen projection system to audience
members in the same room, or you are giving a slide show to a remote audience
via presentation conferencing, the audience does not view the notes on the
presentation slides.
After your presentation, you can display and print any notes
you recorded during the presentation. You can also export meeting minutes to a
notes page or to a Microsoft Word document.
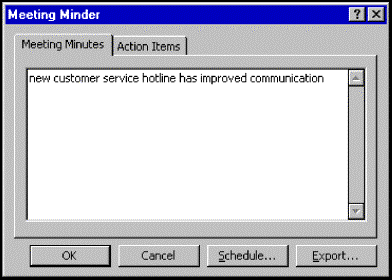
The Meeting Minder dialog box
|
|
|
|
o
|
You can also use the Meeting Minder to create a list
of action items. When you create an action item, an Action Items slide
is added to the end of the presentation to store the action items.
|
|
|
|
|
o
|
You can also select the Meeting Minder command
from the Tools menu to open the Meeting Minder dialog box.
|
|
|
|
|
o
|
You can also use speaker notes to create and print
notes for each slide in a presentation.
|
|
|
|
|
o
|
If you installed Microsoft Outlook, you can use the
Meeting Minder to schedule a meeting or post action items in Outlook.
|
|
|
|
C Procedures
|
1. Click the right mouse button on a
slide during the slide show.
|
|
2. Select the Meeting Minder command.
|
|
3. Select the Meeting Minutes tab.
|
|
4. Type the desired text in the box.
|
|
5. Select OK.
|
f Step-by-Step
From the Student Data directory, open WORLD17.PPT.
Use Meeting Minder to take meeting
notes.
Go to slide 1 and begin the slide show.
|
Steps
|
Practice Data
|
|
1. Click the right mouse on a slide during the
slide show.
A shortcut menu appears.
|
Click the right mouse button on
slide 2
|
|
2. Select the Meeting Minder command.
The Meeting Minder dialog box opens.
|
Click Meeting Minder...
|
|
3. Select the Meeting Minutes tab.
The Meeting Minutes page appears.
|
Click the Meeting Minutes tab, if necessary
|
|
4. Type the desired text in the box.
The text appears in the box.
|
Type new customer service hotline has improved
communication
|
|
5. Select OK.
The Meeting Minder dialog box closes and the meeting notes are recorded.
|
Click OK
|
Press [Esc] to exit the slide show.
d Discussion
You can use the Pack and Go Wizard to compress and save a
presentation to diskettes in order to transport it. The Pack and Go Wizard
allows you to include linked files (such as another PowerPoint presentation or an
Excel worksheet) with a presentation.
You can also embed TrueType fonts, which allows you to run your
presentation on a computer that does not provide the same TrueType fonts as
those used in the presentation.
If you intend to run a slide show on a computer that does not
have PowerPoint installed, you can use the Pack and Go Wizard to package the
PowerPoint Viewer, as well as the presentation slides.
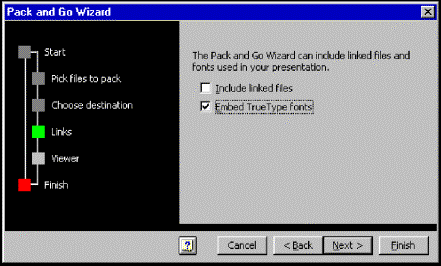
The Pack and Go Wizard
|
|
|
|
o
|
The Pack and Go Wizard copies the PowerPoint Viewer
from the ValuPack folder on the Microsoft Office CD-ROM. Therefore, the
CD-ROM should be available when the Pack & Go Wizard is used. If the
CD-ROM is unavailable, the Viewer can be downloaded from the Microsoft web
site by selecting the Microsoft on the Web command from the Help
menu. Both the Free Stuff and Product News commands allow you
to download the Viewer.
|
|
|
|
|
o
|
Depending on the size of a presentation, you may need
more than one blank, formatted diskette to store the compressed presentation.
You are prompted to insert another diskette, if necessary.
|
|
|
|
C Procedures
|
1. Select the File menu.
|
|
2. Select the Pack and Go command.
|
|
3. Close the Office Assistant, if necessary.
|
|
4. Select Next.
|
|
5. Select the desired presentation.
|
|
6. Select Next.
|
|
7. Select the A:\ drive option.
|
|
8. Select Next.
|
|
9. Select or deselect the Include linked files option.
|
|
10. Select the Embed TrueType fonts option, if desired.
|
|
11. Select Next.
|
|
12. Select the Viewer for Windows 95 or NT option.
|
|
13. Select Next.
|
|
14. Select Finish.
|
|
15. If prompted, insert another diskette into the drive.
|
|
16. If the Storing dialog box is open, select OK to close it.
|
|
17. Select OK.
|
f Step-by-Step
Use the Pack and Go Wizard.
Insert a blank, formatted diskette into the A: drive, if
necessary.
|
Steps
|
Practice Data
|
|
1. Select the File menu.
The File menu appears.
|
Click File
|
|
2. Select the Pack and Go command.
The Pack and Go Wizard opens.
|
Click Pack and Go...
|
|
3. Close the Office Assistant, if necessary.
The Office Assistant closes.
|
Close the Office Assistant, if necessary
|
|
4. Select Next.
The Pack and Go Wizard asks which presentation you want to package.
|
Click Next >
|
|
5. Select the desired presentation.
The presentation is selected.
|
Click  Active presentation, if
necessary Active presentation, if
necessary
|
|
6. Select Next.
The Pack and Go Wizard asks where you want to copy the presentation.
|
Click Next >
|
|
7. Select the A:\ drive option.
The A:\ drive option is selected.
|
Click  A:\ drive, if necessary A:\ drive, if necessary
|
|
8. Select Next.
The Pack and Go Wizard asks if you want to include linked files and
embed TrueType fonts.
|
Click Next >
|
|
9. Select or deselect the Include linked files option.
The Include linked files option is selected or deselected.
|
Click  Include linked files to
deselect the option Include linked files to
deselect the option
|
|
10. Select the Embed TrueType fonts option, if desired.
The Embed TrueType fonts option is selected.
|
Click  Embed TrueType fonts Embed TrueType fonts
|
|
11. Select Next.
The Pack and Go Wizard asks if you want to include the PowerPoint Viewer.
|
Click Next >
|
|
12. Select the Viewer for Windows 95 or NT option.
The Viewer for Windows 95 or NT option is selected.
|
Click  Viewer for Windows 95 or NT Viewer for Windows 95 or NT
|
|
13. Select Next.
The Pack and Go Wizard is ready to compress and save the presentation.
|
Click Next >
|
|
14. Select Finish.
The Pack and Go Wizard closes and a Microsoft PowerPoint message box
opens, stating that the presentation was successfully saved.
|
Click Finish
|
|
15. Select OK.
The Microsoft PowerPoint message box closes.
|
Click OK
|
d Discussion
The PowerPoint Viewer
is a special application
provided with Office 97 that is designed to run slide shows on computers that
do not have PowerPoint installed.
You can include the Viewer when you use the Pack and Go Wizard
to compress and save presentations, or you can copy it directly to its own
diskette.
If the Viewer has been included by the Pack and Go Wizard, it
is automatically loaded when the compressed file is opened. You should make
sure that the host drive has enough free disk space: the PowerPoint Viewer uses
about 1.7 MB on the hard drive, in addition to the size of the presentation.
|
|
|
|
o
|
When you are using the Viewer, you cannot open a file
from another application unless that application is installed on the computer
you are using to run the presentation.
|
|
|
|
C Procedures
|
1. Click the Start button.
|
|
2. Point to Programs.
|
|
3. Select Windows Explorer.
|
|
4. Select the floppy drive.
|
|
5. Open the desired file.
|
|
6. Type the destination folder in the Destination Folder
text box.
|
|
7. Select OK.
|
|
8. Select OK to create the folder, if necessary.
|
|
9. Select OK.
|
|
10. Select Yes to run the slide show.
|
f Step-by-Step
Use the PowerPoint Viewer to run a slide show.
Insert the compressed file on diskette created by the Pack and
Go Wizard into the A: drive.
|
Steps
|
Practice Data
|
|
1. Click the Start button.
The Start menu appears.
|
Click  Start Start
|
|
2. Point to Programs.
A list of programs appears.
|
Point to  Programs Programs
|
|
3. Select Windows Explorer.
Windows Explorer opens.
|
Click  Windows Explorer Windows Explorer
|
|
4. Select the floppy drive.
A list of folders and files on the disk appears.
|
Click  3 1/2 Floppy (A:) 3 1/2 Floppy (A:)
|
|
5. Open the desired file.
The Pack and Go Setup dialog box opens.
|
Double-click Pngsetup
|
|
6. Type the destination folder in the Destination Folder
text box.
The text appears in the Destination Folder text box.
|
Type c:\temp
|
|
7. Select OK.
A Pack and Go Setup message box opens.
|
Click OK
|
|
8. Select OK to create the folder, if necessary.
The first Pack and Go Setup message box closes and another Pack and Go
Setup message box opens, indicating that the installed Viewer will not run on
Windows 3.1.
|
Click OK
|
|
9. Select OK.
The second Pack and Go Setup message box closes and a third pack and Go
Setup message box opens, asking if you want to run the slide show.
|
Click OK
|
|
10. Select Yes to run the slide show.
The third Pack and Go Setup message box closes and the slide show runs.
|
Click Yes
|
Advance the slide show, as necessary. PowerPoint Viewer closes
when it reaches the end of the slide show. Close Windows Explorer and return to
Microsoft PowerPoint.
Close WORLD17.PPT.
e Task
Use the Meeting Minder, the Pack and Go Wizard, the PowerPoint
Viewer, and the Save as HTML Wizard to present to a wider audience.
|
1. Open Meetng17.
|
|
2. Use the Meeting Minder to add the minutes
shown below to the presentation. Press [Esc] to exit the slide show.
|
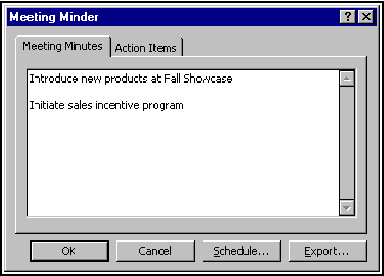
|
3. Use the Pack and Go Wizard to compress the presentation and save
it to diskette. (Remember to insert a blank diskette into drive A:.)
Include the PowerPoint Viewer with the slides.
|
|
4. In Windows Explorer, use the PowerPoint Viewer to run the slide
show from the A: drive. Identify c:\temp as the destination
folder. Press [Esc] to exit the slide show.
|
|
5. Save Meetng17 as HTML to the student data folder on the
student data drive. Accept the default options provided by the Save as HTML Wizard.
Use HTML2 as the name for the conversion settings.
|
|
6. Close the presentation without saving it.
|
In this lesson, you will
learn how to:
·
Import text from Word
·
Export an outline to Word
·
Insert picture files
·
Use scanned pictures
·
Insert sound clips
·
Insert video clips
d Discussion
You can use an existing Microsoft Word
document to create a PowerPoint presentation. You can import text from Word
into an existing PowerPoint presentation or create a new presentation. You can
also import entire outlines created in Word to use as the basis of a PowerPoint
presentation.
When you import text from Word, it appears in PowerPoint in
outline format. PowerPoint creates the outline from the applied styles in the
Word document. For example, any text formatted in Word in the Heading1 style
becomes a slide title in the presentation; text formatted in the Heading2 style
becomes first-level text in a presentation slide, etc.
If the text in the Word document has not been formatted using
styles, PowerPoint creates the outline using the Microsoft Word paragraph
indentations.
You can import an outline created in Word for use as a
PowerPoint outline. The first-level headings from the Word outline become slide
titles and the body text becomes PowerPoint outline indent levels. The outline
imported from Word appears in PowerPoint with the same title and text format of
the current presentation. The format is determined by the slide master of the
PowerPoint presentation.
|
|
|
|
o
|
Outlines created in Microsoft Word are formatted with
heading styles. You can create a new presentation from an existing Word
outline by exporting the outline to PowerPoint while you are in Microsoft
Word.
|
|
|
|
|
o
|
You can also copy text from Microsoft Word and paste
it into PowerPoint, or use the drag and drop method to move text from the
Word document into the PowerPoint presentation. Both files must be open to
use drag and drop.
|
|
|
|
C Procedures
|
1. Click the
Open button  on the Standard toolbar. on the Standard toolbar.
|
|
2. Select the Files of type list.
|
|
3. Select All Outlines.
|
|
4. Select the Look in list.
|
|
5. Select the drive where the Word document is located.
|
|
6. Select the folder where the Word document is located.
|
|
7. Select the file that contains the text you want to import.
|
|
8. Select Open.
|
f Step-by-Step
Import text from Word to create a PowerPoint
presentation.
|
Steps
|
Practice Data
|
|
1. Click the Open button on the Standard
toolbar.
The Open dialog box opens.
|
Click 
|
|
2. Select the Files of type list.
A list of file types appears.
|
Click Files of type 
|
|
3. Select All Outlines.
All Outlines appears in the Files of type box.
|
Click All Outlines
|
|
4. Select the Look in list.
A list of available drives appears.
|
Click Look in

|
|
5. Select the drive where the Word document is located.
A list of available folders appears.
|
Click the student data drive
|
|
6. Select the folder where the Word document is located.
A list of files in the folder appears.
|
Double-click to select the student data folder
|
|
7. Select the file that contains the text you want to import.
The file is selected.
|
Click Packet18
|
|
8. Select Open.
The imported text appears in PowerPoint in Outline view.
|
Click Open
|
Close the presentation without saving it.
d Discussion
PowerPoint also allows you to export a
presentation outline to Microsoft Word. You can edit the outline in Word using
Microsoft Word editing tools and commands.
You can import the outline back into PowerPoint from Microsoft
Word; however, most design aspects will be lost and must be reapplied.
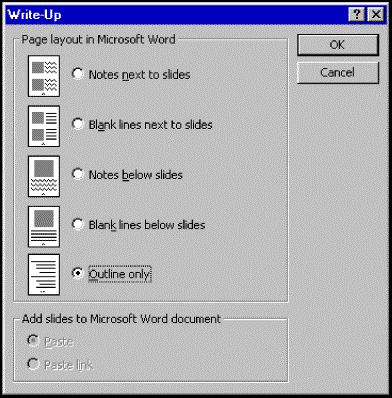
Exporting an outline to Word
|
|
|
|
o
|
If you will be printing the outline in Microsoft Word,
select the Black and White command from the View menu before
selecting the Word Document command from the Send to
submenu on the File menu.
|
|
|
|
|
o
|
The Black and White command on the View
menu is only available when you are working in Slide, Slide Sorter,
and Note Page views. Outline view automatically displays text
in black and white.
|
|
|
|
|
o
|
You can also export notes and handouts to Microsoft
Word. However, in order to export notes, handouts, or outlines, you must have
Word installed on your system.
|
|
|
|
C Procedures
|
1. Select the File menu.
|
|
2. Point to the Send to command.
|
|
3. Select the Microsoft Word command.
|
|
4. Under Page layout in Microsoft Word, select the Outline
only option.
|
|
5. Select OK.
|
f Step-by-Step
From the Student Data directory, open WORLD18.PPT.
Export an outline to Word.
|
Steps
|
Practice Data
|
|
1. Select the File menu.
The File menu appears.
|
Click File
|
|
2. Point to the Send to command.
The Send to submenu appears.
|
Point to Send to
|
|
3. Select the Microsoft Word command.
The Write-Up dialog box opens.
|
Click Microsoft Word...
|
|
4. Under Page layout in Microsoft Word, select the Outline
only option.
The Outline only option is selected.
|
Click  Outline only Outline only
|
|
5. Select OK.
The presentation outline appears in a Microsoft Word window in Rich Text
Format.
|
Click OK
|
Close the Word outline and exit Word.
d Discussion
You can import a picture saved in a
graphic file format from another program or
location and insert it into a PowerPoint presentation. You can insert the
picture on an individual slide or add the picture to the slide master in order
to place the picture on every slide in the presentation.
C Procedures
|
1. Switch to Slide Sorter view.
|
|
2. Select the slide to which you want
to add the picture file or switch to Slide Master view.
|
|
3. Switch to Slide view, if necessary.
|
|
4. Select the Insert menu.
|
|
5. Point to the Picture command.
|
|
6. Select the From File command.
|
|
7. Select the Look in list.
|
|
8. Select the drive where the desired file is located.
|
|
9. Select the folder where the desired file is located.
|
|
10. Select the picture file.
|
|
11. Select Insert.
|
f Step-by-Step
Insert a picture file
into a presentation slide.
Switch to Slide Sorter view, if necessary.
|
Steps
|
Practice Data
|
|
1. Select the slide to which you want to add
the picture file.
The slide is selected.
|
Click slide 7
|
|
2. Switch to Slide view, if necessary.
Slide view appears.
|
Click 
|
|
3. Select the Insert menu.
The Insert menu appears.
|
Click Insert
|
|
4. Point to the Picture command.
The Picture submenu appears.
|
Point to Picture
|
|
5. Select the From File command.
The Insert Picture dialog box opens.
|
Click From File...
|
|
6. Select the Look in list.
A list of available drives appears.
|
Click Look in 
|
|
7. Select the drive where the desired file is located.
A list of available folders appears.
|
Click the student data drive
|
|
8. Select the folder where the desired file is located.
A list of files in the folder appears.
|
Double-click to select the student data folder
|
|
9. Select the picture file.
The file is selected.
|
Click Biker
|
|
10. Select Insert.
The picture appears on the slide.
|
Click Insert
|
Drag the picture to the lower right corner of the slide.
Close WORLD18.PPT.
d Discussion
You can import a scanned picture
from another program or location and insert it into a
PowerPoint presentation. You can insert the scanned picture on an individual
slide or add the scanned picture to the slide master in order to place the
picture on every slide in the presentation.
|
|
|
|
o
|
In order to edit a scanned picture, Microsoft Photo
Editor must be installed.
|
|
|
|
|
o
|
You can also scan a picture directly into a presentation,
provided your computer is properly connected to a scanner.
|
|
|
|
C Procedures
|
1. Switch to Slide Sorter view.
|
|
2. Select the slide to which you want
to add the scanned picture or switch to Slide Master view.
|
|
3. Switch to Slide view, if necessary.
|
|
4. Select the Insert menu.
|
|
5. Point to the Picture command.
|
|
6. Select the From Scanner command.
|
|
7. Scan the picture.
|
|
8. Edit the picture in Microsoft Photo Editor, as desired.
|
|
9. When you have finished editing the picture, select the File menu
in the Photo Editor.
|
|
10. Select the Exit and Return to command.
|
d Discussion
You can insert sounds into a presentation
that you can play while running a slide show. Sound effects draw attention to
the entire show or a particular slide and its contents. The Microsoft Clip
Gallery provides a number of sound clips you can insert into slides to create
special effects. You can insert a sound from a location other than the Clip
Gallery, such as a file.
Sound clips are inserted as objects. When you insert a sound
clip, a sound object icon appears on the slide in Slide view to
represent the sound clip. You can only hear the sound when you are running the
slide show.
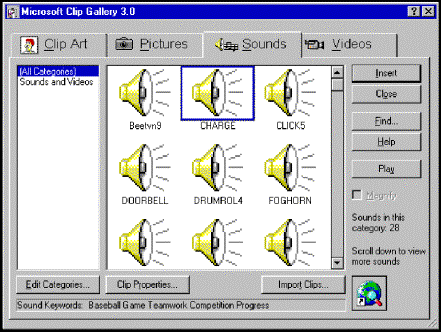
Inserting a sound from the Clip Gallery
|
|
|
|
o
|
You can connect to the World Wide Web for additional
sound clips from the Microsoft Clip Gallery dialog box.
|
|
|
|
|
o
|
To play sounds, you must have equipment on your
computer that supports audio play. Double-click the Multimedia icon in
the Windows Control Panel to determine what equipment is installed on your
computer and how it is set up.
|
|
|
|
|
o
|
You can also insert a sound as a Media Player object
so that you can run the sound using the Media Player installed with Windows
95.
|
|
|
|
C Procedures
|
1. Switch to Slide view.
|
|
2. Select the slide into which you
want to insert the sound.
|
|
3. Select the Insert menu.
|
|
4. Point to the Movies and Sounds command.
|
|
5. Select the Sound from Gallery command.
|
|
6. Select the Sounds tab, if necessary.
|
|
7. Select a sound clip.
|
|
8. If desired, click Play to play the sound before inserting
it into the slide.
|
|
9. Select Insert.
|
|
10. Run the slide show and click the sound object image to hear the
sound.
|
d Discussion
You can insert videos into a presentation
that you can play while running a slide show. Videos can help to illustrate a
point or draw special attention to a slide. The Microsoft Clip Gallery provides
a number of video clips you can insert into slides to create special effects.
You can insert a video from a location other than the Clip Gallery, such as a
file.
Video clips are inserted as objects. When you insert a video
clip, an image will appear on the slide in Slide view to represent the
video clip. You can only view the video while running the slide show.
Inserting a video from the Clip Gallery
|
|
|
|
o
|
You can connect to the World Wide Web for additional
video clips from the Microsoft Clip Gallery dialog box.
|
|
|
|
|
o
|
To play videos, you must have equipment on your
computer that supports video play. Double-click the Multimedia icon in
the Windows Control Panel to determine what equipment is installed on your
computer and how it is set up.
|
|
|
|
|
o
|
You can also insert a video as a Media Player object
so that you can run the video using the Media Player installed with Windows
95.
|
|
|
|
C Procedures
|
1. Switch to Slide view.
|
|
2. Select the slide into which you want to
insert the video.
|
|
3. Select the Insert menu.
|
|
4. Point to the Movies and Sounds command.
|
|
5. Select the Movie from Gallery command.
|
|
6. Select the Videos tab, if necessary.
|
|
7. Select a video clip.
|
|
8. If desired, click Play to play the video before inserting
it into the slide.
|
|
9. Select Insert.
|
|
10. Move and size the video object image, as desired.
|
|
11. Run the slide show and click the video object image to view the
video.
|
e Task
Use data from other sources to create a PowerPoint
presentation.
|
1. Import the Word file Report18 to create a presentation
outline in PowerPoint.
|
|
2. Open Meetng18.
|
|
3. Send the presentation outline only to Word.
|
|
4. Close the Word outline and exit Word.
|
|
5. Go to slide 2 and insert the picture file Mtg. Drag it to
the upper right corner of the slide.
|
|
6. If you have audio capabilities, go to slide 1 and insert the Suspense
sound clip from the Microsoft Clip Gallery.
|
|
7. If you have video capabilities, go to slide 4 and insert the Arrowhit
video clip from the Microsoft Clip Gallery.
|
|
8. Move and resize the video object image on the slide, as
necessary.
|
|
9. Go to slide 1 and run the slide show to view the audio and video
additions. Click the sound and video object images to activate the clips on
the slides.
|
|
10. Close all open presentations without saving them.
|
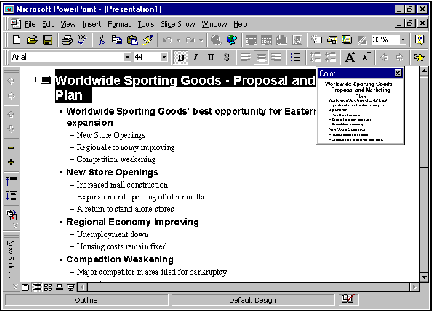
Alignment
changing, 58,
59
Animation
effects
selecting,
253, 254
setting
custom, 254, 255, 256
AutoClipArt,
146, 147
AutoContent
Wizard
using, 46, 47
AutoCorrect
creating
entries, 87, 88, 89
deleting
entries, 90
enabling, 85,
86, 87
using, 87
AutoLayout
selecting, 5,
6
Bullets
adding, 59
formatting,
121, 122, 123
removing, 59
Charts
changing chart
type, 99, 100, 101
closing the
datasheet, 98, 99
deleting data
in the datasheet, 96
entering data
into the datasheet, 97
inserting, 94,
95
Clip art, 140
cropping, 143,
144
inserting,
140, 141
repositioning,
142
resizing, 144,
145, 146
Color schemes,
212
applying, 213,
214
applying to
all slides, 217, 218
customizing,
215, 216
Content
templates
creating a
presentation, 41, 42
Design
templates
applying, 116,
117
creating a
presentation, 40
Finding text,
84, 85
Format Painter
copying
formats, 124
Handout master
adding placeholder
information, 246
formatting,
243, 245
Handouts
printing, 247,
248
Help, 202
Contents, 203,
204, 205
Find, 207,
208, 209
Index, 205,
206
ScreenTips,
202, 203
Hyperlinks
jumping to
another presentation, 272, 273, 274
Meeting Minder
using, 286,
287
Menu commands
using the
keyboard, 9, 10
using the
mouse, 8
Microsoft
Graph, 94
Multiple
presentations
viewing, 194,
195
Notes master,
237
adding
placeholder information, 241, 242
areas, 238
formatting,
238, 240
Notes pages
adding a note,
179, 180
editing a
notes box, 182, 183
editing a
slide object, 181
formatting a
notes box, 184, 185
moving a notes
box, 187, 188
resizing a
notes box, 186, 187
viewing, 178,
179
Notes Pages
formatting,
240
Office
Assistant
balloon, 16
changing
options, 22, 23
finding an answer,
19
hiding, 24
querying the
Assistant, 18
selecting an
Assistant, 19, 20, 21
using the
Assistant, 16, 17
window, 16
Outline view
navigating, 65
rearranging
text lines, 69, 70
working in, 64
Outlines
exporting to
Microsoft Word, 298, 299
Pack and Go Wizard
using, 288,
289, 290
Paragraphs
modifying
spacing, 60, 61
Pictures
importing into
a presentation, 300
importing
scanned, 301, 302
PowerPoint
exiting, 12
starting, 2, 3
using, 6
PowerPoint
Viewer
using, 291,
292
Presentation
creating, 3, 4
Presentations
applying a
color scheme, 213, 214
applying a
scheme to all slides, 217, 218
closing, 32
copying slides
between, 275, 276, 277
creating, 28,
29
creating
custom, 270, 271
customizing,
212
customizing a
color scheme, 215, 216
customizing
the slide background, 218, 219
deleting a
custom template, 222, 223
importing
picture files, 300
importing
scanned pictures, 301, 302
importing text
from Microsoft Word, 296, 297
inserting
sound clips, 302, 303
inserting
video clips, 304, 305
jumping to,
272, 273, 274
opening, 34
saving, 29,
31, 38, 39
saving a
custom template, 220, 221
using color
schemes, 212
Printing, 106
outlines, 109,
110
printing
selected slides, 110, 111
Redo, 133
Replacing
text, 84, 85
Rulers
displaying,
125, 126
ScreenTips,
202, 203
Slide
background
customizing,
218, 219
Slide elements
deleting, 132
Slide Finder
copying slides
between presentations, 275, 276, 277
Slide master,
228
adding
placeholder information, 231, 232, 233
areas, 228
formatting,
229, 230, 231
Slide shows
adding action
items, 171, 172
adding speaker
notes, 169, 170
annotating,
166, 167, 168
changing the
pen color, 168, 169
creating
custom, 270, 271
displaying
the shortcut menu, 163, 164
ending, 173,
174
hiding slides,
265
navigating,
165, 166
rehearsing
transition timings, 260, 261
running,
162, 163
running from
the PowerPoint Viewer, 291, 292
setting up,
262, 264
using the pen,
166, 167, 168
Slide Sorter
view
using, 152,
153
Slide
transition effects
selecting,
257, 258
setting
timings, 258, 259, 260
Slide view
navigating,
43, 44
Slides
collapsing,
66, 67
copying, 157,
158, 197
copying
between presentations, 275, 276, 277
deleting, 71,
158, 159
duplicating,
156, 157
entering text,
35, 36
expanding, 66,
67, 278, 279
hiding in a
presentation, 265
inserting, 37,
70, 71
moving, 155,
198, 199
printing, 108,
109
rearranging,
72
rehearsing
transition timings, 260, 261
selecting,
153, 154
selecting
transition effects, 257, 258
setting page
options, 106, 107
setting
transition timings, 258, 259, 260
summary, 280
Sound clips
inserting,
302, 303
Special
effects
using, 252
Spelling
checking as
you type, 78
Spelling
checker, 78
hiding
spelling errors, 79
starting, 80,
81
using the
Change option, 83
using the
Ignore All option, 81
using the
Ignore option, 81, 82
Spelling
Checker
using the
Change All option, 83
using the
Change option, 83
Style Checker,
118
Summary slides
creating, 73,
74, 280
Tab stops
adding, 128
Templates
deleting
custom, 222, 223
saving custom,
220, 221
Text
changing font,
54
changing font
effect, 56, 57
changing font
size, 55, 56
copying, 128,
129, 195, 196
deleting, 132
formatting,
119, 120
importing from
Microsoft Word, 296, 297
moving, 130,
131
Text lines
demoting, 68
promoting, 68
Title master,
234
areas, 234
formatting,
235, 236, 237
Toolbars
displaying,
10, 11
hiding, 10, 11
Undo, 133,
134, 135
Video clips
inserting,
304, 305
Views
Notes Pages, 7
Slide Show, 7
Slide Sorter,
7
switching, 44,
45
Windows
application, 6
work area, 6